


About
re-vamped coffee table
Our old coffee table got nibbled on by our dog. I hated it anyways and one day when my boyfriend was clearing out the shed he stumbled across a coffee table.
Now I know what you're thinking.. how do you forget or "stumble" across a whole f**king coffee table? Just remember girls.. we know what our purses are like.. no questions asked eh?
Anyways I immediately remembered this tutorial I had seen in my craftzine mag and got right to work.
The hardest thing in the whole project was deciding what I wanted on the top of the table!!! You'll want to make more once you complete this. One doesn't seem enough and it's super easy.
-
 Charyawn221 favorited New To You Coffee Table
20 Jun 12:00
Charyawn221 favorited New To You Coffee Table
20 Jun 12:00
-
Charyawn221 added New To You Coffee Table to DIG Furniture
20 Jun 12:00
-
Charyawn221 added New To You Coffee Table to DIG
20 Jun 12:00
-
 Lex R. favorited New To You Coffee Table
23 Mar 19:21
Lex R. favorited New To You Coffee Table
23 Mar 19:21
-
 Kay Bay favorited New To You Coffee Table
06 Sep 13:47
Kay Bay favorited New To You Coffee Table
06 Sep 13:47
-
chelsea g. favorited New To You Coffee Table
24 Aug 07:44
-
 Kathleen H. favorited New To You Coffee Table
23 Jun 05:36
Kathleen H. favorited New To You Coffee Table
23 Jun 05:36
-
Tanecia W. favorited New To You Coffee Table
25 May 20:56
-
 nigrummonten favorited New To You Coffee Table
04 Feb 04:43
nigrummonten favorited New To You Coffee Table
04 Feb 04:43
-
 razorbladedesigns added New To You Coffee Table to Furniture and such
11 Jan 07:44
razorbladedesigns added New To You Coffee Table to Furniture and such
11 Jan 07:44
You Will Need
-
 Step 1
I took an old table we found in the shed.
In this case I decided to cut off the legs because it was too tall... or maybe our couch is too low.. Hmmm...
-
 Step 2
Make sure if you do this that the bottom is nice and flat or you will have wobbly table madness and tea will be spilt!!!
-
 Step 3
Next you want to sand the surface, make sure it's smooth. When you put your poster on top you don't want bumps!! It was cause issues. I worked from a course grit down to a fine grit
-
 Step 4
Give it a good wipe after you sand paper with a damp clothing then a dry one. Sawdust in the under paint (in the next step) leave big old nasty bumps..
We don't want them do we? -
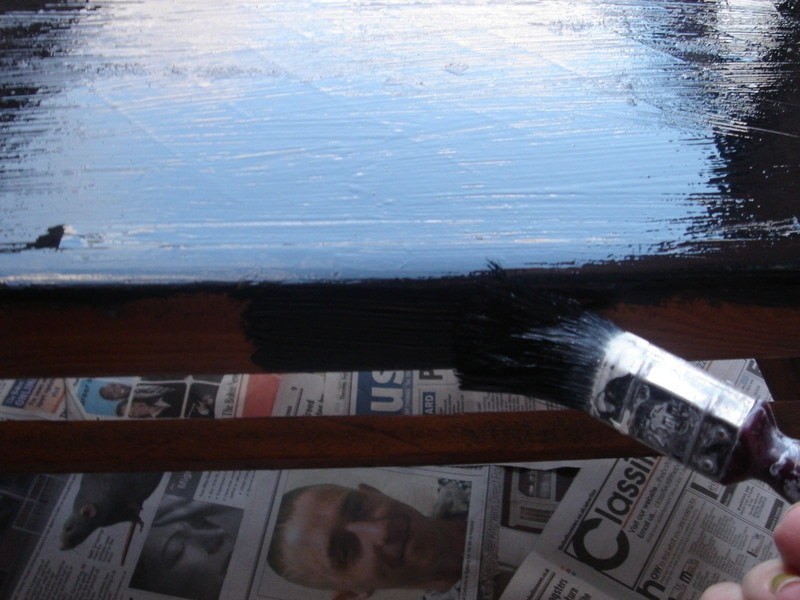
 Step 5
Now I used a outdoor black metal/wood paint.
You can use a hardy spray paint too. Just make sure it's something that is durable. Tables get knocked, scratched, wiped etc. So you want this work of art to last as long as possible.
-
 Step 6
Then put on your second coat for extra protection and coverage.
-
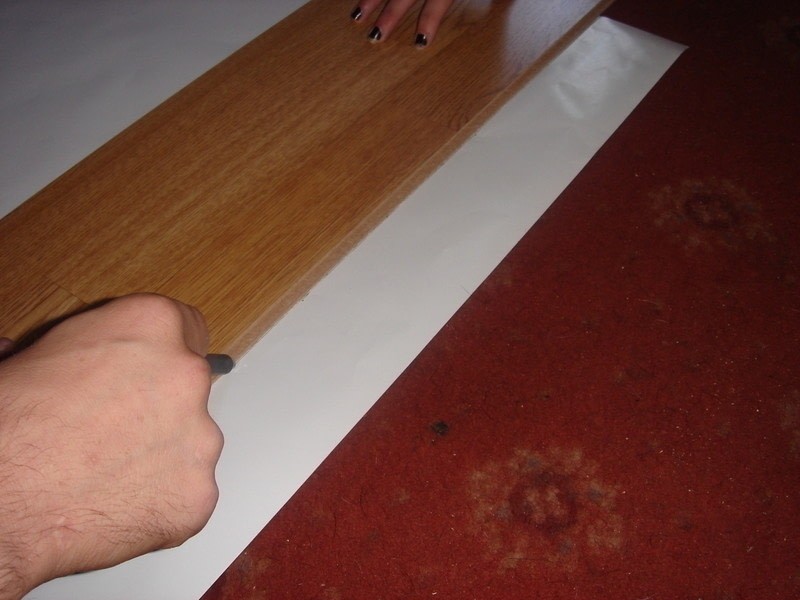
 Step 7
Next I took my poster out.
I measured the top of my table and gave an extra inch on each side.
-
 Step 8
And then I cut out the poster
-
 Step 9
You can get this stuff at craft stores. I think the carpet stuff might be a bit gooey,
Just good old Spray Adhesive will do. -
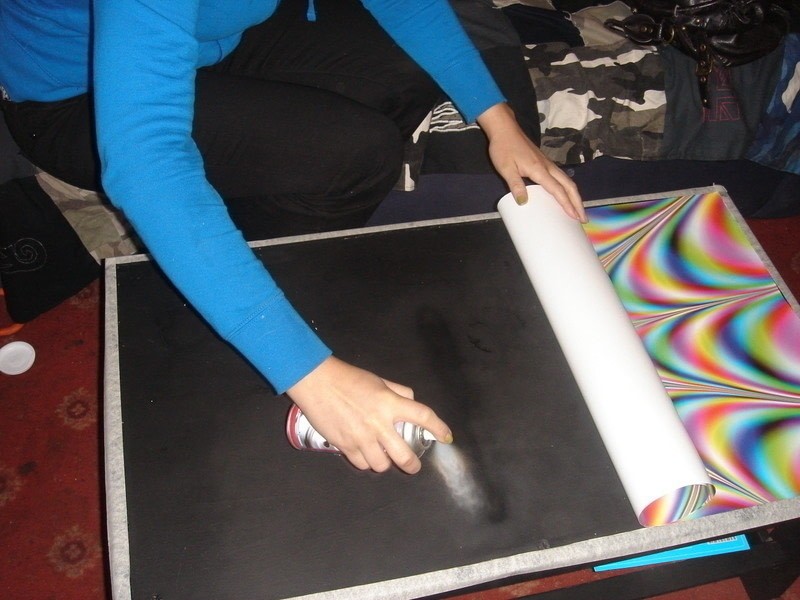
 Step 10
My table had a lip so I taped it off with painters tape so it didn't get all gluey.
Give it a good even med. spray. -
 Step 11
When you put your poster down, do it with care to try and leave as little bumps as possible.
Remember you only get it lay it down ONCE. Be careful.
Smooth out as much as you can with you hands. -
 Step 12
If you still have bumps, grab your iron, put it on dry setting. Put a piece of cotton between the poster and your iron and you can literally just iron out the bumps.
-
 Step 13
DECISION!!
You want to protect your table top. There are a few ways to do this.
Now you can use a poly resin, or a floor lacquer to seal this bad boy off. This is lengthy and is a little complicated, however the finish is beautiful.
In my opinion I still think these methods are susceptible to scratches.OR in my case we got a piece of glass cut for our table top.
Simple, cheap and easy. -
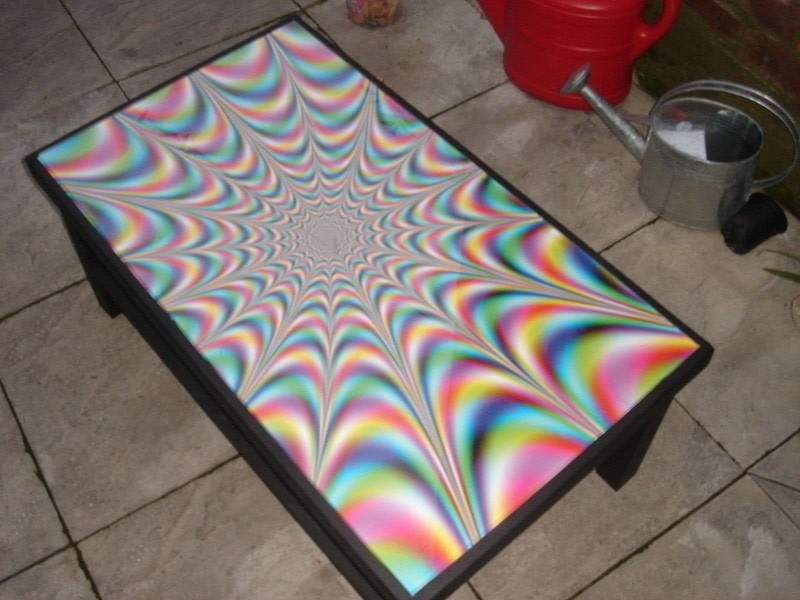
 Step 14
Then sit back, amaze yourself on how clever you are, relax and have a cup of tea!!!


CO + K User
i love it! and a great how-to as well!