
About
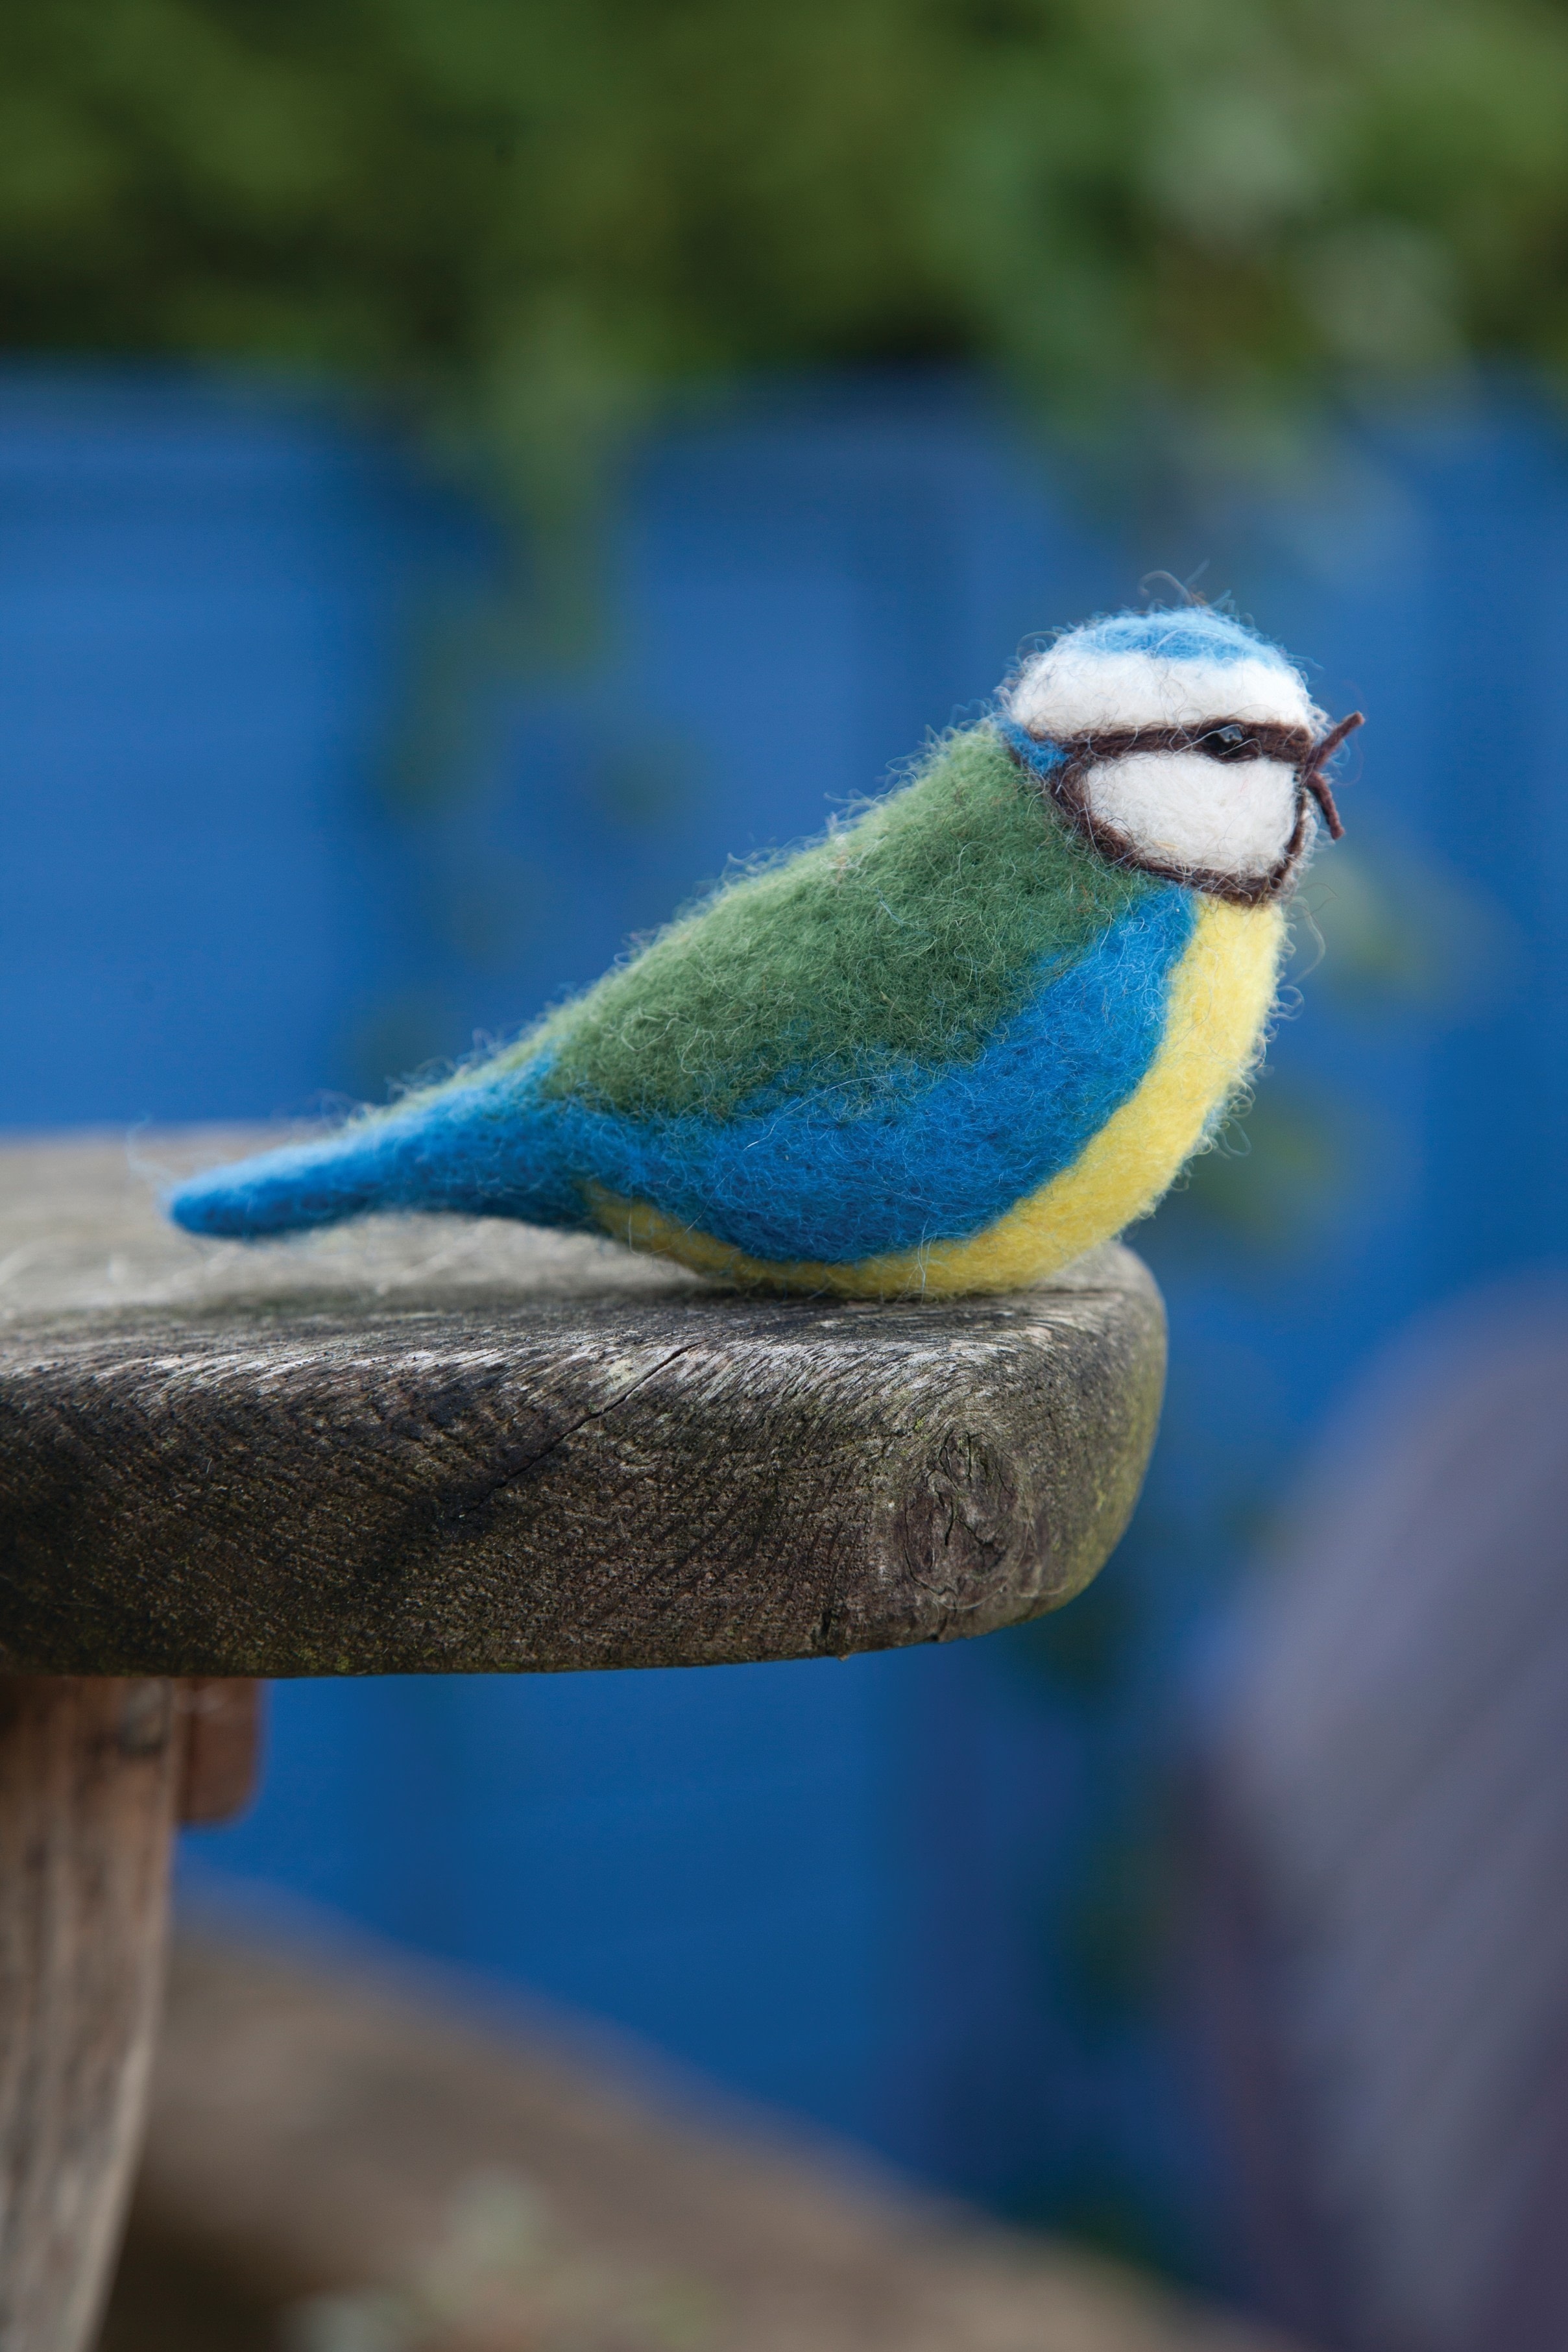
Making Needle-Felted Animals
This project is featured in 'Making Needle Felted Animals', a beautiful how-to book published by Hawthorn Press. The book features over 20 animal projects, with a detailed techniques section, advice on creating your own animal portraits, and beautiful illustrations throughout.
-
 Saskia v. favorited Needle Felt Blue Tit
22 Jan 21:46
Saskia v. favorited Needle Felt Blue Tit
22 Jan 21:46
-
Karen W. favorited Needle Felt Blue Tit
04 Dec 17:17
-
 Claire V. favorited Needle Felt Blue Tit
07 Mar 11:00
Claire V. favorited Needle Felt Blue Tit
07 Mar 11:00
-
Hollie P. added Needle Felt Blue Tit to saving for later
12 Jun 23:38
-
Debora N. favorited Needle Felt Blue Tit
17 Sep 18:57
-
Rebecca M. favorited Needle Felt Blue Tit
11 Jun 18:59
-
 Penny F. added Needle Felt Blue Tit to Needle felting
04 Jan 20:02
Penny F. added Needle Felt Blue Tit to Needle felting
04 Jan 20:02
-
 Angie C. favorited Needle Felt Blue Tit
01 Oct 15:34
Angie C. favorited Needle Felt Blue Tit
01 Oct 15:34
-
 amanda.shillito favorited Needle Felt Blue Tit
13 Sep 22:23
amanda.shillito favorited Needle Felt Blue Tit
13 Sep 22:23
-
Suzi T. favorited Needle Felt Blue Tit
01 Sep 16:14
-
Step 1
How to Needle Felt:
The felting process is achieved by stabbing the felting needle into the wool tops. The barbs on the needle tangle the loose fibres until they felt together.
The needle is fragile and can bend or break, so it is important when felting that the needle goes in and out of the wool in a straight line, and at the same angle. We have found that keeping the wrist straight helps to achieve this.
Another cause for a needle to break is if it hits something hard. Therefore it is important to make sure that you use a felting mat.
Pricking yourself with a needle really does hurt, so keep your fingers out of the way! -
Step 2
Needle Felt Instructions: Blue Tit
Before you start, take a pinch of each colour wool and put to one side in case you need some for finishing touches.
-
 Step 3
Body, head and tail base:
Take the white wool and wrap it into a ball. Start needling into it from all angles, using a medium needle. Needle more into the back, around the neck and tail.
-
 Step 4
By needling more into the places marked, shape one end into the bird's head, and make a point at the other, to create a base for the tail. Make sure the head is firmly felted. Felt a little into the underneath so that the bird sits up.
-
 Step 5
Tail: Take a small pinch of blue wool for the tail. Needle it into a triangle for the tail shape, leaving loose fibres at one end. Turn it over, felt on both sides. Attach to body using loose fibres.
-
 Step 6
Markings
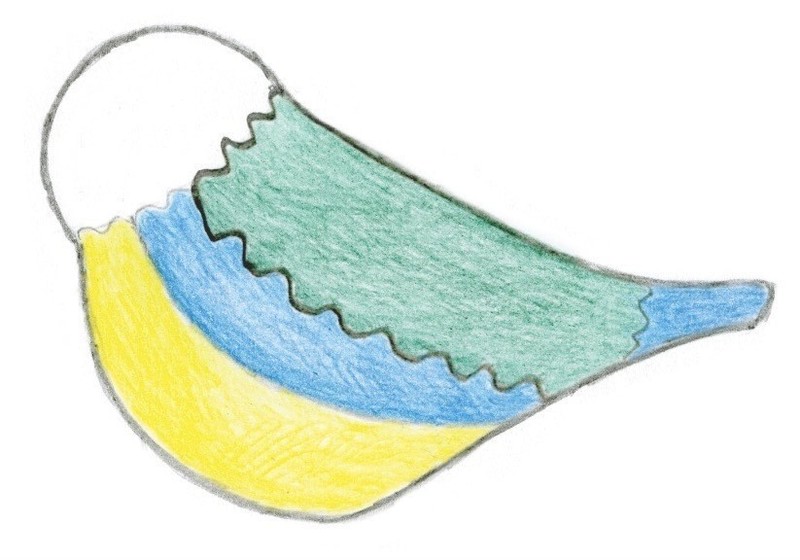
Now use a fine needle for markings. Leaving the head area white, attach all of the yellow over the chest and overlap slightly under the wing area, from the neck to the base of the tail. -
 Step 7
Put aside a good pinch of blue wool for cap and chest streak.
-
 Step 8
Layout some of the remaining blue wool overlapping the wing area and use your felting needle to draw the outline of the wing into the wool. Fold any overlapping fibres back toward the wing and felt into place. The blue covers the sides and top of the tail base.
-
 Step 9
Now use as much as you need of the green to felt over the top of the back.
The blue tit has a dark mask, which encircles its neck, also going from the back of its neck across each eye to the beak, and from the beak down to the neckline. You can create this by felting on a thin line as follows: spin a thin strand of dark wool between your fingers, position on the bird's head and needle carefully into place.
-
 Step 10
Take a pinch of blue wool and lay it on top of the head for the 'cap'. Needle it down firmly around the edges but you can leave the top loose for a tufted look. Needle a white flash onto each wing using a fine piece of white wool and again use a fine piece of blue wool to felt a streak down the chest.
-
 Step 11
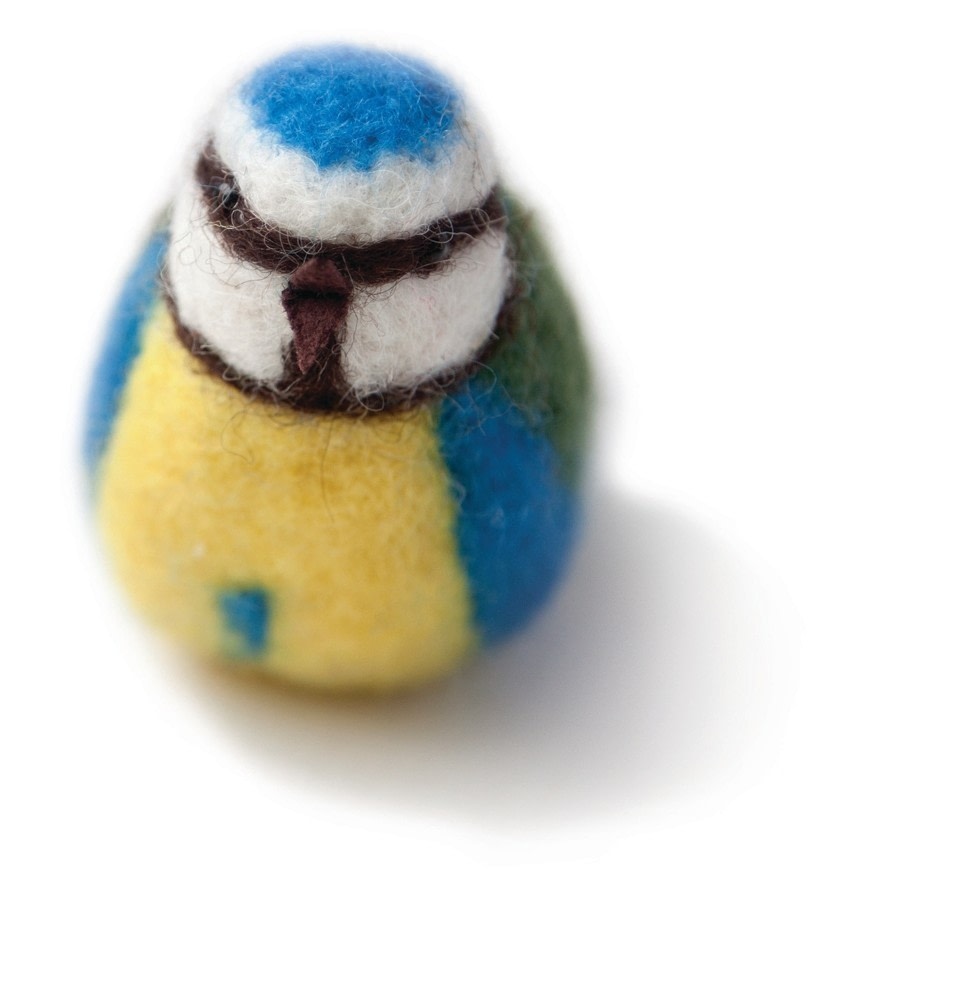
Eyes & beak
Cut a diamond by folding the sheet felt in half and cutting a V shape pointing away from the fold. Push the threaded needle through the back of the head to the beak position. Secure the beak with a few stitches through the middle of the diamond shape. Now sew on the beads for eyes. Return the needle through the back of the head where it first went in, and then tie the two loose ends together securely. Felt a little wool over the ends to hide them.