


About
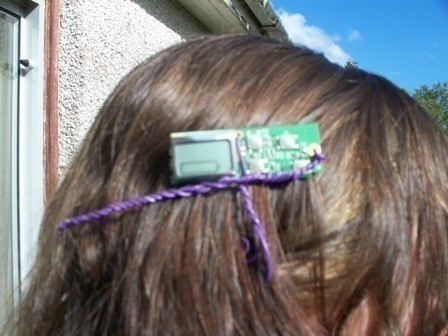
A microchip mounted on a hair slide using wire
This project is cheap as long as you have a microchip/broken digital camera handy.. It gets pricey if you have to buy a new one.
You Will Need
-
 Step 1
Firstly, get your chosen Microchip/circuit board and decide which way you want it to be. Which end will be at the front?
Then, decide how you want to attach your clip. I dont own a hot glue gun or even normal glue, so I chose to use wire. -
 Step 2
Place your clip on your chosen side of the Microchip, and if you're using a glue gun then glue it in place.
If you're using wire, look for holes where screws would usally go through, and use these to thread your wire through. Find 2 holes and put the clip between these somehow. (Each chip is different so I cant be much more detailed) Pull the wires tight so that the clip is attached in that place, and twist the wires together. Repeat atleast twice in different areas of the clip to hold it securely. -
 Step 3
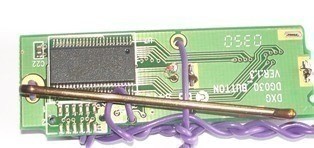
If you used a glue gun, you're either finished or if you want it to look a little fancier you can wrap some wire on it and keep following. :)
Make sure the ends of the wire are long and that you dont twist the entire lengths together.
Then, using either your fingers or pliers, shape the one set of wire into swirls at the bottom. Be creative! -
 Step 4
With the second (and third if you have them) sets of wires, pull them to the bottom of your Microchip and twist them all together, going back to the end of the chip. keep going until you have your desired length. Strip one wire of its plastic covering to get silver/copper to glimmer through. :)
Done!


Comments


 1
Watercolor Art »
Watercolor Paints Made From Make Up
1
Watercolor Art »
Watercolor Paints Made From Make Up

