


About
DIY Push Molds
You can use them to duplicate beads or make your own flat backs from your beads and pendants.
-
 Holly J. added Make Your Own Push Molds to Polymer Clay
09 Jul 22:03
Holly J. added Make Your Own Push Molds to Polymer Clay
09 Jul 22:03
-
 jeanetteedwardswasthomas commented on Make Your Own Push Molds
16 May 19:47
jeanetteedwardswasthomas commented on Make Your Own Push Molds
16 May 19:47
-
 Key West Witch favorited Make Your Own Push Molds
05 May 05:59
Key West Witch favorited Make Your Own Push Molds
05 May 05:59
-
 Maria P. favorited Make Your Own Push Molds
27 Jul 19:17
Maria P. favorited Make Your Own Push Molds
27 Jul 19:17
-
 VillainousNinja favorited Make Your Own Push Molds
26 Jul 00:06
VillainousNinja favorited Make Your Own Push Molds
26 Jul 00:06
-
 Dragona favorited Make Your Own Push Molds
25 Jul 14:51
Dragona favorited Make Your Own Push Molds
25 Jul 14:51
-
 Sveta favorited Make Your Own Push Molds
24 Jul 05:47
Sveta favorited Make Your Own Push Molds
24 Jul 05:47
-
 Rock R. favorited Make Your Own Push Molds
07 Jan 18:33
Rock R. favorited Make Your Own Push Molds
07 Jan 18:33
-
 pjds78 favorited Make Your Own Push Molds
16 Dec 06:14
pjds78 favorited Make Your Own Push Molds
16 Dec 06:14
-
Cheryl S. favorited Make Your Own Push Molds
17 Oct 17:11
You Will Need
-
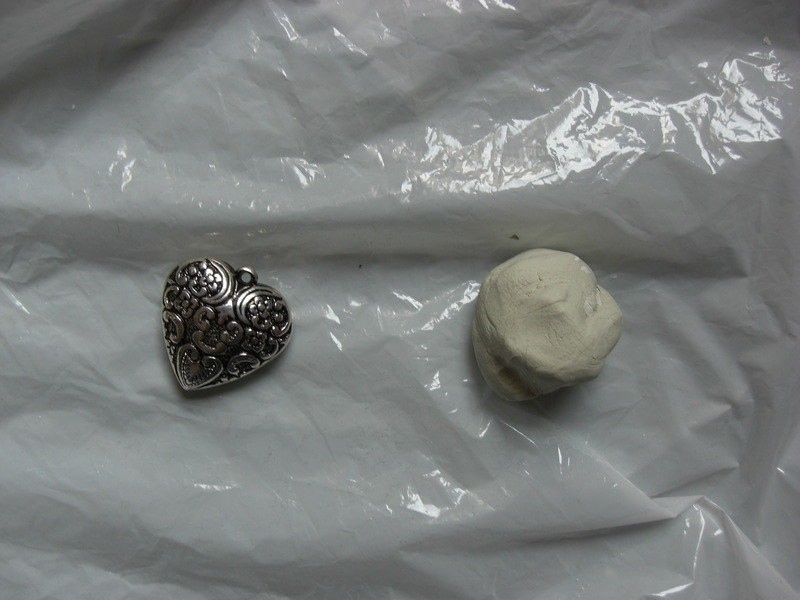
 Step 1
This is what you need
-
 Step 2
Take a piece of your modelling clay which is big enough for your bead or pendant to make a mold out of it.
-
 Step 3
Flatten it and cover it with Baby Powder, so you can take your item later easier out of the clay.
-
 Step 4
Push your item carefully in the modelling clay.
-
 Step 5
Take your item carefully out of the modelling clay and let the clay dry.
-
 Step 6
Take a piece of polymer clay which fits in your mold and knead it so that is easy to use.
-
 Step 7
Use a little bit of the baby powder for the mold, so you can take the polymer clay easier out of it.
-
 Step 8
Push the polymer clay in the mold.
-
 Step 9
Take your polymer clay carefully out of the mold.
-
 Step 10
Cut the edges and make it a little bit even.
Ready is it!!!


Anyway where'd you get your charm? If you don't mind my asking
Handy tutorial too!I'm sure I'll pit it to use!
CO + K User