


About
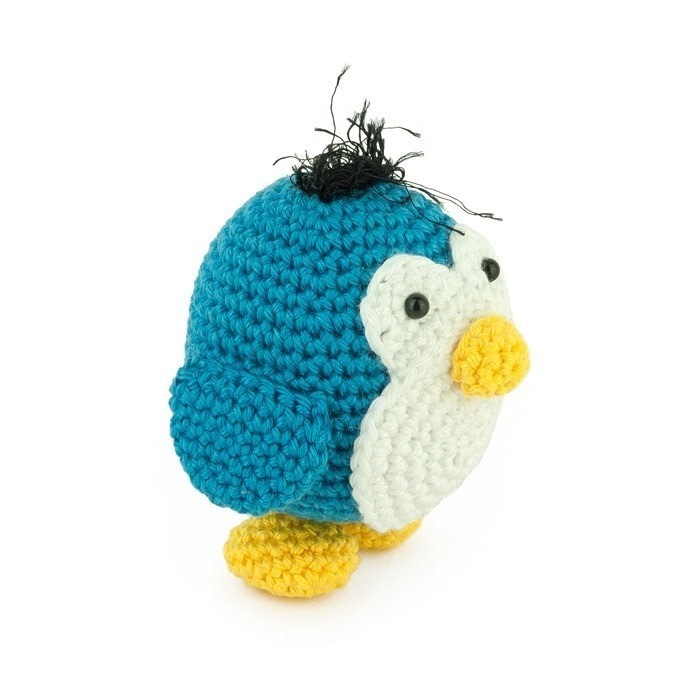
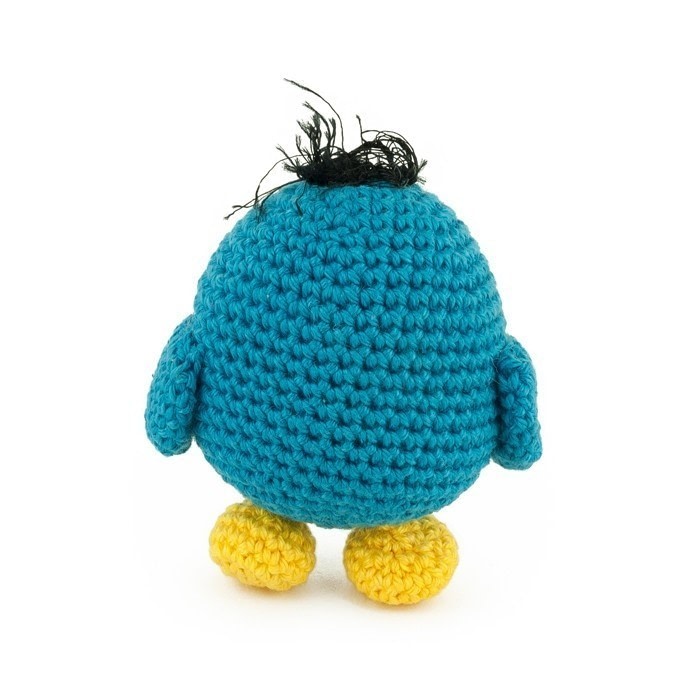
Little Penguin
The penguin is easy to make and you can finish it in a few hours.
Tags
-
 khaosinkinema favorited Little Penguin
04 Oct 19:52
khaosinkinema favorited Little Penguin
04 Oct 19:52
-
 Jasmin favorited Little Penguin
01 Oct 11:52
Jasmin favorited Little Penguin
01 Oct 11:52
-
 Emma J. commented on Little Penguin
30 Sep 08:41
Emma J. commented on Little Penguin
30 Sep 08:41
-
Emma J. commented on Little Penguin
30 Sep 08:41
-
 Jodi W. commented on Little Penguin
27 Sep 03:32
Jodi W. commented on Little Penguin
27 Sep 03:32
-
Jodi W. favorited Little Penguin
27 Sep 03:30
-
 heidi.jarmaine favorited Little Penguin
15 Sep 23:59
heidi.jarmaine favorited Little Penguin
15 Sep 23:59
-
 Crafterella featured Little Penguin
09 Sep 23:00
Crafterella featured Little Penguin
09 Sep 23:00
-
 The Dark Vixen favorited Little Penguin
08 Sep 10:31
The Dark Vixen favorited Little Penguin
08 Sep 10:31
-
 Elena B. added Little Penguin to animal plushies
07 Sep 21:15
Elena B. added Little Penguin to animal plushies
07 Sep 21:15
-
Step 1
Face part 1
(Use white yarn)
RND 1: 6 sc in magic ring + 1 tch (6)
RND 2: 6 sc (6)
Tie-off.Face part 2
(Use white yarn)
RND 1-2: the same as part 1, don’t tie-off
RND 3: 5 sc along the flat side of this part and continue with 5 sc along the flat side of part 1 + 1 tch (10)
RND 4: 10 sc (10)
Tie-off and leave enough yarn to sew the face to the belly. Place the safety eyes in the middle of the round part of the face. Don’t fixate them yet. -
Step 2
Belly
(Use white yarn)
RND 1: 6 sc in magic ring (6)
RND 2: 2 sc in each sc (12)
RND 3: 2 sc in each 2nd sc (18)
RND 4: 2 sc in each 3rd sc (24)
RND 5: 2 sc in each 4th sc (30)
RND 6: 2 sc in each 5th sc (36)
Tie-off with a sl.st and leave enough yarn to sew the belly to the head/body. -
Step 3
Head/body
(Use blue yarn)
RND 1: 6 sc in magic ring (6)
RND 2: 2 sc in each sc (12)
RND 3: 2 sc in each 2nd sc (18)
RND 4: 2 sc in each 3rd sc (24)
RND 5: 2 sc in each 4th sc (30)
RND 6: 30 sc (30)
RND 7: 2 sc in each 5th sc (36)
RND 8: 36 sc (36)
RND 9: 2 sc in each 6th sc (42)
RND 10-19: 42 sc (42)
Place the face at the head/body and make sure that the eyes are about round 8. Fixate the safety eyes at the inside of the head/body.
RND 20: dec over each 6th and 7th sc (36)
RND 21: dec over each 5th and 6th sc (30)
RND 22: dec over each 4th and 5th sc (24)
RND 23: dec over each 3rd and 4th sc (18)
Fill the head/body and keep filling until the last round.
RND 24: dec over each 2nd and 3rd sc (12)
RND 25: dec over each 2 sc (6)
Tie-off with a sl.st and close the head/body. -
Step 4
Wings (2x)
(Use blue yarn)
RND 1: 6 sc in magic ring (6)
RND 2: 2 sc in each sc (12)
RND 3: 12 sc (12)
RND 4: 2 sc in each 2nd sc (18)
RND 5-7: 18 sc (18)
Make the wing flat to create a half circle. Close the wing by crocheting the 2 sides of the wing together with sc. Tie-off and leave enough yarn to sew the wings to the head/body. -
Step 5
Beak
(Use yellow yarn)
RND 1: 6 sc in magic ring (6)
RND 2: 2 sc in the 1st, 2nd, 4th, 5th sc (10)
RND 3: 10 sc (10)
Tie-off with a sl.st and leave enough yarn to sew the beak to the head/body. -
Step 6
Feet (2x)
(Use yellow yarn)
RND 1: 6 sc in magic ring (6)
RND 2: 2 sc in each sc (12)
RND 3: 2 sc in the 1st, 2nd, 3rd, 7th, 8th, 9th sc (18)
RND 4-5: 18 sc (18)
RND 6: dec over the 1st and 2nd, 3rd and 4th, 5th and 6th, 10th and 11th, 12th and 13th, 14th and 15th sc (12)
Fill the feet and keep filling until the last round.
RND 7: dec over each 2 sc (6)
Tie-off with a sl.st and leave enough yarn to sew the feet to the head/body. -
Step 7
Putting all the parts together
Sew the face (that’s already partially attached to the head/body) to the top of the belly. Then sew the face and the belly to the head/body.Sew the wings to the head/body, somewhere at round 12.
Sew the beak at the place where the face and belly meet.
Sew the feet to the bottom of van the head/body.
Sew the fluffy yarn to the top of the head/body.
Comments


