


About
For those of you who are sick of people applying lipstick in class!
Some tips:
When erasing with this eraser, roll it up all the way and hold onto the eraser itslf-not the tube. This will prevent the eraser from breaking. Also, erase at an angle, so you can keep the angled tip to your eraser.
-
 Syeyon K. commented on Lipstick Eraser
22 Jun 06:06
Syeyon K. commented on Lipstick Eraser
22 Jun 06:06
-
 kristy c. added Lipstick Eraser to erasers
22 Feb 02:00
kristy c. added Lipstick Eraser to erasers
22 Feb 02:00
-
kristy c. favorited Lipstick Eraser
22 Feb 02:00
-
 cristinakilljoyway favorited Lipstick Eraser
19 Feb 15:05
cristinakilljoyway favorited Lipstick Eraser
19 Feb 15:05
-
 Griselda C. favorited Lipstick Eraser
01 Jul 00:55
Griselda C. favorited Lipstick Eraser
01 Jul 00:55
-
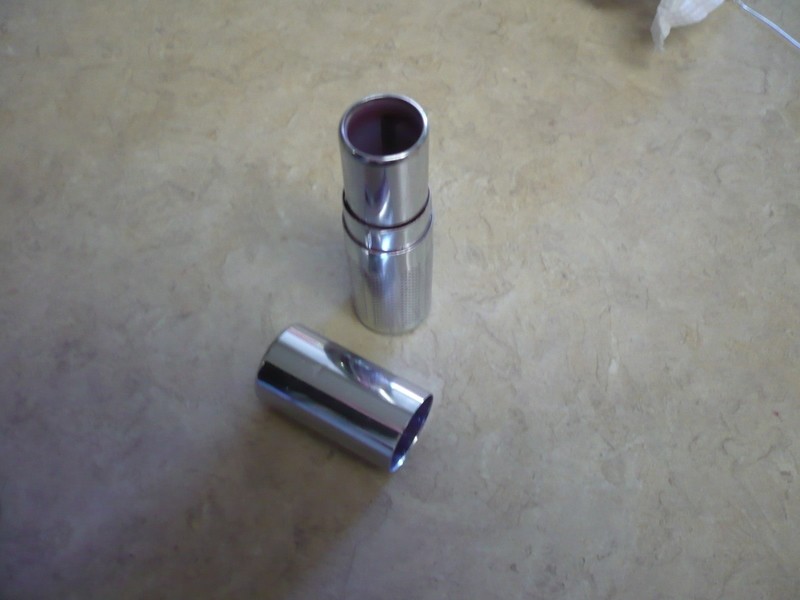
 Step 1
Remove your eraser from the eraser tube. Cut a diagonal line across one end of the eraser. It does not have to be a perfect cut. To smooth out the cut tip of your lipstick eraser, rub it at an angle against a clean sheet of paper. At this point, the eraser will still be too long to fit into the lipstick tube and be able to close it.
-
 Step 2
Clean out your empty lipstick tube. You can use dishsoap, makeup remover, or even run it through the dishwasher.
-
Step 3
Put the eraser in the lipstick tube. Place the cap over the eraser as if to close the tube. Measure how much of the eraser you need to cut to make it fit in the tube. Cut this off the end of the eraser that hasn't already been cut diagonally.
-
 Step 4
Next, you will glue the eraser into the tube.
Here's a warning: most lipstick tubes have little holes in the bottom of the inside part that pushes the lipstick up. If you apply the glue to this directly, it may run through the holes and clog the lipstick tube so it won't push up properly.
When you use the hot glue gun to attach the eraser, don't wait for the gun to get completely hot and melt the glue. The colder and harder the glue is, the less likely it is to drip through the holes in the tube.
Roll the tube up all the way before you glue the eraser in it. Then apply a generous amount of glue and attatch the eraser. Make sure it is standing straight and let it dry.


my teacher want to have a chalk just like this.
I looked on Amazon and Ebay, but I couldn't find any.
However, they do sell erasers in the shape of crayons. This would be even better than a eraser-pen, because it would be thicker, like lipstick. I bought one once at a Party City, but you can find them online as well!
I hope I helped!