


About
Dazzle your Fridge with Sparkly Magnets!
I've been Up-cycling these kinds of magnets for years, this is the first time I've tried using glitter!
Tags
-
 Becky P. favorited Lamenated Collage Magnets (Glitter + Star Trek!)
16 Apr 20:38
Becky P. favorited Lamenated Collage Magnets (Glitter + Star Trek!)
16 Apr 20:38
-
 Tierra T. favorited Lamenated Collage Magnets (Glitter + Star Trek!)
14 Nov 21:48
Tierra T. favorited Lamenated Collage Magnets (Glitter + Star Trek!)
14 Nov 21:48
-
 Conner W. added Lamenated Collage Magnets (Glitter + Star Trek!) to gift ideas
16 Jul 14:56
Conner W. added Lamenated Collage Magnets (Glitter + Star Trek!) to gift ideas
16 Jul 14:56
-
Conner W. added Lamenated Collage Magnets (Glitter + Star Trek!) to craft ideas
16 Jul 14:56
-
Conner W. favorited Lamenated Collage Magnets (Glitter + Star Trek!)
16 Jul 14:56
-
 Valerie R. favorited Lamenated Collage Magnets (Glitter + Star Trek!)
11 Jun 01:38
Valerie R. favorited Lamenated Collage Magnets (Glitter + Star Trek!)
11 Jun 01:38
You Will Need
-
 Step 1
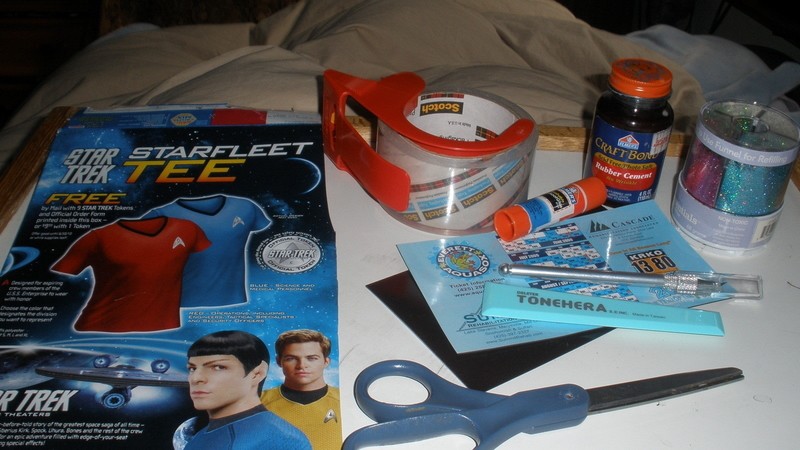
Gather your materiels, you will need:
1. Clear packing tape
2. Scissors and/or Exato knife.
3. Thin magnet(s) (you can get these just about everywhere that promotes these businesses, I got mine from a coffee shop)
4. Glue Stick, or Rubber Cement (optional)
5. Smoothing Stick Or any other straight edge, hard surface for smoothing, such as a ruler.
6. Glitter (optional) -
 Step 2
Cut out your image and arrange it how you like. My picture is from the back of a cereal box, so the cardstock makes it a bit easier to work with. I snipped out the logo and pasted it with rubber cement over the image for a '3D' look.
-
 Step 3
Strip as much of the plastic and paper from the magnet, this way your [picture can stick to the magnet better if you decide to glue it down. I also scoured the magnet with the blade of the scissor for the glue to stick better, as a precaution.
-
 Step 4
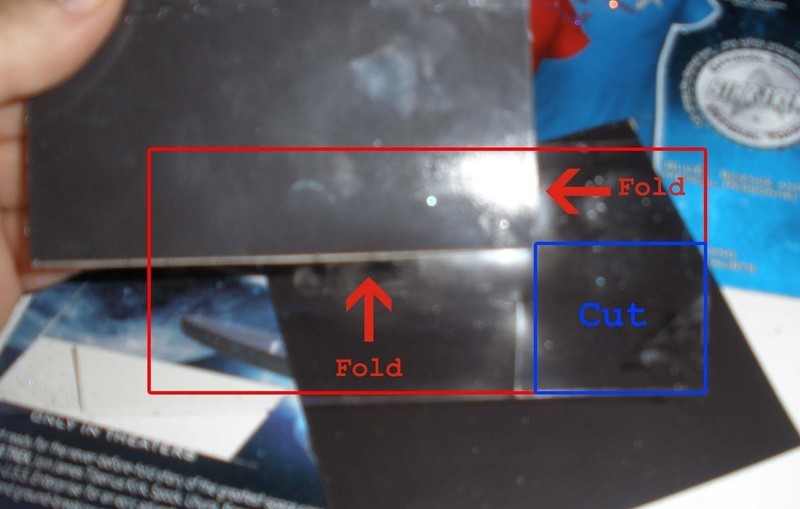
Next, place the picture over the magnet and cut and trim to size. (I flipped the magnet wrong size down to better contrast the two images).
With a very light application of the Glue Stick, dab the corners of the picture to the magnet (right side up). USING RUBBER CEMENT OR LIQUID GLUE CAN BLEED THROUGH THE IMAGE! This will keep the magnet and the image together during the rest of the project.
-
 Step 5
Here's the fun part!
With the edge of the glue stick, draw the areas where you want glitter to stick, and apply glitter (I used two different colors, silver and blue) With the edge of a toothpick or a scraper, gently remove the excess glitter from unwanted areas. -
 Step 6
Allow the glitter to set for a few minutes...perhaps start another magnet while you wait?
-
 Step 7
This is the tricky part.
With clean hands, lay the image flat on a surface free of glitter and paper (preferably a clean table or counter) carefully tape over the image with the clear tape, sealing in the glitter and protecting the paper. With your smoothing stick, carefully smooth down the plastic to clearify the image and get rid of any little bubbles. Over smoothing may cause damage to both the tape and image. (Smooth inbetween setting a new piece of tape).To seal the edges, stick pieces of clear tape onto the image with the corner and edges sticking out. Flip the manget side over, and snip the corner piece off the tape (getting as close to the magnet corner as possible) and fold the sticky side of the tape down onto the manget, sealing the edge.
-
 Step 8
You can be done with your magnet now if you wish, but if you want to make the tape smoother use a heating gun to slightly melt the tape. Be careful! Using the heating gun too long can cause the tape to either melt or warp the image.
-
 Step 9
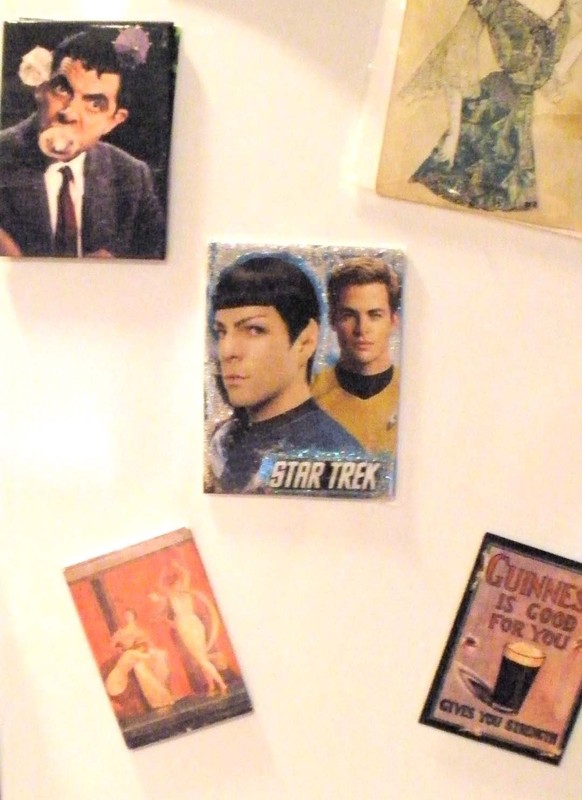
Ta Da! A new magnet for your fridge!


Comments


