


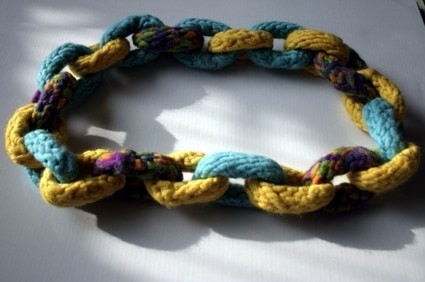
About
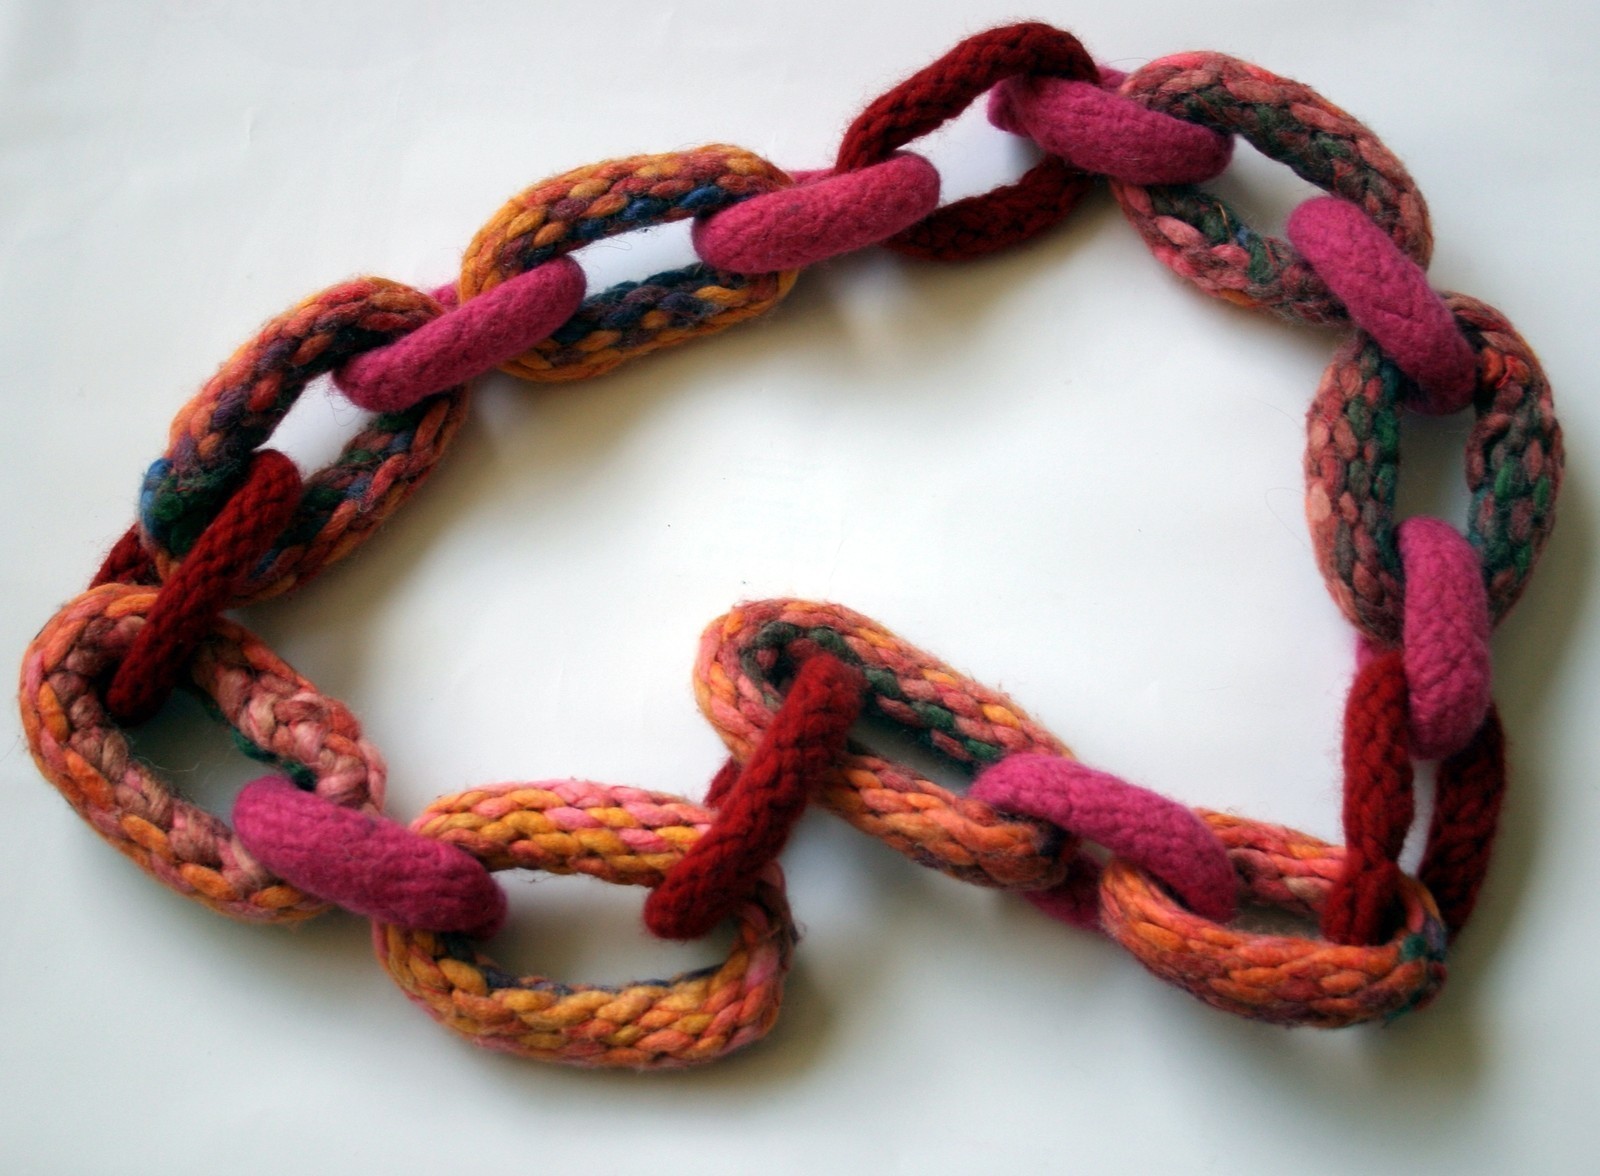
a knitted chain necklace of wool
I saw on a other crafting site this necklace, i had asked the person a question about why so difficult on knitting with several needles, and i try a flexibel needle , but i didn't work. Because i has some left over very thick wool yarn, and not the needles to do the same trick as the crafter had used, i must do it in a differend way. i think that this manner is more easier, then the other first one. My mom said allways:"why difficult i've it could be easy!" I'm agree with those words.. Ii thought mayby you like it .
I have find out that you only must knitted with a pair of knitting needles ectangular shapes of patches.
because you can knit it so quickly you can use this project as a quickly to make leftover present for the christmisdays. Or for yourself or as a commen present.
so i thought i will make a tute for you.
You don't have to felt the chains , but i like that, it looks much prettier . Ive you choosen to felt it, you must use only 100 whoollen yarn. You can use the washing-machine or a steam iron or only by hand. The last manner is will cost more time.
And for those of us, who aren't the greatest knitters , you can reed this link for the how to knit and its explain a lot of the knitting terms in english. I was so glad when i had found this link, because in the dutch langues we use differend knitting words names.:
http://learntoknit.lionbrand.com/
The time is have used is without the felting proces time! Because i like to be a green peron, i have a one person household and that taking more time to fill a washing machine with laundry.LOL
enjoy this craf and much fun with your chain necklace and the end!;-D
update:
thanks to my friend Karin that had made the version i learned to knitting an i cord
it's much faster when you do that, you will have less sewing to do at the end,
I have tryed it out and learend that you can use 6 or 7 stiches for this as well.
i have found a great how to for you so i will give on here the link.
http://learntoknit.lionbrand.com/faq/463.html?learntoknit=1&language=En
You allways can still knit the patches but now you can choose;-D
hope it's hellpfull for you all.
much knitting fun and thank you for hopping by;-D
-
 Kathleen H. favorited Knitted Chain Necklace
22 Nov 18:14
Kathleen H. favorited Knitted Chain Necklace
22 Nov 18:14
-
 Kimya J. favorited Knitted Chain Necklace
26 May 00:34
Kimya J. favorited Knitted Chain Necklace
26 May 00:34
-
 Ximena A. favorited Knitted Chain Necklace
17 Jul 17:54
Ximena A. favorited Knitted Chain Necklace
17 Jul 17:54
-
 Jenna R. added Knitted Chain Necklace to Tavi Gevinson
12 Jul 09:42
Jenna R. added Knitted Chain Necklace to Tavi Gevinson
12 Jul 09:42
-
 Rochelle B. favorited Knitted Chain Necklace
22 Jun 22:04
Rochelle B. favorited Knitted Chain Necklace
22 Jun 22:04
-
 Crafterella added Knitted Chain Necklace to Lana Del Ray
05 Dec 18:43
Crafterella added Knitted Chain Necklace to Lana Del Ray
05 Dec 18:43
-
 Kathy S. favorited Knitted Chain Necklace
19 Jul 23:36
Kathy S. favorited Knitted Chain Necklace
19 Jul 23:36
-
 Ada B. added Knitted Chain Necklace to Necklaces
14 Apr 11:42
Ada B. added Knitted Chain Necklace to Necklaces
14 Apr 11:42
-
 vasilena s. favorited Knitted Chain Necklace
13 Apr 10:19
vasilena s. favorited Knitted Chain Necklace
13 Apr 10:19
-
 lunatica favorited Knitted Chain Necklace
18 Feb 21:06
lunatica favorited Knitted Chain Necklace
18 Feb 21:06
-
 Step 1
cast on 11 stiches
On knitting needles of number 9 (or i've you use less thick yarn, a other number)
Use the stockinette stich. The wrongs(left site is later on the right side.!
knit 6 needles and cast off on the front side (the wrong side for this project) the stiches off.
cut of the thread.
cut of not the tread not to short, you can use him for the sewing!In the end you have knitted a rectangular shape!
-
Step 2
choise a other colour yarn and repeat the pattern above.
I have use for my red one 19 patches, but i've you like a longer necklace you must knit some more or less i've you like a shorter one.:-DSo knit some more of these fabrics.
-
 Step 3
Put al the knitted patches togheter when you think you have enough of them.
and lay them in a row and look wich colour change you like, so you can see how the chain must become and looking after you have sew them togheter.
-
 Step 4
Pick up the first one and lay it in the full length.
crease it double -
 Step 5
sew the short sides to each other, weave of the lose ends at the same time, and cut of the thread.
-
 Step 6
Fold this circle so that you have a long seam and sew them togheter.
-
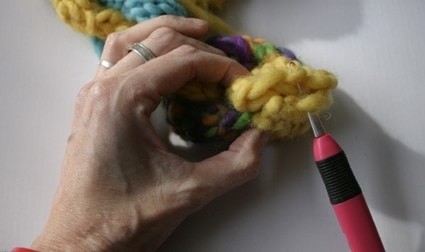
 Step 7
Because i had to thick yarn, and i didn't have a embrodery needle with such big eyeneedle i have use a crochet hook number 4.
but when you have used much thinner yarn you can use an embroidery needle.
On this pict you can see it better, what i trying to tell you.;-D -
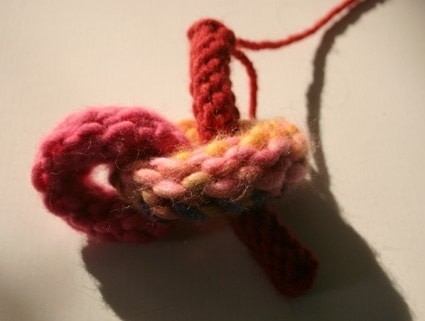
 Step 8
you have cot a sort of knitted donut shape, yummy!!! LOL
-
 Step 9
Pich up the seccond patch and pull this trough the donut shape zie the pict.
-
 Step 10
Crease this seccond patch double, so the short sides are together.
And sew them. -
 Step 11
Fold this shape in the length
Sew then the long double side and you have again finishing again a chain. -
 Step 12
pick up the third patch and repead this until you have get the length you disire.
Attention:
(for the extra long chain necklace i have used 19 patches. but you must deside you own legth and the kind of yarn can you are using makes the difference of how many patsches you will use! And i make too a difference if you choose to felt this chain necklaces or not!) -
 Step 13
The last patch :
pull this one trough the first chain and the last see the pict. -
 Step 14
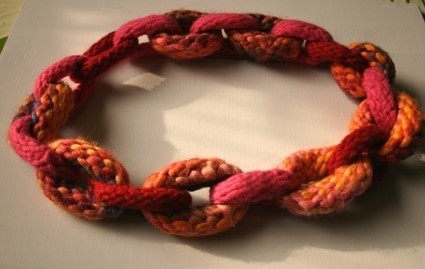
Put the short shapes togehter and sew then and again repeat this with the length side and you have finisched the last chain of your chain.
so it looks like this. -
 Step 15
The felting proces:
throw your necklace chain with some other laundry in your washing machine. Your washing machine must be full with the laundry, thats better for the felting proces.And put the necklace everytime in a pillowcase. I have wash this on 40 degrees. When you hold your necklace out of the machine, you must strech the necklace in its shape. Everytime again! -
 Step 16
So again repeat the washing machine proces.
after 3 times is okay, sometimes it can happen that not everything of the chains are correct felted, so then you can felt this by hand or you must put it again in the washing machine.
And when it is finished you must let it dry and again streching it in its shape.
A other option i have used , it came from own of my friend on this site Tine! You can used the steam iron. I have tried this out, you must give it some more time, but it works fine.Because its a knitted material, it cost more time.a last notice:
My red necklace was from difference kind of woollen yarn made, the so the finished product of the chains were in the end differends.
On this pict you see the chain necklace after three times in the washing machine. -
 Step 17
And then you are finishing and you can give it away or use it by your self!


Versions


Comments


