


About
Stitch a pretty jumper top.
Check out the website link ->
And thanks for all the feedback ladies. =] Pleased that you like it.
-
 Key West Witch favorited Jumper
07 May 09:15
Key West Witch favorited Jumper
07 May 09:15
-
 Rebeccah D. favorited Jumper
23 Jun 15:37
Rebeccah D. favorited Jumper
23 Jun 15:37
-
 Ashana C. favorited Jumper
26 Dec 02:47
Ashana C. favorited Jumper
26 Dec 02:47
-
 matthew t. commented on Jumper
14 Oct 05:26
matthew t. commented on Jumper
14 Oct 05:26
-
 Shelly S. added Jumper to refashion
23 Aug 03:31
Shelly S. added Jumper to refashion
23 Aug 03:31
-
Shelly S. favorited Jumper
23 Aug 03:31
-
 Bethany A. favorited Jumper
11 Dec 03:23
Bethany A. favorited Jumper
11 Dec 03:23
-
Kylee-Rhiannon F. favorited Jumper
08 Apr 22:06
-
 JesikaAce90 favorited Jumper
27 Jan 03:33
JesikaAce90 favorited Jumper
27 Jan 03:33
-
 Heather B. favorited Jumper
01 Dec 23:47
Heather B. favorited Jumper
01 Dec 23:47
You Will Need
-
 Step 1
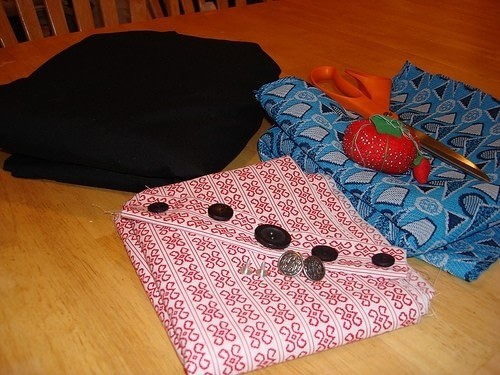
Gather the materials you need.
The blue fabric wasn't used for this.
This jumper's made with two different fabrics.
The black, and the red.Use however many buttons you wish. I prefer just a few big buttons, but grrr I didnt have any. Make sure you have enough buttons to keep your bodice securely closed.
Not Pictured: Tailors chalk and an iron.
-
 Step 2
These are the pieces you are going to need.
The measurements are half the garment, so make sure you get them right.
First, measure from under your bust to your waist. Add a few inches for seam allowances and a hem. This is where my 10" came from.
Next, measure around the largest part of your stomach. Divide that number by two and add an inch or so. This will be the measurement for Piece C. Mine was 16"
Then, decide where you want your button "strip" to go. I put mine at about 11" leaving 5" for the opposite side. add 1-2" for your casings and about 1 1/2" for seam allowances. This gave me my 8 1/2" and my 14 1/2".
The skirt and the straps are simple, go ahead and make them what you wish.
Below are my measurements.
Piece A=14 1/2" x 10"
Piece B=8 1/2" x 10"
Piece C=16" x 10"
Skirt=12" x 64". (For width, I used my waist measurement x2. This can differ for the amount you want it to be gathered.)
Straps=26" x 3" -
 Step 3
*Optional, add interfacing to "casing".
Grap piece A and WRONG side up fold the RIGHT side over about ¼“, then fold again, about ¾”. This will be the "casing" where your buttons will go.
Finish the top edge, or measure where it will be so you have a better idea on where to put your buttons.
-
 Step 4
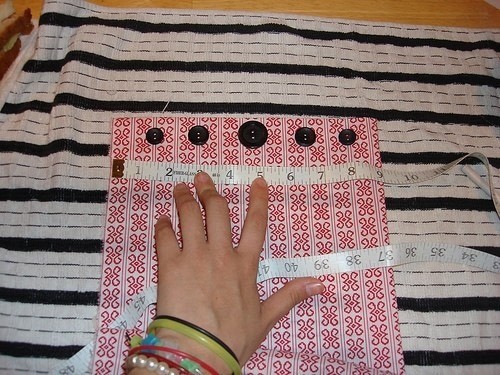
Measure the placement of your buttons and try to space them out evenly. Be sure to leave room for the skirt to be attatched.
Mark the placement of your buttons.
-
 Step 5
Pull out a needle and sew those buttons on!
You are going to sew your buttons inside the "casing." Now, when the bodice is inside out, you can't see the stitches, instead you see the clean right side of the fabric.
-
 Step 6
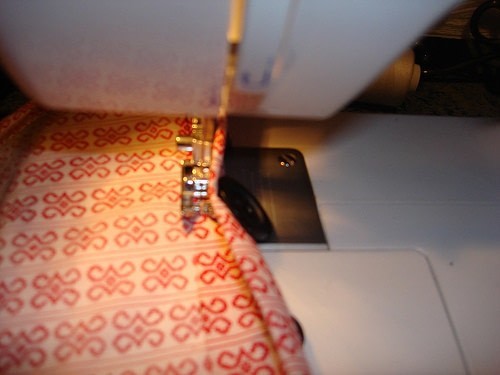
Now you are going to sew the "casing" you made for your buttons, closed. This might take a bit of manuevering because the buttons tend to get in the way. It might help to tilt your button when you go to sew near it.
Woooohhhoooo done with those buttons!
We are done with Piece A for now.
-
 Step 7
*Optional, add interfacing to "casing".
Onto B!
Okay, this is pretty much a repeat of the last, but hmm we get to make buttonholes and the casing is on the opposite side.SO, flip the fabric over, so its WRONG side up, and fold over about ¾” on the LEFT side, fold over again about 1 ½”.
Mark where your buttonholes are going to go. Go ahead and sew up the "casing" for this. And then do all of those lovely buttonholes.
Don’t forget the top hem either! So, are we done with those buttonholes??
-
 Step 8
Go ahead and button your pieces together. Woohoo they work!
Is it time for a break yet? Take a few minutes to have a snack and clean up a bit, the hard part is over.
So, piece a + piece b= bodice front.
Hem top of piece c.
With right sides together, and buttons still buttoned, go ahead and sew bodice front to bodice back at side seams. -
 Step 9
Try it on! It should be a bit big in some places, mainly around the very top.
-
 Step 10
Now, take it off and flip it inside out. This time we get to pin! Make sure the side seams match up with where your actual sides are.
We’re not shaped like boxes, right?We must let the jumper know that, show it who's boss!
Take in the sides so that it fits pretty snug and hugs your curves(for the most part.) If your wearing two shirts like I was, its best to take the top one off so you dont double your chances of accidentally pinning the bodice to your shirt.
-
 Step 11
You can go ahead and unbutton yourself out of the trap of pins. Lay the bodice on a flat surface and with your tailors chalk connect the pinheads, then draw a line. This line is going to help us a lot. Make sure your fabric stays flat while doing this, so you don't take it in too much.
-
 Step 12
Sew alongside the line rather than on it to allow for extra room. Try it on again. The right way. Mine was too tight at the very top and I couldn't fasten the top button, so I took out some of the stitches on both sides. Keep altering it until it fits.
There might be an easier way to make it form fitting like by using darts or something, but this is what I did and it worked for me. Trim the seams once you get the fit right.
Do your seams still match up with your sides? Mine are a bit off but its okay.
-
 Step 13
Go ahead and gather your skirt.
I suck suck suck at hemming, so I actually went and did mine before gathering.
-
 Step 14
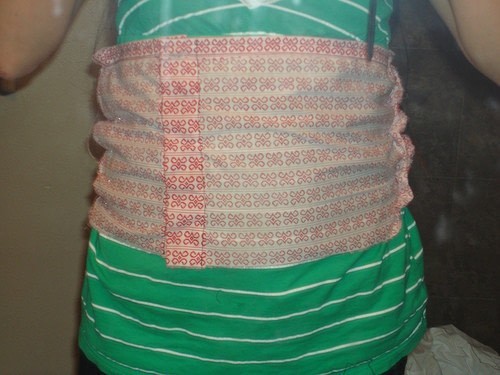
Pin and sew your skirt to the bodice. Keep the bodice buttoned so that they overlap like in the above picture.
-
 Step 15
Woot! Go ahead and try it on again, we're going to put the straps on next!
-
 Step 16
Sew up your straps and pin them on. Yeah, even attempt to pin them onto the back, yourself. Make it criss cross if you'd like.
With my yellow jumper, they were directly sewn on both the front and back. This isn't that hard to get on, except, because they criss cross it gets confusing.
With this one, I sewed them directly onto the front, and put buttons and buttonholes on the back.
-
 Step 17
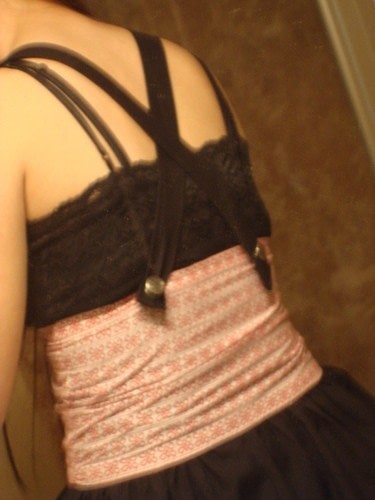
The finished back. I added buttons to the back which adds a nice touch and it allows the straps to be angled a lot better.
-
 Step 18
Hoorah!


CO + K User
Super banging