


About
Hello! Today, I'm happy to share with you all the hand lettering technique that I use on the wooden signs that I create.
Yes, lots of techniques are out there…painting over letter stickers is a popular one, especially when creating subway art. Letter stencils are another easy method. Neither was what I was after, though. I wanted something that would give me large letters, and I also didn’t like the line “breaks” that you see in letter stencils.
Enjoy!
-
 Holly O. favorited How To Hand Letter Signs Like A Pro (Or, At Least, Like Me)
21 Mar 03:03
Holly O. favorited How To Hand Letter Signs Like A Pro (Or, At Least, Like Me)
21 Mar 03:03
-
 Shelley W. added How To Hand Letter Signs Like A Pro (Or, At Least, Like Me) to Diane Keaton - DIY the Room
01 Mar 02:55
Shelley W. added How To Hand Letter Signs Like A Pro (Or, At Least, Like Me) to Diane Keaton - DIY the Room
01 Mar 02:55
-
 Ginger D. favorited How To Hand Letter Signs Like A Pro (Or, At Least, Like Me)
19 Jun 06:14
Ginger D. favorited How To Hand Letter Signs Like A Pro (Or, At Least, Like Me)
19 Jun 06:14
-
 Karen D. favorited How To Hand Letter Signs Like A Pro (Or, At Least, Like Me)
06 Oct 00:47
Karen D. favorited How To Hand Letter Signs Like A Pro (Or, At Least, Like Me)
06 Oct 00:47
-
caroline s. added How To Hand Letter Signs Like A Pro (Or, At Least, Like Me) to other crafts
15 Apr 07:46
-
 deb.mathenia favorited How To Hand Letter Signs Like A Pro (Or, At Least, Like Me)
22 Feb 21:13
deb.mathenia favorited How To Hand Letter Signs Like A Pro (Or, At Least, Like Me)
22 Feb 21:13
-
 Meaghan N. favorited How To Hand Letter Signs Like A Pro (Or, At Least, Like Me)
19 Nov 01:44
Meaghan N. favorited How To Hand Letter Signs Like A Pro (Or, At Least, Like Me)
19 Nov 01:44
-
 Youghurt Jaja favorited How To Hand Letter Signs Like A Pro (Or, At Least, Like Me)
27 Oct 19:07
Youghurt Jaja favorited How To Hand Letter Signs Like A Pro (Or, At Least, Like Me)
27 Oct 19:07
-
Alissa B. favorited How To Hand Letter Signs Like A Pro (Or, At Least, Like Me)
27 Oct 05:50
-
 mamibunny favorited How To Hand Letter Signs Like A Pro (Or, At Least, Like Me)
23 Oct 16:04
mamibunny favorited How To Hand Letter Signs Like A Pro (Or, At Least, Like Me)
23 Oct 16:04
You Will Need
-
Step 1
Find a font that you want to recreate, and, using your word processing software, type out and print out exactly what you want the sign to say. Also, make your letters the exact size you want them to be in the finished product.
-
 Step 2
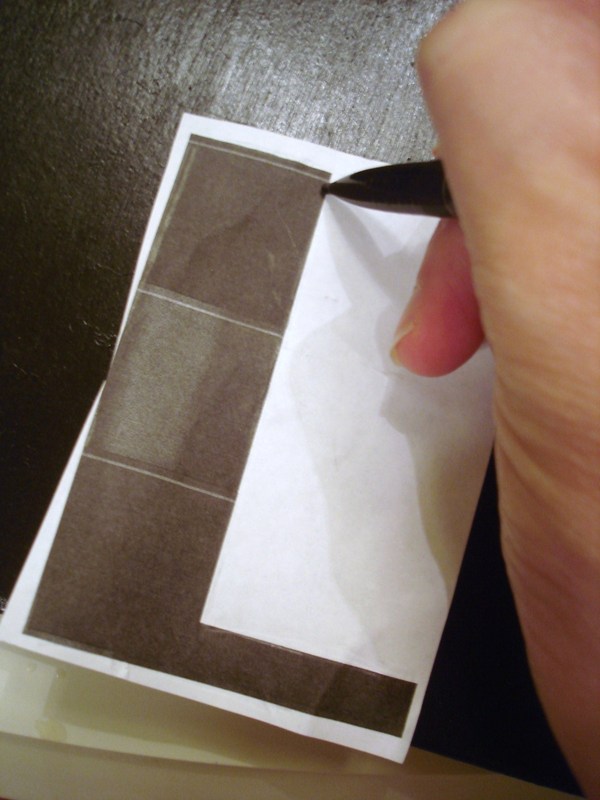
Cut out each individual letter (leave a border of white around each letter), and place each letter exactly where you want it on your wood. Take your pencil (I used a mechanical pencil with no lead showing), and outline each of your letters.
The marks will be visible, but only barely! -
 Step 3
(This, by the way, is where real artists probably want to stop reading-if they haven’t already!) Outline your letters using a paint pen.
-
 Step 4
Using a small paintbrush and craft paint. Fill in your letters (I needed two coats).
Let dry, and you're done!


Comments

