About
A full tutorial showing how we created a modern accent wall for the nursery.
When I was designing the nursery, I knew I wanted to have some sort of feature or accent wall. Something to draw your eye to a main section of the room where the crib would go.
Accent walls are something I love adding to rooms because they add a ton of texture and character to a space.
-
 Christene A Holder published her project How To Create A Modern Accent Wall
23 May 09:00
Christene A Holder published her project How To Create A Modern Accent Wall
23 May 09:00
-
 Step 1
Design
First, we needed to create the design for the wall. Before we could start the design, we measured the length and height of the wall so that we knew the main dimensions we would be working with.
Then, we quickly sketched some design ideas on paper to see what kind of pattern we wanted.
We created a mock-up of the wall using Sketch-Up. Here’s the design we came up with.
Because we put the main dimensions into the software, we were able to have the computer figure out what the measurements would be for each individual board.
To keep everything simple, every angle in the design was 45 degrees.
-
 Step 2
Cutting
As part of our design we labeled each board with a letter. This was really important because we were going to cut all of the pieces at once. The labels would be our guide so we know how to assemble each piece to create the design on our accent wall.
Using the computer design, we cut all of the boards to size using a miter saw.
Some of the lengths in the design were longer than the MDF boards themselves, so we had to use two boards for those areas. When we had these cases, we cut an angle between the boards. This would help them fit seamlessly together on the wall.
After each board was cut, we labeled the back of the board. Then we brought everything up the nursery for installation.
-
 Step 3
Installing
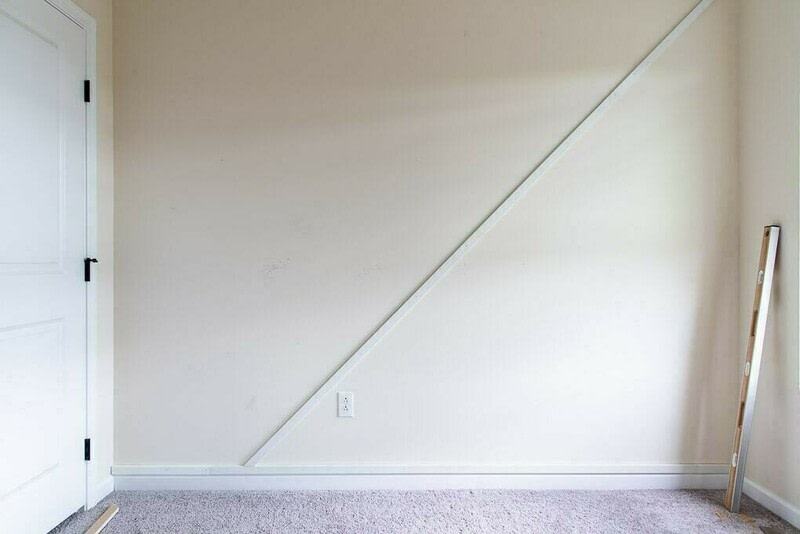
The first piece that we installed on the wall was the base piece. We decided to create a base piece at the bottom of the accent wall but slightly above the existing trim in the room.
-
 Step 4
This piece was one of the lengths that was longer than the MDF boards themselves. So, we had to cut this in two separate pieces.
To make sure they fit together really well, we cut them at an angle where they would attach together. This helps to hide the seam between them and make it look like one long seamless piece of wood.
-
 Step 5
To attach the board to the wall, we first added some wood glue to the back of the board. Then, using the level, we placed the board on the wall according to our design. Once it was level and in place, we used a nail gun to attach it to the wall.
-
 Step 6
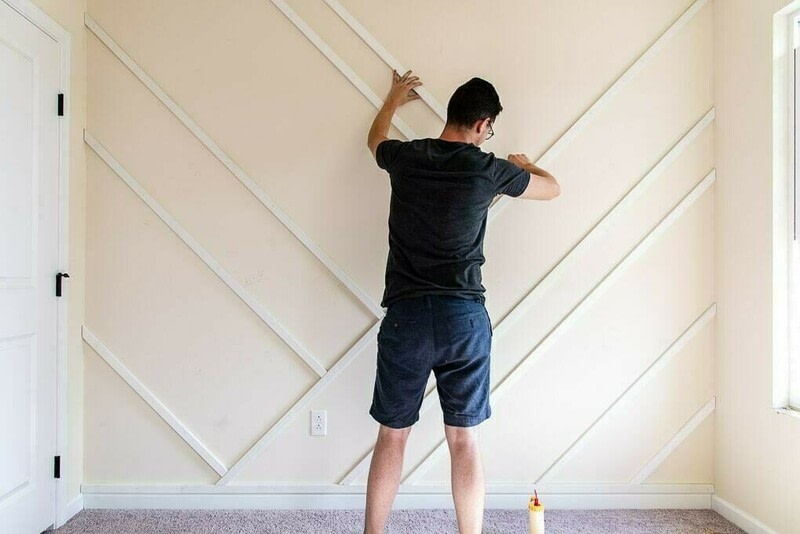
After the base piece, the next piece that we installed was the main diagonal. This was the longest piece and was used as a guide for installing the other boards on the wall. My advice is to work with the largest pieces first.
-
 Step 7
We used a speed square to make sure the angle was correct for the large diagonal piece. Then we attached it to the wall in the same way that we attached the base piece.
-
 Step 8
Then, we kept attaching boards to the wall according to the design plan.
-
 Step 9
Each time, we measured the location based on either the large diagonal board or another board that was in place on the wall.
-
 Step 10
Attaching more pieces to the wall.
-
 Step 11
Attaching more pieces to the wall.
-
 Step 12
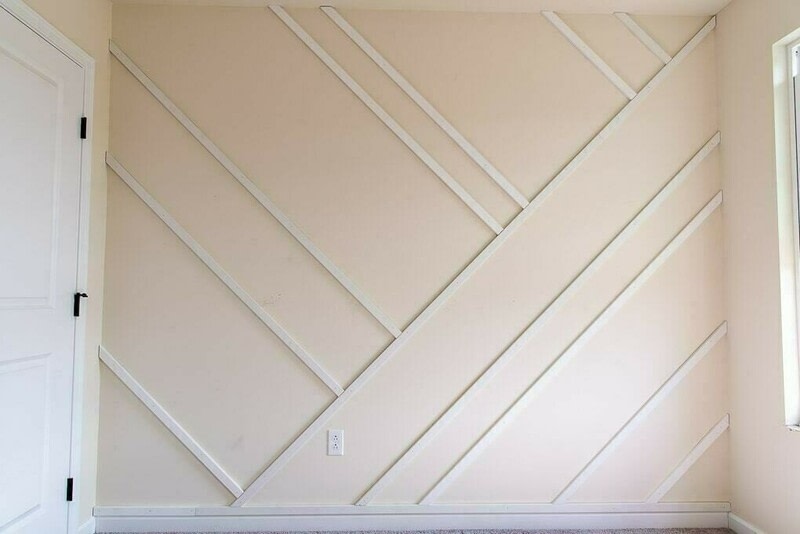
Finishing
Once all of the boards were attached to the wall, the design was ready. We just had to add the finishing touches.
-
 Step 13
Since we attached the boards to the wall with a nail gun, we needed to fill all of the holes. Using wood putty, we filled the nail holes and sanded them so they were flush with the wood surface.
To make the accent wall look like one built-in piece, we decided to caulk the gaps between the boards and the existing wall. This would hide any gaps or spaces and make everything look seamless.
You can see in the photo the gaps between the boards and the nails from attaching the boards to the wall. This was before all of the caulking and adding wood putty.
-
 Step 14
After the caulk was dried, it was time to paint the entire wall.
I decided that I wanted the accent wall to be white. We used trim paint that we had on hand from the rest of our house projects. The trim paint is a semi-gloss white. It really gives the accent wall a nice finished look.
I used a small foam roller to paint the wall between the boards. And for the corners of the boards and the wall, I used a small angled paintbrush.
I used two coats of paint to completely cover the accent wall. After everything was dried, the modern accent wall was done!