


About
Interested in creating modern calligraphy but have no idea where to start? Start here!
Want to get started with modern calligraphy? This guide details setting up your pen, using ink, and practicing the basic strokes for beautiful calligraphy.
-
 Becky d added Getting Started With Modern Calligraphy {The Basics} to Painting & Drawings-Calligraphy
26 Feb 03:26
Becky d added Getting Started With Modern Calligraphy {The Basics} to Painting & Drawings-Calligraphy
26 Feb 03:26
-
 wanza f. added Getting Started With Modern Calligraphy {The Basics} to My furniture bucket list
17 Jul 22:27
wanza f. added Getting Started With Modern Calligraphy {The Basics} to My furniture bucket list
17 Jul 22:27
-
wanza f. added Getting Started With Modern Calligraphy {The Basics} to Letters
17 Jul 22:26
-
Rebecca M. favorited Getting Started With Modern Calligraphy {The Basics}
11 Jun 04:31
-
 paola m. added Getting Started With Modern Calligraphy {The Basics} to disegnare
16 Mar 20:47
paola m. added Getting Started With Modern Calligraphy {The Basics} to disegnare
16 Mar 20:47
-
paola m. favorited Getting Started With Modern Calligraphy {The Basics}
16 Mar 20:47
-
 forbunnie favorited Getting Started With Modern Calligraphy {The Basics}
10 Mar 12:49
forbunnie favorited Getting Started With Modern Calligraphy {The Basics}
10 Mar 12:49
-
Elizabeth F. favorited Getting Started With Modern Calligraphy {The Basics}
09 Mar 15:08
-
 Shelly S. added Getting Started With Modern Calligraphy {The Basics} to Art
07 Mar 06:00
Shelly S. added Getting Started With Modern Calligraphy {The Basics} to Art
07 Mar 06:00
-
Shelly S. favorited Getting Started With Modern Calligraphy {The Basics}
07 Mar 06:00
You Will Need
-
 Step 1
The first thing you'll need is a calligraphy pen nib. I recommend the Nikko G or Brause Steno (Blue Pumpkin) for beginner nibs. They're forgiving and relatively easy to work with.
-
 Step 2
One thing that I didn't realize when I first started was that I would need to "prime" my nibs before I began practicing. The nibs come from the manufacturer with protective oil on them and that oil is not conducive to calligraphy. Wash your nibs with dish soap or some baking soda and water. I used an old toothbrush to do this.
-
 Step 3
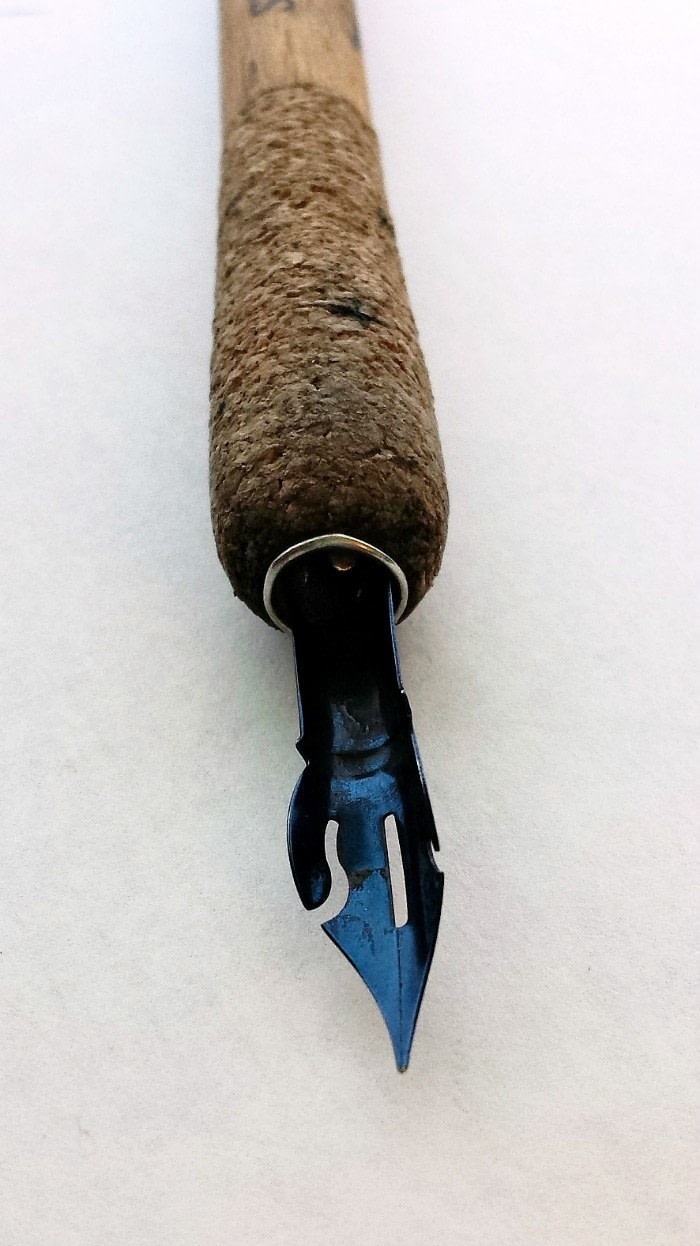
Once your nibs have been primed, you're ready to insert your nib into the holder. Your nib holder will have little prongs that resemble petals. Insert the non-pointy end of the nib between the holder and the prongs. Do not insert them in the middle of the prongs, however logical this may seem. The outside metal circle has a break in it (on the right side of the first picture below). Put your calligraphy nib where the break happens. Push it in tight, but don't force it.
-
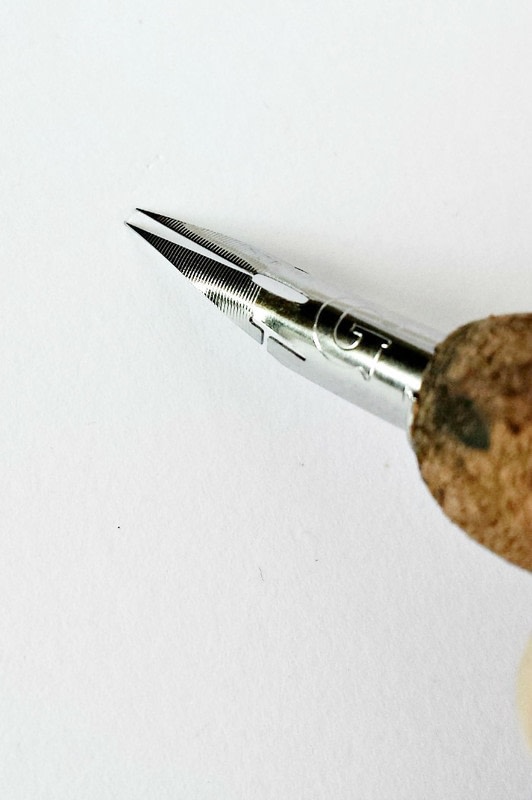
 Step 4
Next, dip your nib into the ink. You'll want to dip about halfway up the vent. The vent is the little hole about halfway up the nib. Better to have too little ink than too much, so you may want to err on the side of too little. You're now locked, loaded, and ready to write.
-
 Step 5
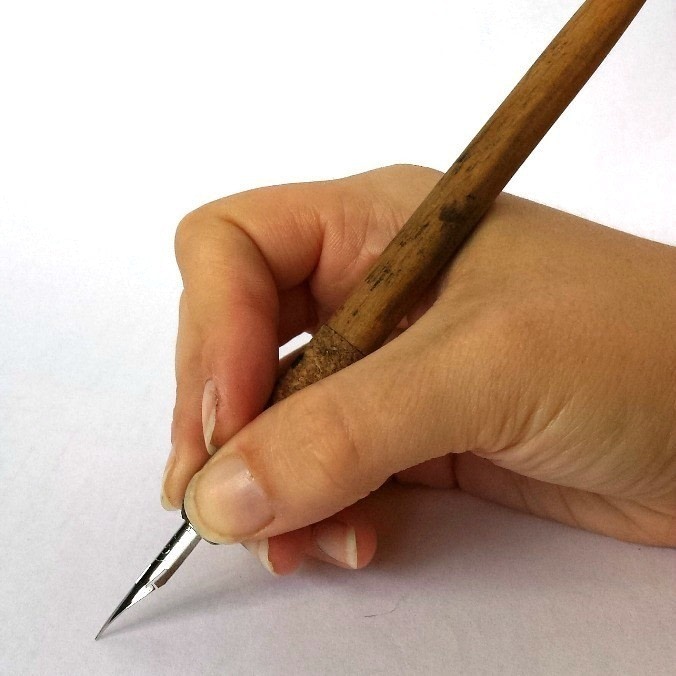
Holding your pen: I grip my pen the same way that I would a regular pen, pinching with my thumb, pointer, and middle finger. My ring finger supports the pen from underneath and my pinky ends up dragging on the paper.
-
 Step 6
Hold your pen at a 45 degree angle from the paper. Unlike writing with a normal pen, move the tip of the pen, not the whole pen. If you move the whole pen, your strokes will not be a consistent thickness.
-
 Step 7
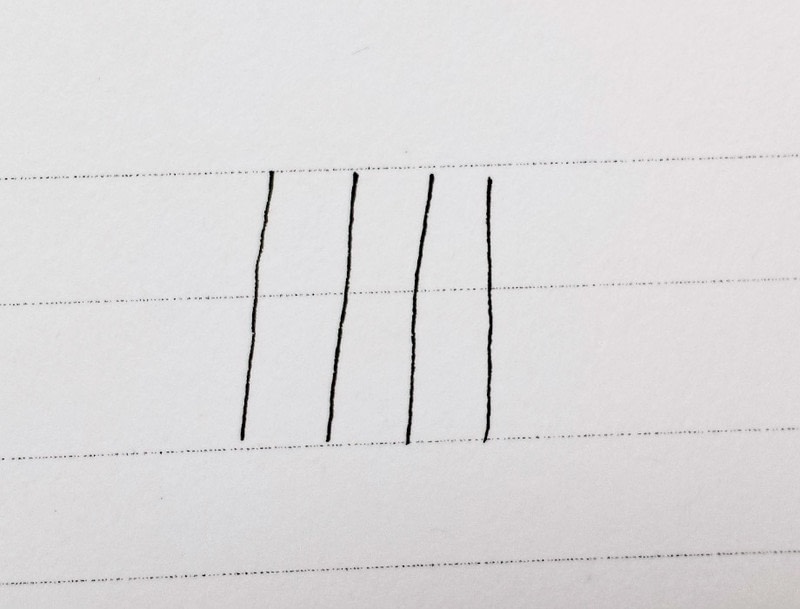
Before jumping right into practicing letters, it's a good idea to get a handle on the basic calligraphy strokes.
Practice downstrokes: One thing that makes calligraphy beautiful is the contrast between the thick downstoke of the pen and the thin upstroke.
The key to getting these thick and thin strokes is pressure. When the nib is pulled down, the tines of the nib spread apart to create the thick lines of the downstroke.
-
 Step 8
Experiment with pressure to get a nice even downstroke (press fairly hard, but not so hard that the nib snags on the paper).
-
 Step 9
Practice upstrokes: Downstrokes are thick, upstrokes are thin. When you move your pen upwards on the paper, apply very little pressure so you get only a thin line (sometimes called hairlines). It's trickier to get these perfectly straight when you're practicing them in isolation, so don't worry if yours aren't 100% straight (mine weren't!). Remember to keep your pen at 45 degrees. Upstrokes and downstrokes are the meat and potatoes of your calligraphy writing.
-
 Step 10
These letters are formed using c-strokes and circles: a, b, c, d, g, o, p, and q. I usually start my c-strokes and circles at about 2 o'clock on the paper. Check your form: If you're holding your pen the right way the left side of your shape should be thick, while the right, upstroke side of your shape should be thin.
-
 Step 11
Practice loops: These letters are almost always formed using loops: e, f, g, j, l, o (the inside loop), and y. These letters are sometimes formed using loops: b, d, h, k, q, r, s, t. Practice thin and thick loops, upward-facing and downward-facing loops.
-
 Step 12
Continue to practice these strokes until you feel comfortable with them. When you are confident in your basic strokes, put together some of these strokes to form letters. If you need help, check out http://www.destinationdecoration.com/getting-started-with-modern-calligraphy-letter-formation/. Good luck!