


About
Create your own safe plastic that you can make into any shape
-
 Deb E. favorited Gelatine Plastic!
14 Apr 20:12
Deb E. favorited Gelatine Plastic!
14 Apr 20:12
-
rene c. favorited Gelatine Plastic!
30 Nov 07:53
-
 Sarah Sylvia S. favorited Gelatine Plastic!
22 Jul 05:41
Sarah Sylvia S. favorited Gelatine Plastic!
22 Jul 05:41
-
 ToshiaBear favorited Gelatine Plastic!
20 Jul 20:52
ToshiaBear favorited Gelatine Plastic!
20 Jul 20:52
- fay.schouten favorited Gelatine Plastic! 01 Apr 15:35
- iheartigers favorited Gelatine Plastic! 08 Feb 21:22
-
 cristinakilljoyway favorited Gelatine Plastic!
15 Jan 18:58
cristinakilljoyway favorited Gelatine Plastic!
15 Jan 18:58
-
 Rachel P. favorited Gelatine Plastic!
04 Jan 02:26
Rachel P. favorited Gelatine Plastic!
04 Jan 02:26
-
 Juliet J. added Gelatine Plastic! to Crafts and techniques
29 Dec 17:17
Juliet J. added Gelatine Plastic! to Crafts and techniques
29 Dec 17:17
-
 Judy favorited Gelatine Plastic!
09 Dec 04:55
Judy favorited Gelatine Plastic!
09 Dec 04:55
-
 Step 1
Buy a pack of gelatine powder. You can buy sheets but I've never worked with those so best buy powder.
-
 Step 2
Here are the sachets inside. Empty 2 out into a bowl.
Boil some water -
 Step 3
Pour in some water and mix.
I'm not sure how much water to put in exactly but don't follow the instructions on the back of the box.
Pour a little until it's pretty thick, not watery. -
 Step 4
Now let's take some food dye and put one drop into the mixture. Any colour will do.
-
 Step 5
I added one drop of blue and because the mixture was already yellowish, it became aqua!
-
 Step 6
Separate the mixture into shallow plates.
Now you wait for it to set. This might take around 20mins or so.
When it's ready, you'll be able to touch it without bits coming off on your finger. -
 Step 7
Take a small knife and start cutting out shapes!
-
 Step 8
You can print off pictures, cut them out and trace around them if you want.
I traced a guitar pick for this raindrop shape -
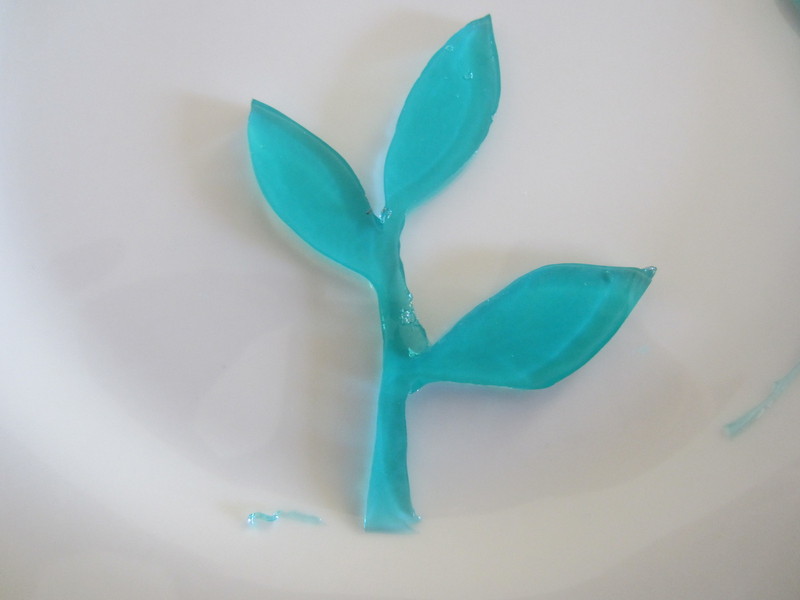
 Step 9
It's like gel, looks almost like glass in this colour
-
 Step 10
Be very careful when taking the shape out.
-
 Step 11
You can either take out the shape very gently or cut around the shape.
If the shape is really delicate and thin, cut around it. -
 Step 12
I cut this out freehand a while ago and used the shape to trace out another one
-
 Step 13
These are all the shapes I cut out...not very much compared to the wasted parts:/
So you can skewer a hole into the top of a shape and when it's hardened, string onto a necklace or bracelet.
-
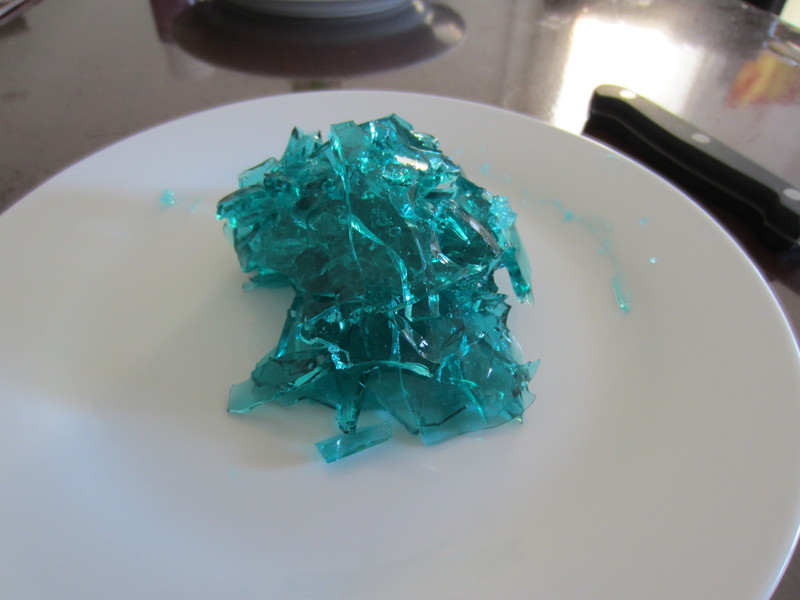
 Step 14
-All the failed broken parts squashed into one ball.
-
Step 15
The shapes will dry out in a while and become thinner, harder and plastic like. This might take a few days


CO + K User
When these are dry they can last i guess until you break them...they don't go mouldy or anything
When it dries it just stays hard. It doesn't go moldy or anything