

About
If you have a box of nails and a skein of yarn, you can make an awesome tree, too!
Wall-sized string art tree.
Tags
-
 Summer favorited Fun Tree String Art
25 Jul 02:10
Summer favorited Fun Tree String Art
25 Jul 02:10
-
 leksee.swenson favorited Fun Tree String Art
25 Feb 02:26
leksee.swenson favorited Fun Tree String Art
25 Feb 02:26
-
 Kimya J. favorited Fun Tree String Art
29 Oct 21:36
Kimya J. favorited Fun Tree String Art
29 Oct 21:36
-
 Crafterella featured Fun Tree String Art
09 Jun 23:00
Crafterella featured Fun Tree String Art
09 Jun 23:00
-
 she's crafty... commented on Fun Tree String Art
06 Jun 14:49
she's crafty... commented on Fun Tree String Art
06 Jun 14:49
-
she's crafty... favorited Fun Tree String Art
06 Jun 14:47
-
 PJJazzyJess published her project Fun Tree String Art
06 Jun 09:55
PJJazzyJess published her project Fun Tree String Art
06 Jun 09:55
-
 Step 1
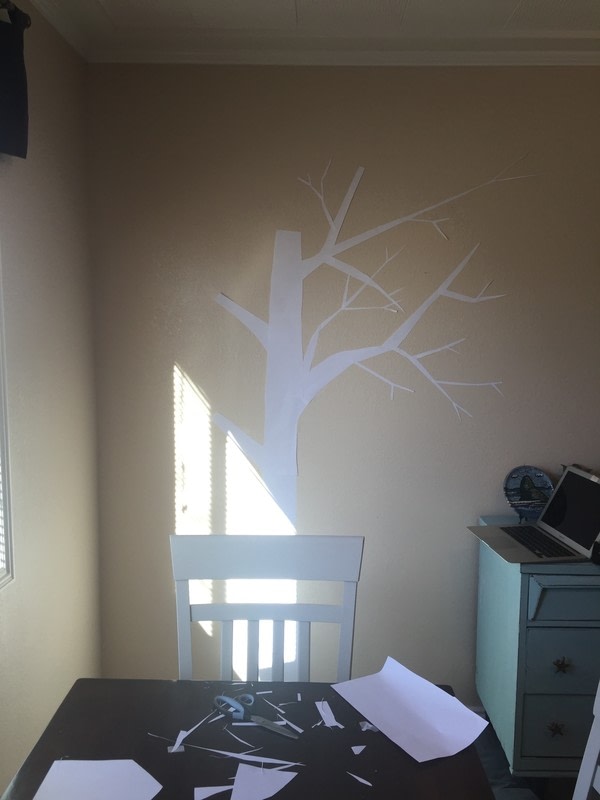
Start by taping paper to the wall to create your shape.
-
 Step 2
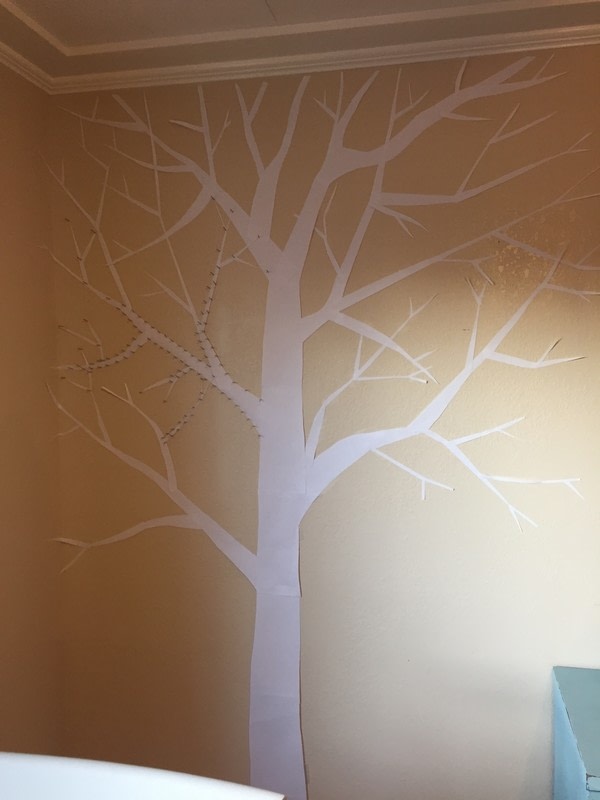
Keep going until you have the shape you want!
-
 Step 3
Now start pounding nails around the edge of the shape. Pound them in enough that they don't wiggle, but not so far that you can't wind the string around them.
-
 Step 4
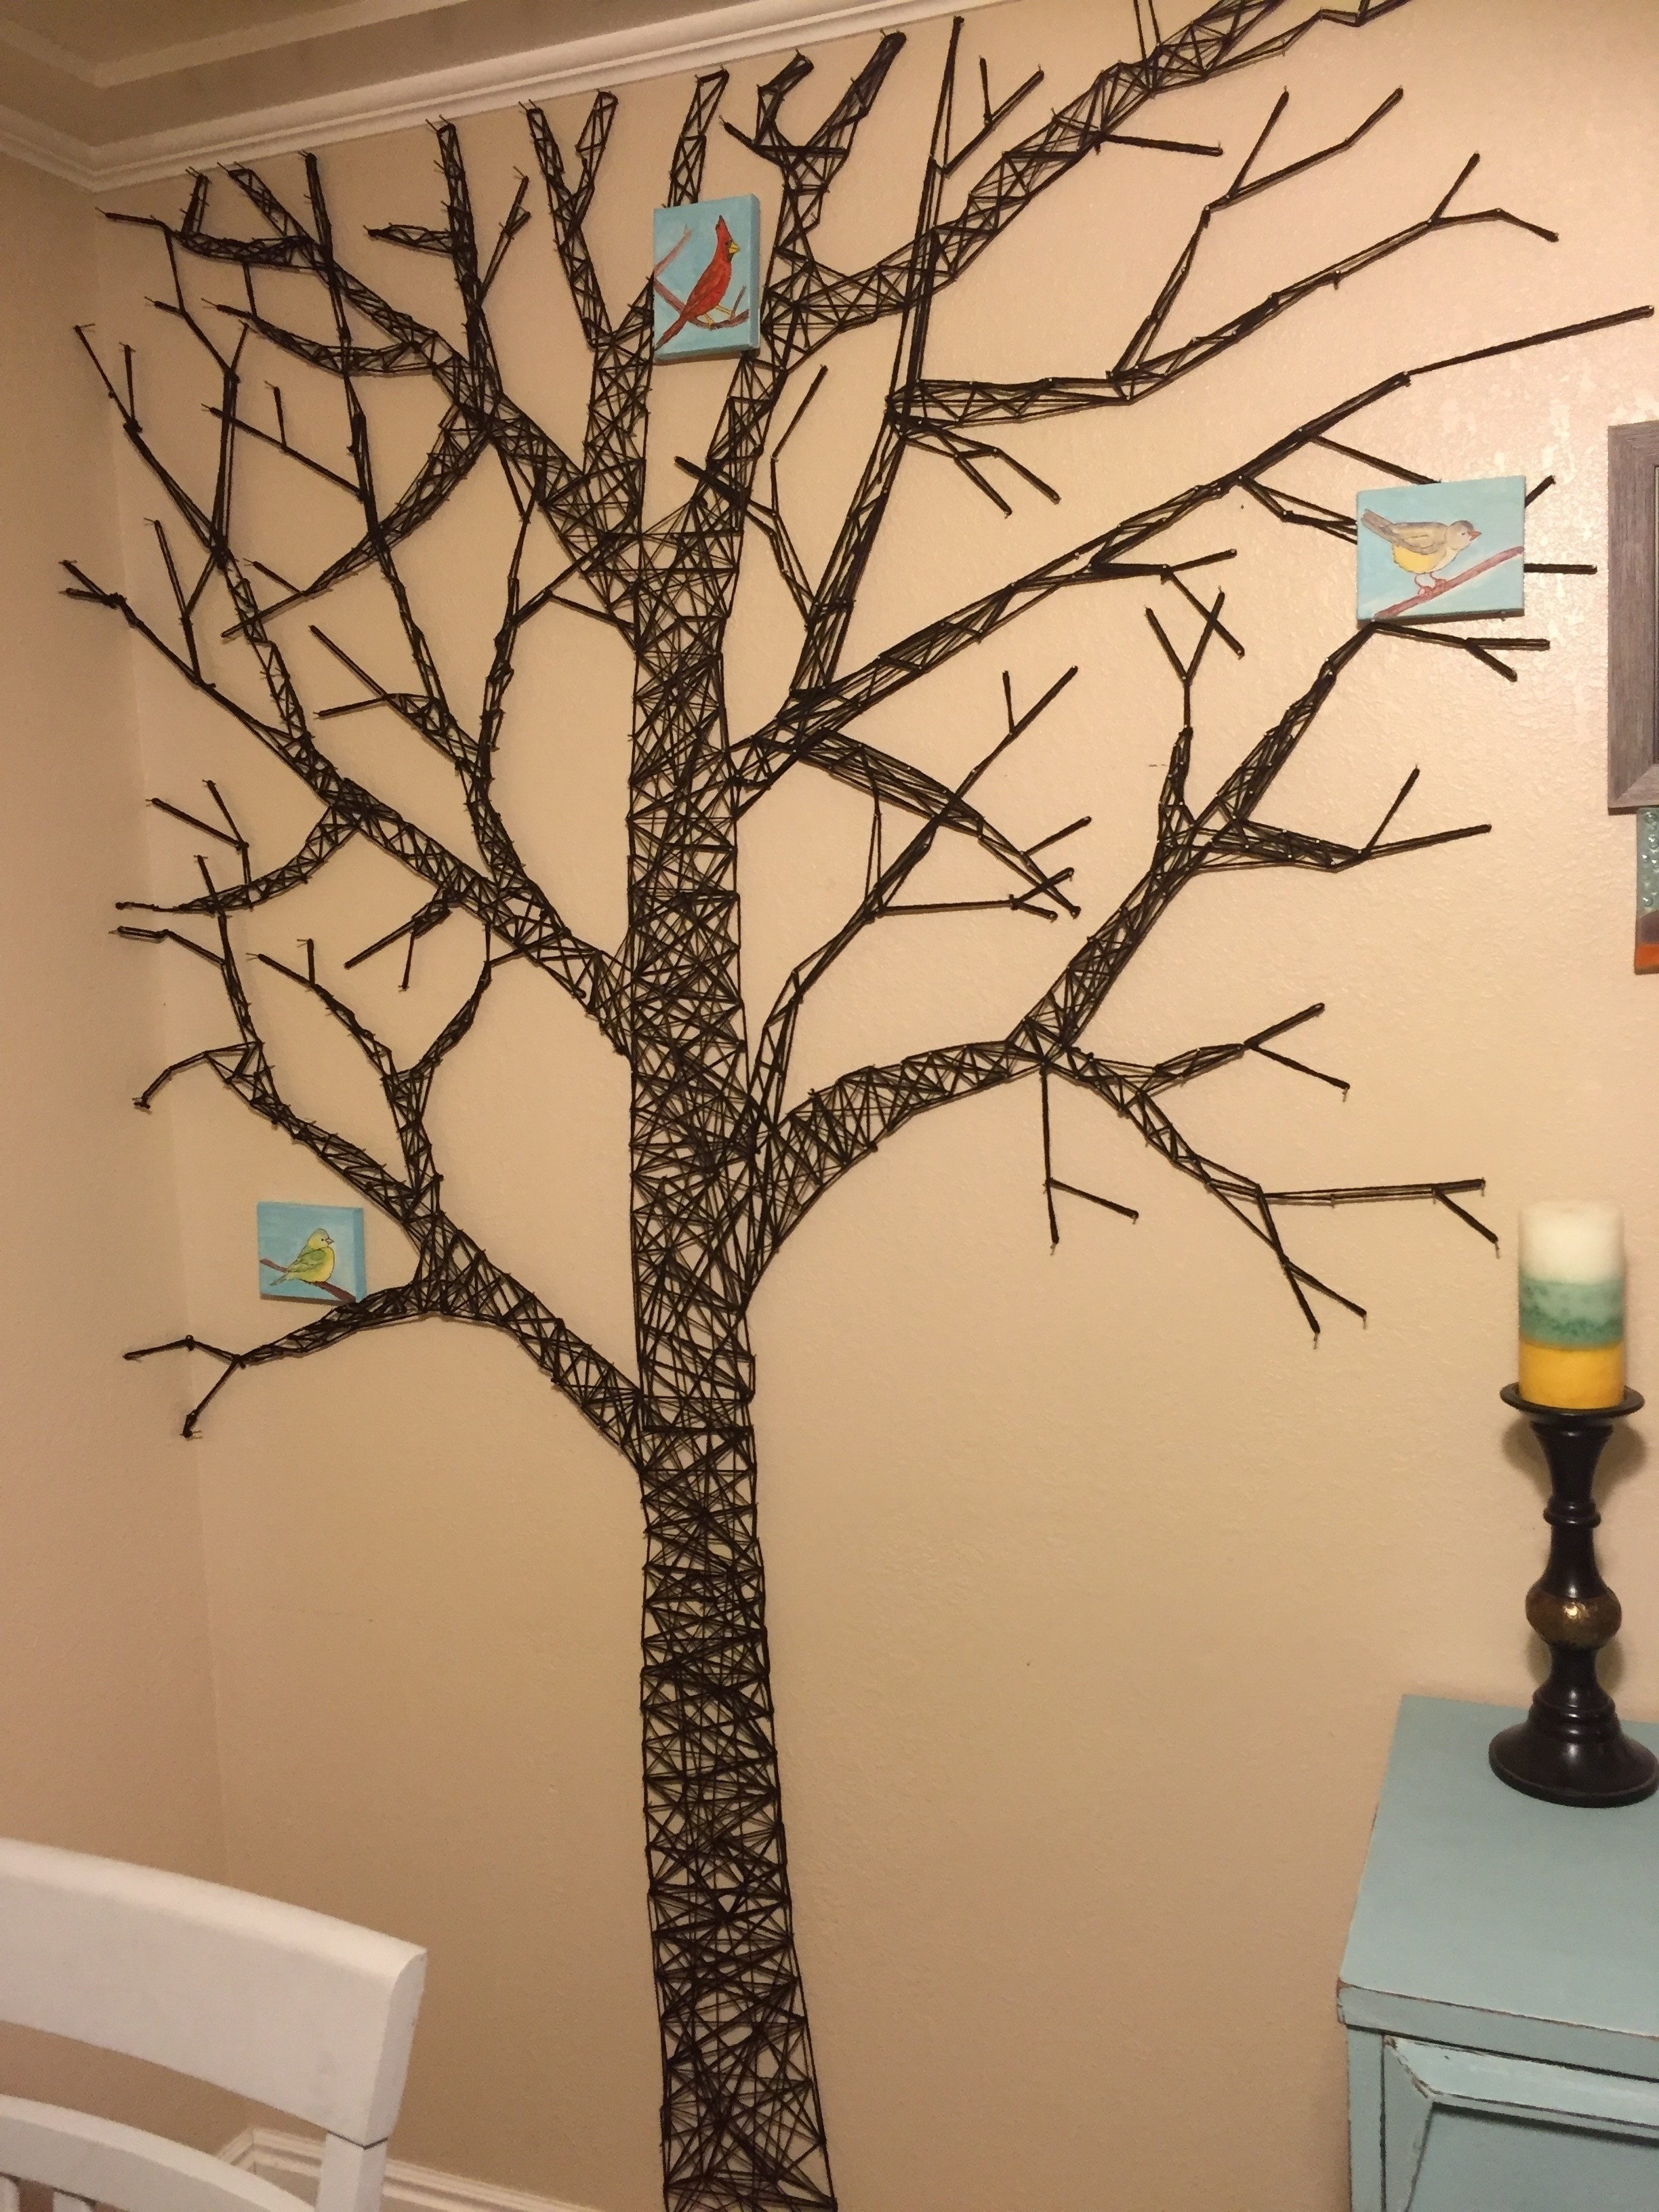
Now, start winding yarn around the nails to create the string patterns. I went in sections, tearing off the paper as I went.
-
 Step 5
On the thicker parts like the trunk, I added some nails in the center to create some more interesting shapes when winding the yarn around the nails.
-
 Step 6
Keep going until you get the desired shape! This is how far I got with one skein of yarn.
-
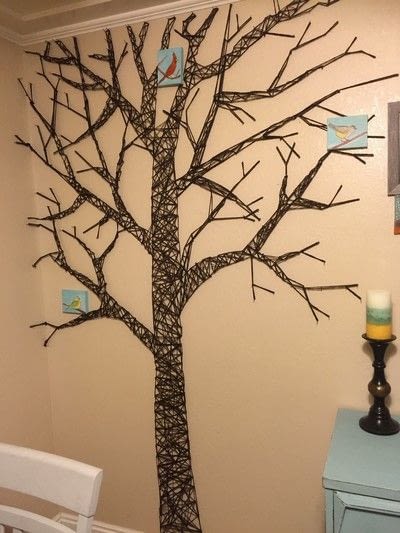 Step 7
I wanted to fill it in a little more, so I got a second skein of yarn. It wasn't the same exact color, but I just added it throughout so it blended in. I liked that the two colors added a little more dimension!
-
 Step 8
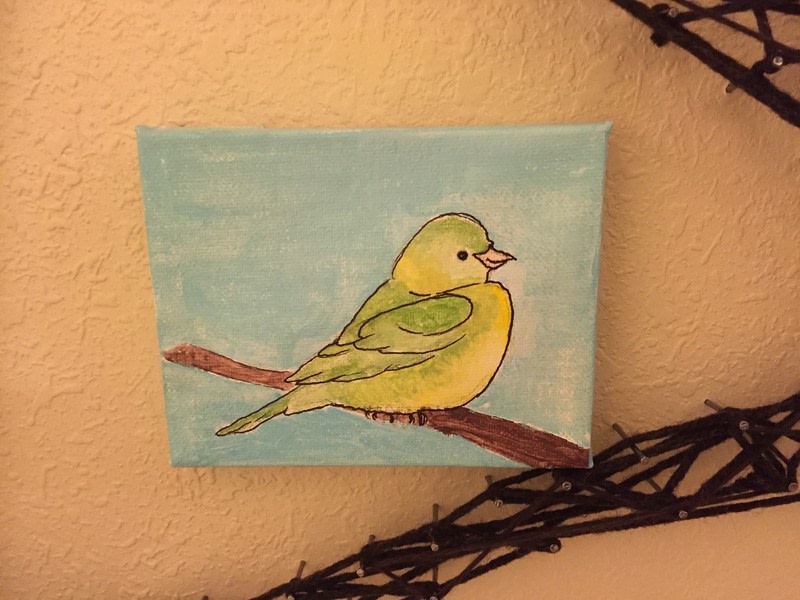
I thought it looked a little plain, so I bought some mini-canvases, and painted some happy little birds!
-
 Step 9
Voilá, you made a tree!