Fishbone Fold
Extract from The Art of the Fold • By Hedi Kyle and Ulla Warchol • Published by Laurence King


About
The Art of the Fold
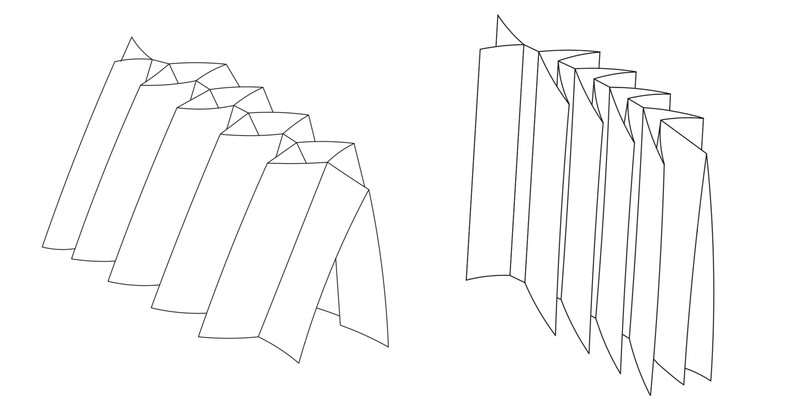
Originally inspired by the seven-section dos-à-dos booklet fold, one can see the evolution of the Fishbone structure. By pushing the limits, extending the cut and non-cut areas and adding more panels, an arrangement resembling a fishbone developed. This structure utilizes a variation of the box pleat. It also shares characteristics with a map fold known as the Falk Fold, patented in 1951 by G.E.A. Falk.
This structure can be used in a flat book format, with the “pages” able to turn in a traditional way. We often stand it up, however, pulling the leading section as a tab. The result is a cascading display of the pages. By gently pushing back on this tab, the pages snap into their original position. The Fishbone’s ability to extend out makes it uniquely suited to displaying content on both sides simultaneously.
FINISHED DIMENSIONS:
61⁄2 x 41⁄8 in. (16.5 x 10.5 cm)
-
 Tammy W. favorited Fishbone Fold
06 Nov 23:14
Tammy W. favorited Fishbone Fold
06 Nov 23:14
-
 holycrow favorited Fishbone Fold
06 Nov 20:39
holycrow favorited Fishbone Fold
06 Nov 20:39
-
 Pam favorited Fishbone Fold
06 Nov 20:12
Pam favorited Fishbone Fold
06 Nov 20:12
-
 Crafterella featured Fishbone Fold
02 Nov 23:01
Crafterella featured Fishbone Fold
02 Nov 23:01
-
 Helen W. favorited Fishbone Fold
26 Oct 17:52
Helen W. favorited Fishbone Fold
26 Oct 17:52
-
 Laurence King published his project Fishbone Fold
26 Oct 09:00
Laurence King published his project Fishbone Fold
26 Oct 09:00
-
 Step 1
The right side of the paper should be facing up. Fold up 1 in. (2.5 cm) on the left side and 2 in. (5 cm) on the right, creating extensions, right and left.
-
 Step 2
Fold the remaining portion into four sections by folding the sheet in half and then in half again. These are all valley folds.
-
 Step 3
Open up. Starting from the right and skipping the first fold, mark 1⁄2 in. (1.5 cm) to the right of each fold, as shown.
-
 Step 4
Using a straight edge, score and crease from mark to mark, creating four new valley folds defining four narrow sections. All folds are valley folds.
-
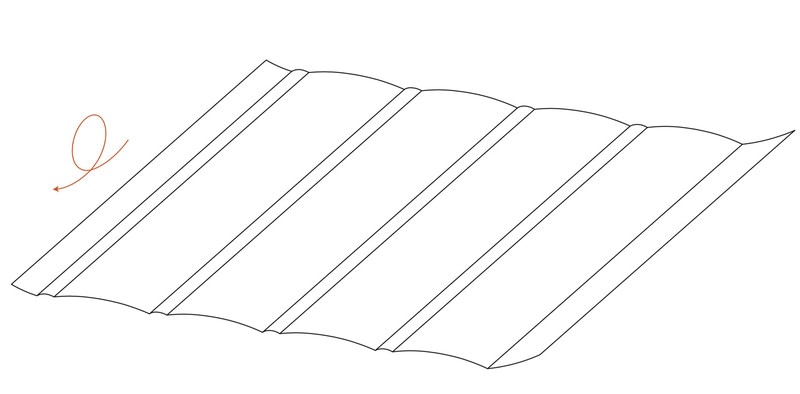
 Step 5
Flip the sheet over toward you so that the valley folds are now mountain folds and the 2-in. (5-cm) extension is still on your right. Fold the sheet in half lengthwise and open up.
-
 Step 6
From the right-hand side, begin pleating by bringing the first mountain fold to the second one.
-
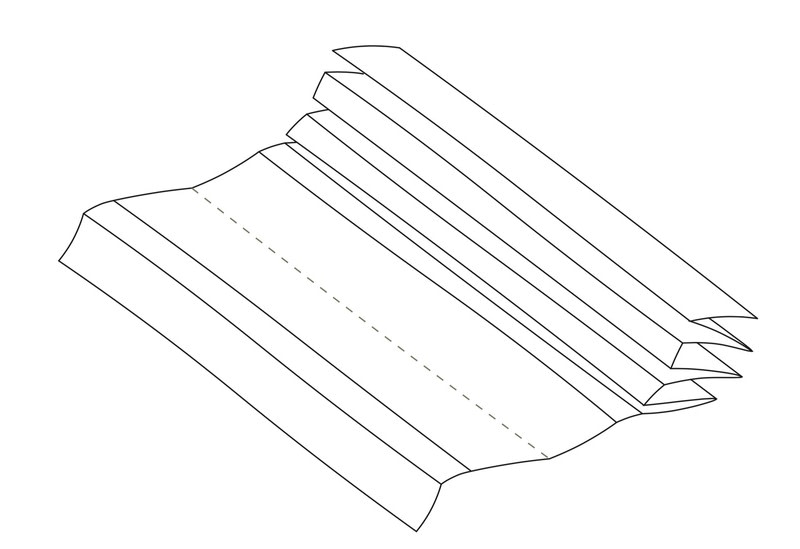
 Step 7
Skipping the 1⁄2-in. (1.5-cm) section, bring the next mountain fold to the next. You are halving the larger sections each time. Continue to pleat until the end of the sequence.
-
 Step 8
Open the paper up and mark the right extension and the four 1⁄2-in. (1.5-cm) sections with an X, as shown. Following the diagram, cut along the horizontal fold between the X-marked sections, being careful not to cut into the X-marked sections themselves.
-
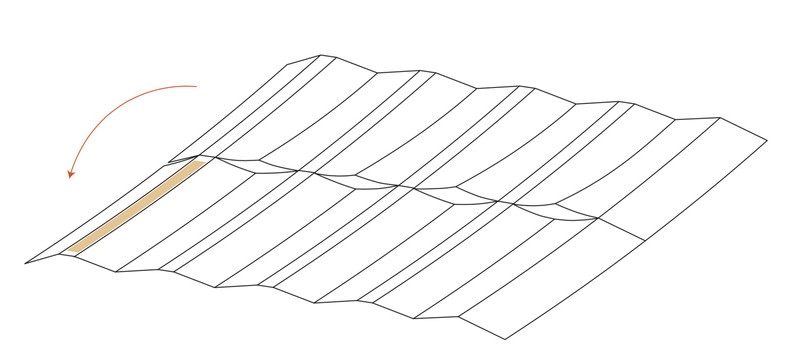
 Step 9
Apply a strip of double-sided tape
to half of the last narrow section, as shown. Bring the top half of the sheet toward you and remove the backing paper from the double-sided tape to adhere the top half to the bottom half. -
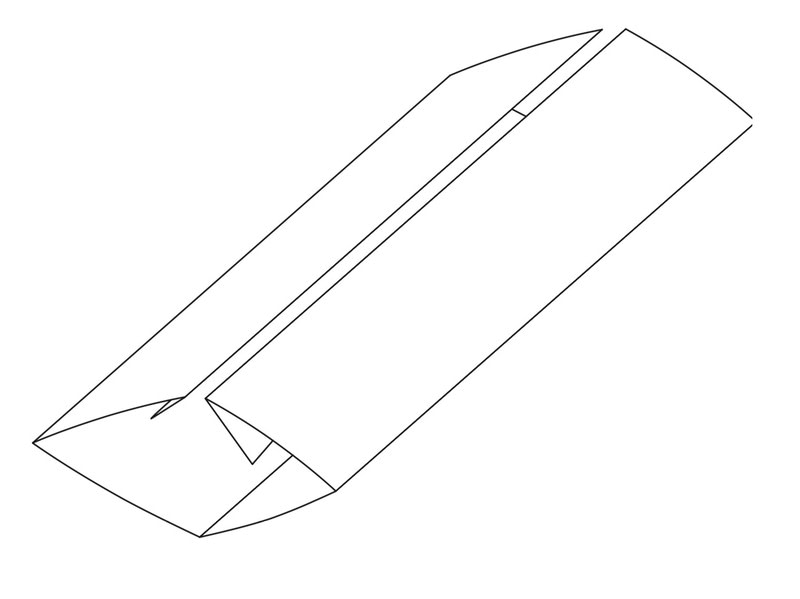
 Step 10
Stand the piece up. Gently pushing in from the right extension, collapse the pages into the fishbone form.