About
Film Baggie DIY
I don't really love the word "baggie" but it was the working title of this project and I couldn't think of anything else to call them. Pouch...pouch would have been good.
Regardless of what this is called, I thought it would be a cute way to carry used and unused film around in your purse. Another idea is to use one side for regular film and the other side for Instax mini film.
-
 MischievousRaven added Film Baggie to Photography
28 Sep 13:08
MischievousRaven added Film Baggie to Photography
28 Sep 13:08
-
 Step 1
Cut a piece of fabric that is 11.5" by 12.5".
-
 Step 2
Fold with right sides together. You are folding the longer (12.5") side so that the top edge measures 11.5".
-
 Step 3
Keeping right sides together, sew down both sides of your fabric.
-
 Step 4
Use pinking shears to cut the raw edges of the seams you just sewed.
-
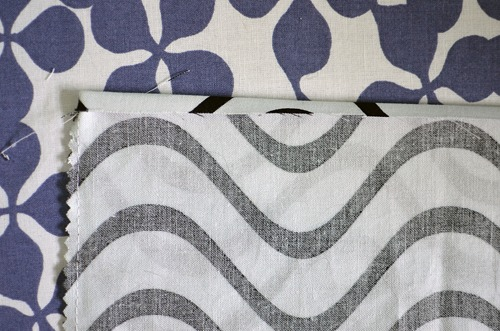
 Step 5
Keeping your pouch inside out, turn down a small hem and iron. It doesn't need to be exact, but around 0.25" is good.
-
 Step 6
Turn down another, larger hem (around 0.75" is what I did) and iron. This tucks in your raw edge and hides it from view.
-
 Step 7
Sew along the bottom edge of your hem. This creates a little tunnel at the top of your pouch that we will put a drawstring through later.
-
 Step 8
Turn your pouch right side out. Take a moment to pat yourself on the back for making it this far.
-
 Step 9
Next you are going to sew a line down the centre of your pouch starting at the line of stitching across the top. Meaning that above the stitch line will not be attached together while the bottom of your pouch will be divided into two sections.
-
 Step 10
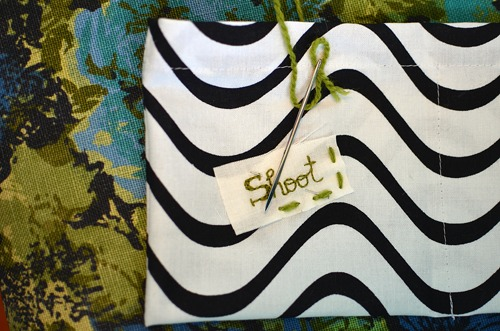
Get out your embroidery thread and embroider yourself some labels that say "shoot" and "develop" or "instax" and "35mm" or whatever the heck you would like them to say. I embroidered my labels onto different pieces of fabric that I will sew on in the next step. Place your labels where you would like them to go and pin them down.
-
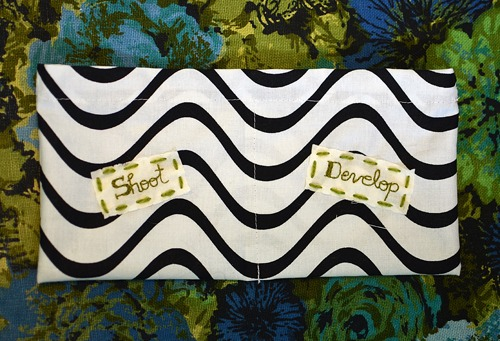
 Step 11
Stitch your labels on!
-
 Step 12
I used a thin yarn and a yarn needle but you could also use embroidery thread and a regular needle.
-
 Step 13
Next we are going to add a drawstring. I used yarn threaded on a yarn needle again but you could use ribbon and put little slices in your fabric to feed it through. Insert the needle a little off from the centre front of your pouch. Carefully feed your needle through your tunnel and out the other side.
-
 Step 14
Tie little knots in your yarn right beside the holes so that your drawstring doesn't disappear into the tunnel.
-
 Step 15
You are all done! Put some film in your pouch and I will show you how to tie it up compactly.
-
 Step 16
Pull your drawstring and tie a knot. Then fold your pouch in half along the centre stitch line. Now you can wrap your drawstring around the top of the pouch and tie a bow.
I hope you found this idea handy! Let me know if you make one for yourself. I actually made this one as a gift so I will be making another one for myself soon!