![Felt Pumpkin project designed by Andrea Sousa . Free tutorial with pictures on how to make a pumpkin plushie in under 60 minutes by felting with felting needle, wool roving, and wool roving. Inspired by halloween, pumpkins, and food. How To posted by Alison M. [Ornamentea.com]. Difficulty: 3/5. Cost: Cheap. Steps: 11](https://images.coplusk.net/project_images/45095/image/Screen_shot_2010-02-18_at_20.56.54_1266526741.jpg)

About
Felt Pumpkin project designed by Andrea Sousa
Note: Do not use scissors to remove roving from the bundle. Tear sections of roving as a cut edge will be hard to blend or smooth.
Tags
-
 Neko-San K. favorited Felt Pumpkin
31 May 21:02
Neko-San K. favorited Felt Pumpkin
31 May 21:02
-
 amanda.shillito favorited Felt Pumpkin
26 Jan 18:58
amanda.shillito favorited Felt Pumpkin
26 Jan 18:58
-
 Chudames favorited Felt Pumpkin
13 May 05:53
Chudames favorited Felt Pumpkin
13 May 05:53
- Lilian E. added Felt Pumpkin to crafts 08 Dec 16:58
- Lilian E. added Felt Pumpkin to crafts 08 Dec 16:58
You Will Need
-
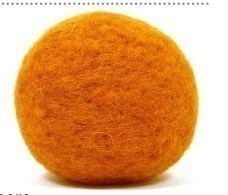
 Step 1
Use your hands to pull six feet of orange roving off the bundle. Separate roving into two 3 foot pieces. Roll one strip tightly to form a barrel shape approximately 2.5 inches by 2.5 inches. Place this barrel on top of the foam block and use a single felting needle to secure the tail end of the roving with quick, short pokes. This should only take about twenty to thirty pokes.
-
Step 2
Separate the remaining three foot strip of roving into two pieces. Wrap one piece around the barrel shape, perpendicular to the previous wrap. Working on top of the foam block, use your needle secure to the end. Poke any flap edges that hang over the side in, but do not belabor your poking at this point. Now you will have a shape that resembles a square.
-
Step 3
With the remaining strip of roving wrap around your piece perpendicular to the last strip. You roving strips will be crossing each other. Secure the end as in #1. Your piece should be much more of a spherical shape.
-
Step 4
Place your roving sphere on the foam and use the single needle to shape the sphere with short pokes. Do not concentrate too much on one spot. Be mindful of creating a round shape as you go. Continue to poke for a few minutes until there is an overall tightness but the pumpkin shape is still squishy with some give.
-
 Step 5
Determine the top of your pumpkin. With the single needle create an indention in the pumpkin by poking in a thin line from the top to the bottom radiating out from the center of the pumpkin as shown. To create a uniform look, make 2 lines from top to bottom to halve the pumpkin. Add two more lines to divide the pumpkin into four quadrants. Divide each quadrant to create 8 sections on the finished pumpkin. Set pumpkin aside.
-
Step 6
To create leaves pull a six-inch strip of each color of green roving. Lay one strip over the other and then pull on each end apart. Layer the two pieces of roving again and repeat to create a blended green. Blend the two colors together by layering both colors and pulling from each side. Repeat until the colors are thoroughly blended.
-
Step 7
Divide the blended roving into two equal tufts. Use your fingers form a leaf shape with one tuft by folding the edges underneath. Do not cut the shape out or you will have a rough edge to the leaf. Place your leaf shape on the Clover Felting Mat. Unlock your Clover Five Needle Felting Tool by twisting the end as directed. Use the Felting Tool to tighten up the wool in the leaf shape with short pokes. This will felt the wool. When it begins to become a tight piece, pull the leaf gently up and turn over to felt the other side. When leaf is fully felted use your single needle to create an indentation down the center of the leaf similar to the lines on the pumpkin.
Repeat with remaining green tuft to create a second leaf. Set leaves aside. -
 Step 8
To create stem pull a 2-inch strip of each color of green roving. Blend together as you did the leaf roving. Create a tuft that is about 1 inch by 2 inches and roll it tight to create a 1 inch long cylindrical stem shape. With a single needle poke in the end of the roving just as you did with the pumpkin body. Create the stem end on one end of the cylinder with short jabs of the single needle. Leave the other end of the cylinder fluffy. Tighten the whole stem up just a little bit by rolling it over the foam block and poking with a single needle. Set stem aside.
-
Step 9
To create vine pull a 2-inch strip of each color of green roving and blend together. Using your palms roll the blended roving into a rope as you would make a coil of clay. To speed up the felting process blow into your cupped palms. When the rope is sufficiently tight set aside.
The vine- Take just a little bit of fluff off of your two green rolls of roving. Using your palms, rub the pieces into a long cylindrical shape, just as you would make a coil out of clay. You may need to blow some nice hot air into your palms in order to speed the felting process up. -
 Step 10
Place the fluffy end of the stem in the center of the top of the pumpkin. Use your single needle to attach stem to pumpkin with deep pokes all around the base of the stem. As you poke move the needle in towards the center of the stem to firmly attach the stem.
-
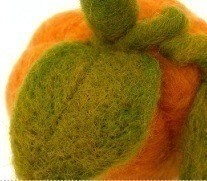
 Step 11
Place one leaf at the base of the stem and use the single needle to attach the leaf base to the pumpkin as you attached the stem. Repeat to attach the vine. Coil the vine and attach the remaining leaf to the end of the vine using deep pokes. Check to see that all leaves and stems are firmly attached to the pumpkin and use the needle to secure any loose parts.