


About
For those who enjoy curiosity cabinet, insect specimen, shadowboxes and more
This tutorial will consist of a simple and easy way to create a beautiful pendant. The ending image will give you an idea of how the pendant would look completed with resin epoxy. My tutorial on resin is located in a separate project.
-
 Key West Witch added Faux Insect Curiosity Pendant Tutorial to Jewelry
30 Jun 01:44
Key West Witch added Faux Insect Curiosity Pendant Tutorial to Jewelry
30 Jun 01:44
-
 Barbara M. added Faux Insect Curiosity Pendant Tutorial to projects I likes...
27 Mar 20:42
Barbara M. added Faux Insect Curiosity Pendant Tutorial to projects I likes...
27 Mar 20:42
-
Barbara M. favorited Faux Insect Curiosity Pendant Tutorial
27 Mar 20:42
-
 Sarah Snowflake favorited Faux Insect Curiosity Pendant Tutorial
14 Sep 06:10
Sarah Snowflake favorited Faux Insect Curiosity Pendant Tutorial
14 Sep 06:10
-
 Michaela F. favorited Faux Insect Curiosity Pendant Tutorial
02 Sep 11:25
Michaela F. favorited Faux Insect Curiosity Pendant Tutorial
02 Sep 11:25
-
 Evridika K. added Faux Insect Curiosity Pendant Tutorial to Jewelry
20 Apr 22:55
Evridika K. added Faux Insect Curiosity Pendant Tutorial to Jewelry
20 Apr 22:55
-
kiki w. added Faux Insect Curiosity Pendant Tutorial to Craft 2 sell
29 Jan 07:17
-
 SpiritPal added Faux Insect Curiosity Pendant Tutorial to Project ideas
02 Apr 04:24
SpiritPal added Faux Insect Curiosity Pendant Tutorial to Project ideas
02 Apr 04:24
-
 Val t. favorited Faux Insect Curiosity Pendant Tutorial
03 Jan 03:31
Val t. favorited Faux Insect Curiosity Pendant Tutorial
03 Jan 03:31
-
Jenna C. added Faux Insect Curiosity Pendant Tutorial to To Sell
11 Dec 18:13
You Will Need
-
 Step 1
Step one involves getting your supplies ready.
You will need a jewelry setting. You will need a background (if plausible) and you will need insect images. I will talk you through how to do and acquire these.
----
For a background scrapbook paper is the best. They are beautifully decorated and easy to cut.
you could trace graphite around the edge of your pendant and RUB it to the blank side of the scrapbook paper -
Step 2
For a background scrapbook paper is the best. They are beautifully decorated and easy to cut.
TO SIZE YOUR BACKGROUND TO YOUR PENDANT you could trace graphite around the edge of your pendant and RUB it to the blank side of the scrapbook paper. Then cut (use an XACTO or scissors) inside that transferred circle, oval, square- whatever you used.You could mod podge a guesstimation and then press the paper inside the pendant. OR you could be fancy and measure it accordingly. I do the transfer way because it is pristine.
-
Step 3
The next step would be MOD PODGE your BACKGROUND inside the PENDANT. Then you will need to place MOD PODGE on top of your background to seal it. (especially if you want to use resin)
-
 Step 4
FIND IMAGES OF YOUR INSECTS
There are an abundance of copyright-free vintage illustrations on the internet. These are free printables available to you. You can do this just by searching google images specifically for VINTAGE INSECT, VINTAGE MOTH, VINTAGE BUTTERFLY, etc.
Measure your pendant. Mine was 1.5 inches across. Therefore I had to print my moth at an approximate .5 icnhes to fit inside the pendant comfortably.
Cut with xacto knife or scissors
-
 Step 5
To get your insect to RAISE from the background and give it that "free-floating captured specimen look" use a slightly thick cardstock, paper, mountain dew cardboard paper, etc.
Just something to give it a slight foreground appeal. AND MAKE SURE IT IS CUT SMALL ENOUGH to not be seen.
-
 Step 6
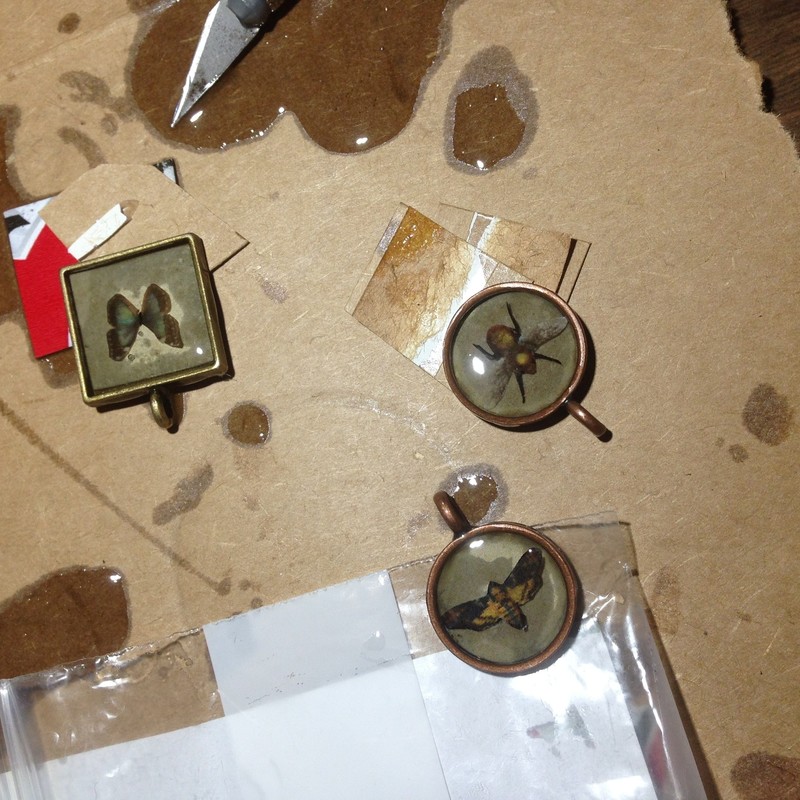
This is what you will have with the background and foreground insect in place
-
 Step 7
Pretty cool am I right?
-
 Step 8
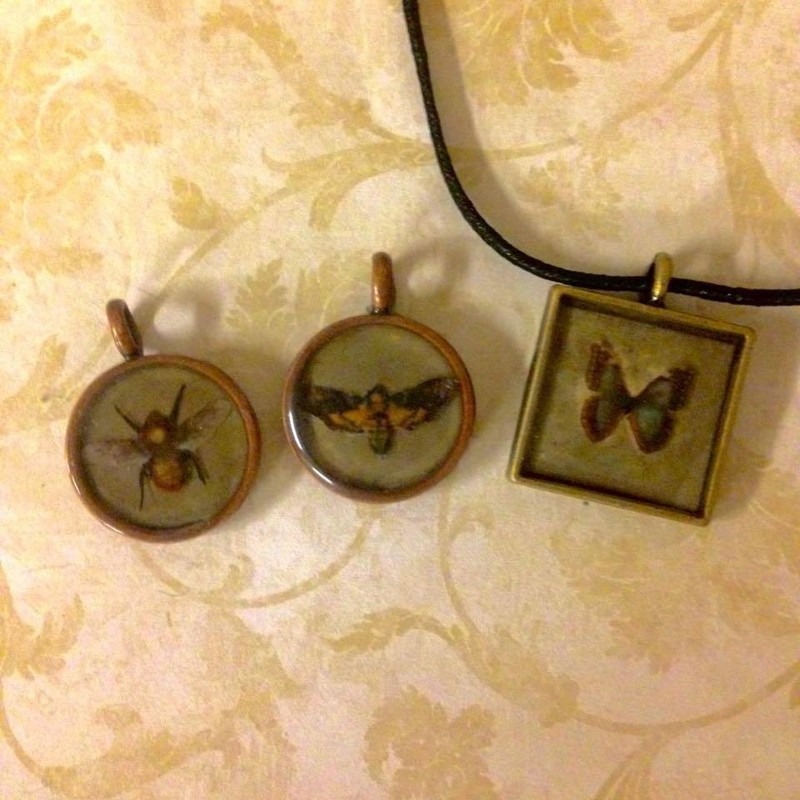
I also sealed my pieces into resin epoxy for a final touch. If are interested in going a step further, this material is extremely easy to use and will give your pieces an eternal seal on top of the faux presence of glass.
-
 Step 9
Ta-da!


But I have a question- looks like the settings don't have a glass layer- so you're just pouring the resin on top of the cut out insect?
But I have a question- looks like the settings don't have a glass layer- so you're just pouring the resin on top of the cut out insect?
But I have a question- looks like the settings don't have a glass layer- so you're just pouring the resin on top of the cut out insect?
But I have a question- looks like the settings don't have a glass layer- so you're just pouring the resin on top of the cut out insect?
But I have a question- looks like the settings don't have a glass layer- so you're just pouring the resin on top of the cut out insect?