Envelope Belt Purse And Necklace
Extract from 100 Micro Crochet Motifs • By Glaves, Steffi • Published by David & Charles


About
100 Micro Crochet Motifs
This project is perfect for keeping special things close to you. Whether
you’re storing money or keepsake notes, this envelope can be scaled up and down depending on the thread and hook used.Finished size
20mm x 23mm (3/4in x 7/8in)
Belt Purse
Finished size
90mm x 90mm (31/2in x 31/2in)
Adapt your purse with straps and handles or extra charms so that it’s just as special as the special object inside it.
Necklace
Finished size
20mm x 23mm (3/4in x 7/8in)
-
 brenfrow01 favorited Envelope Belt Purse And Necklace
09 Jul 07:42
brenfrow01 favorited Envelope Belt Purse And Necklace
09 Jul 07:42
-
 Key West Witch favorited Envelope Belt Purse And Necklace
26 Jun 22:02
Key West Witch favorited Envelope Belt Purse And Necklace
26 Jun 22:02
-
 Carla B. favorited Envelope Belt Purse And Necklace
24 Jun 01:10
Carla B. favorited Envelope Belt Purse And Necklace
24 Jun 01:10
-
 Juana S. favorited Envelope Belt Purse And Necklace
19 Jun 13:34
Juana S. favorited Envelope Belt Purse And Necklace
19 Jun 13:34
-
 Ms Dorito added Envelope Belt Purse And Necklace to sew craft
12 Jun 18:10
Ms Dorito added Envelope Belt Purse And Necklace to sew craft
12 Jun 18:10
-
 Glenda W. favorited Envelope Belt Purse And Necklace
06 Jun 23:34
Glenda W. favorited Envelope Belt Purse And Necklace
06 Jun 23:34
-
 satilanna favorited Envelope Belt Purse And Necklace
15 May 18:40
satilanna favorited Envelope Belt Purse And Necklace
15 May 18:40
-
 Crafterella featured Envelope Belt Purse And Necklace
06 May 23:00
Crafterella featured Envelope Belt Purse And Necklace
06 May 23:00
-
 Delicate Stitches favorited Envelope Belt Purse And Necklace
05 May 13:36
Delicate Stitches favorited Envelope Belt Purse And Necklace
05 May 13:36
-
 C.J. M. added Envelope Belt Purse And Necklace to Crochet
05 May 11:07
C.J. M. added Envelope Belt Purse And Necklace to Crochet
05 May 11:07
You Will Need
-
 Step 1
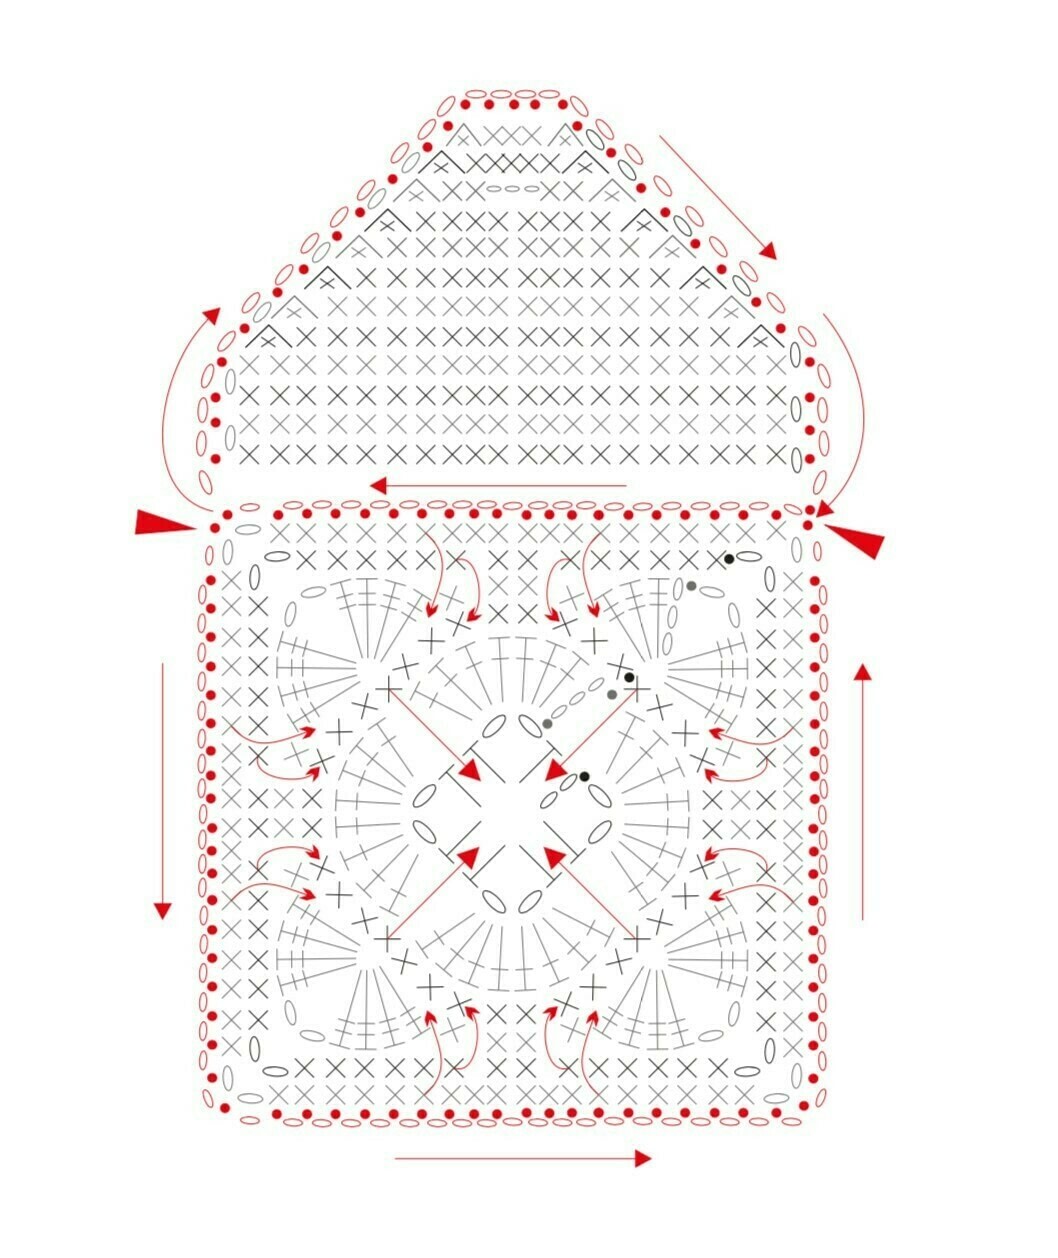
Front Panel
Follow instructions for the Floral Envelope Square.
Back Panel
Repeat rounds 1 to 6 as for front panel. You will now be working in rows.
Row 7 (RS): 1ch, 1dc in next 19 sts, 1dc in 2ch corner sp (20 sts).
Rows 8 to 10: Turn work, 1ch, 1dc in each st.
If you want the bag flap to be extra long add 2 to 4 more rows here.
Row 11: Turn work, 1ch, dc2tog, 1dc in next 16 sts, dc2tog (18 sts).
Rows 12 to 15:Turnwork,1ch, dc2tog, 1dc in each st to last 2 sts, dc2tog (10 sts).
Row 16:(Buttonhole)Turnwork,1ch, dc2tog, 1dc in next 2 sts, 3ch, skip 2 sts, 1dc in next 2 sts, dc2tog (9 sts).
Check at this point that your chosen bead or button will go through the hole, if the buttonhole is too small then increase the number of ch sts in the buttonhole.
Row 17: 1ch, dc2tog, 1dc in next st, 3dc in buttonhole ch sp, 1dc in next st, dc2tog (7 sts).
Row 18:Turnwork,1ch,dc2tog,1dc
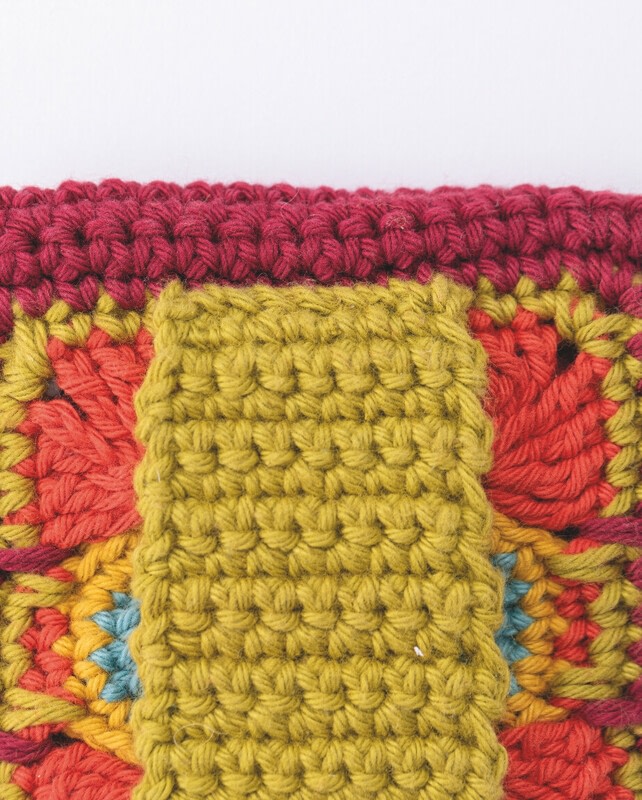
back panel
joining panels
61
in next 3 sts, dc2tog (5 sts), fasten off,
front panel
weave in end and trim (1). -
 Step 2
Joining Panels
This step involves using slip stitches to join the two sides together. Alternative methods can be used such as blanket stitch or whip stitch.
Lay the back panel wrong side up. Lay the front panel on top of the back panel, right side up, and line up the corner ch sps.
Working through both front and back panels together, ss in top
left corner ch sp, *(1ch, 1ss) in each pair of sts down one side of the bag to join together (2) -
 Step 3
, (1ch, ss, 1ch, ss) in corner ch sp, rep from * for next 2 sides and 1 corner (3).
-
Step 4
In the last top right corner, work (1ch, ss) through both panels, 1ch, ss through front panel only.
Working through front panel sts only, work (ss, 1ch) in each st across top of panel, ss in top left corner ch sp again.
Turn work to continue with the flap, (1ch, ss) in each row end up first
side of flap, (1ch, ss) in each st along top, (1ch, ss) in each row end down second side of flap, 1ch, ss in top right corner of bag to finish. Sew button to top panel checking the buttonhole placement before sewing. -
 Step 5
Belt strap (optional)
Row 1: 9ch, leave a long length of yarn for sewing later – to make the bag strap wider, add more ch sts.
Row 2: 1dc in second ch from hook, 1dc in each remaining ch (8 dc).
Rows 3 to 17: turn work, 1ch, 1dc in each st.
Fasten off at end of row 17. Use yarn at top and bottom of strap to sew onto back of bag (4). -
Step 6
Shoulder strap (optional)
Ss through both panels in top right corner ch sp, (3ch, 1tr) in same sp (makes small loop), 3ch, 1tr into loop sp,
cont until desired length is reached, ss
in top left corner ch sp. Trim and sew in ends to finish. -
 Step 7
Adding Findings for necklace
Use a crochet hook to prise 2 holes in the centre of row 7 of the back panel so a jump ring can be threaded through. Attach another jump ring before closing with pliers (5).