


About
emilie autumn sculpture violin pink red white super sculpey heart
Sculpture I made for a school assignment :)
EA with her old hair~<3
I made Sir Edward(her rat) and a little top hat as well but apparently someone knocked her over while I was getting my camera, causing them to fall off. I didn't notice at first so they aren't included in this picture.
I made a lot of photo's during the process, shall I make a how-to? :D
-
 Ruby Autumn favorited Emilie Autumn Sculpture
06 Dec 23:22
Ruby Autumn favorited Emilie Autumn Sculpture
06 Dec 23:22
-
 Miss_Fit favorited Emilie Autumn Sculpture
08 Jul 21:38
Miss_Fit favorited Emilie Autumn Sculpture
08 Jul 21:38
-
 fallonc favorited Emilie Autumn Sculpture
16 Feb 02:06
fallonc favorited Emilie Autumn Sculpture
16 Feb 02:06
-
 sweet92590 favorited Emilie Autumn Sculpture
31 Dec 22:32
sweet92590 favorited Emilie Autumn Sculpture
31 Dec 22:32
-
 Charlotte H. favorited Emilie Autumn Sculpture
14 Dec 02:55
Charlotte H. favorited Emilie Autumn Sculpture
14 Dec 02:55
-
Emily D. favorited Emilie Autumn Sculpture
18 Nov 18:25
-
 Azraels Requiem commented on Emilie Autumn Sculpture
27 Sep 16:56
Azraels Requiem commented on Emilie Autumn Sculpture
27 Sep 16:56
-
Azraels Requiem favorited Emilie Autumn Sculpture
27 Sep 16:55
-
 Juliet J. commented on Emilie Autumn Sculpture
13 Sep 12:06
Juliet J. commented on Emilie Autumn Sculpture
13 Sep 12:06
-
 Cooki favorited Emilie Autumn Sculpture
02 Aug 06:39
Cooki favorited Emilie Autumn Sculpture
02 Aug 06:39
-
 Step 1
The first thing you want to do when making a clay sculpture, like my Emilie, is to make a solid armature. I used a solid wire for the basic shape. The parts that are going to be the thickest always need some extra filling, tin foil is perfect for that.
As you can see I already made a start with the violin, but you can do that any time you want.
I haven't baked anything yet -
 Step 2
now here is the result of my first bake. I made a rough definition of the torso with Super Sculpey, the head and the arms were going to be added later. I did do some more detail on her back.
I didn't bake following the instructions of the box, but I baked her shorter at a lower temperature. (110 degrees Celsius if I remember correctly, for about a quarter or twenty minutes)
Now what I did do wrong the entire time was to put the sculpture in a preheated oven and to take her out right when the time was over. It caused so called moonies to appear all over the surface. -
 Step 3
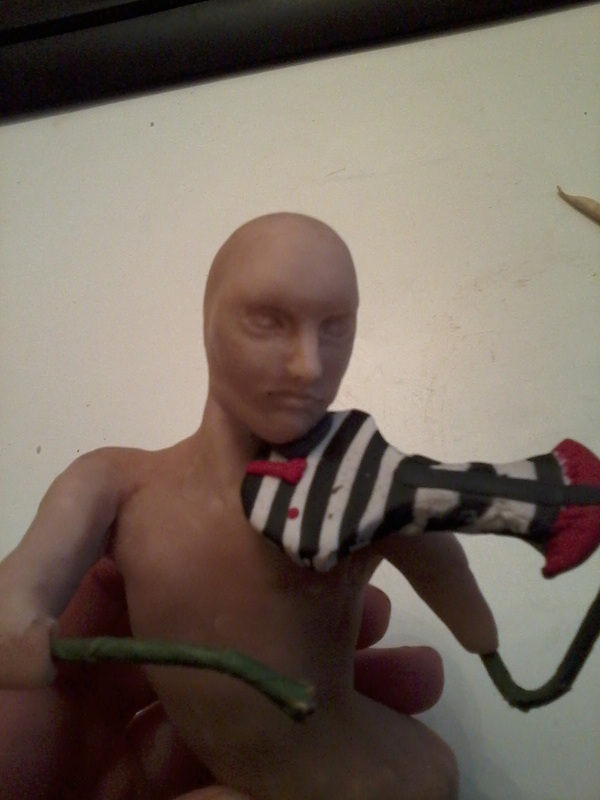
The next bake was after I finished her face. As you can see right here I finished the violin. I baked it with the first bake I believe, but I'm not sure since it was some time ago I made this.
Defining the face involves a lot of reference pictures and just editing until you're satisfied. I also put the violin there to make sure the thing would fit in perfectly.
I decided to bake before going to the next step because the chance of unintentionally deforming the head would be high when I started on the arms. -
 Step 4
This bake was to secure her boobs, ears and arms. I tried as best as possible to keep in mind how the muscles would lay to make it more realistic.
the reason I didn't do the hands yet was the same in step 3. I might have screwed the arms up while working on her fingers. -
 Step 5
When the body was finished I started on her hair. For this part I did not use Sculpey, but Fimo clay.
I put some pinkish red on her head and carved the shape of hair strands in it. The piggy tails were placed after that, just like the little hat. -
 Step 6
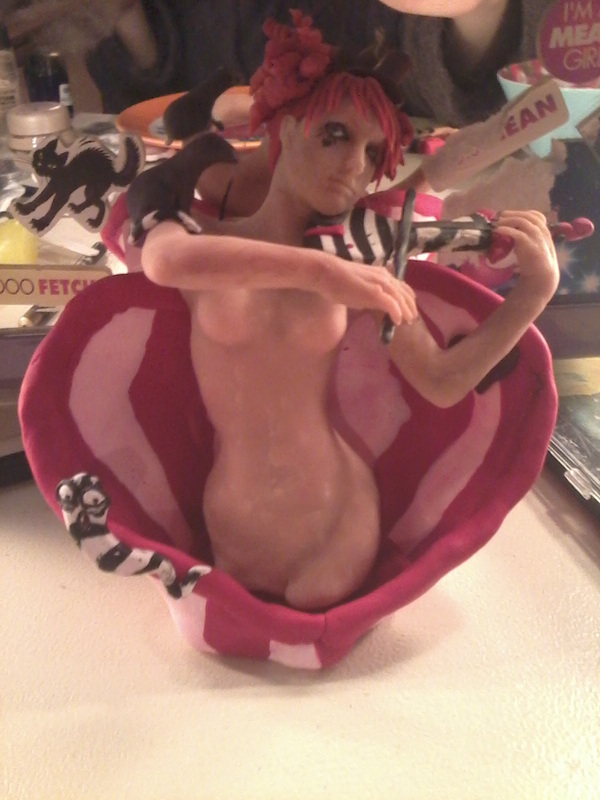
Here is everything I did in clay.
This was before I started moving her around to all places so this is the most complete picture I have :')
She lost some locks, the rat lost it's tail, the violin stick got lost and the hat fell off countless times.My advice is to keep the sculpture at home or wherever you are working so you do less damage to it.
-
 Step 7
The last part was fun to do. It's hard to explain what I did, I just went crazy with fabric, glitter, feathers and nailpolish.


Comments


