About
Give your embroidery project a beautiful and elegant finish.
Looking for a classy way to display your embroidery art? Try stretching it on a canvas frame. Featuring your embroidery project on stretched canvas gives it a lovely finish, and it’s much easier (and faster) to do than you might expect.
-
 Beth C. published her project Embroidery On Stretched Canvas
01 Sep 09:00
Beth C. published her project Embroidery On Stretched Canvas
01 Sep 09:00
-
 Step 1
To prep my fabric for framing, I first pressed it well to remove any wrinkles. Should your fabric need ironing, turn it over so that you are ironing the reverse of the fabric, avoiding the stitches as much as possible.
-
 Step 2
The stretched canvas I chose was 3/4-inch thick so I left about 2-½ inches of fabric beyond the edge of my stretcher bars on each of the four sides. Once you’ve measured everything, lay your embroidery project face down on your work table and put your canvas face down on top of it.
-
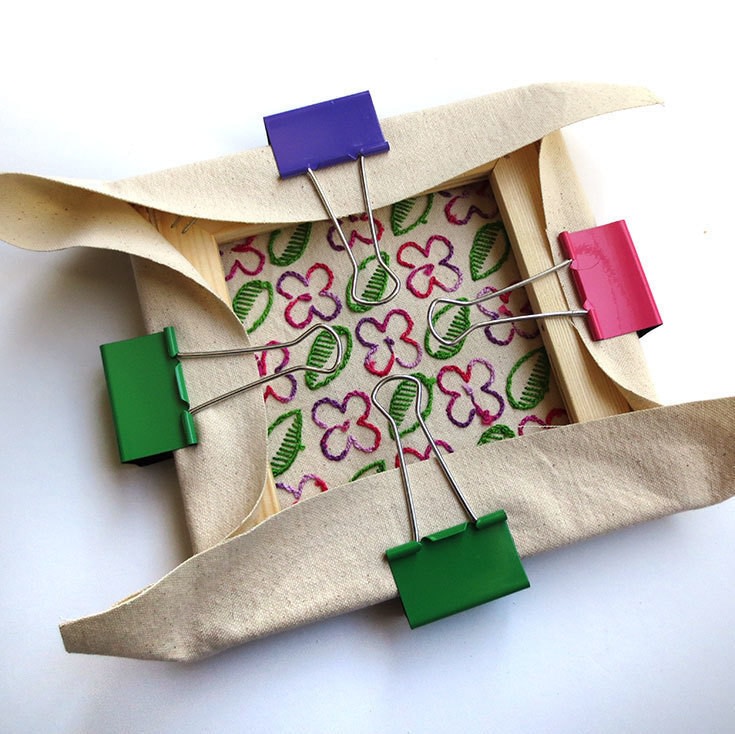
 Step 3
Next grab one of your binder clips, and wrapping one edge of the fabric around your canvas frame, clip it in place along the center of one edge of the frame. Repeat this with each of the four sides, tightening the fabric as needed. You want your fabric to be nice and taut.
-
 Step 4
Beginning at one of the corners, pull the fabric either to the right or the left (depending on what side you are starting on)
-
 Step 5
Then take your finger and press down the fabric along the edge of the frame so that you are pinching the fabric against the edge and back of the corner you are working on.
-
 Step 6
Fold the pinched piece of fabric down flat, and pull the remaining corner fabric down over it - the goal is to make the fabric as tight and flat on the corners as possible.
-
 Step 7
Finally, making sure your fabric is pulled tight, staple the corner in place. Repeat this process with each of the four corners, and remove the binder clips.
-
 Step 8
Working along the back of the frame, pull the fabric taut and staple it in place in the center of each of the 4 sides. For best results, work on opposite sides, rather than going around in a circle. At this point you can either display your stretched embroidery, or if you’d like a neater back, move on to step 9.
-
 Step 9
To give your stretched embroidery a neater finish on the back, cut out a piece of felt slightly smaller than your stretched canvas. Adding a line of glue around the felt, affix it to the back of your canvas frame. Once the glue is dry, hammer a sawtooth hanger through the fabric and into the top back edge of your frame.
-
 Step 10
Your new embroidery art is ready to hang or gift!