


About
Pearl embellished collar
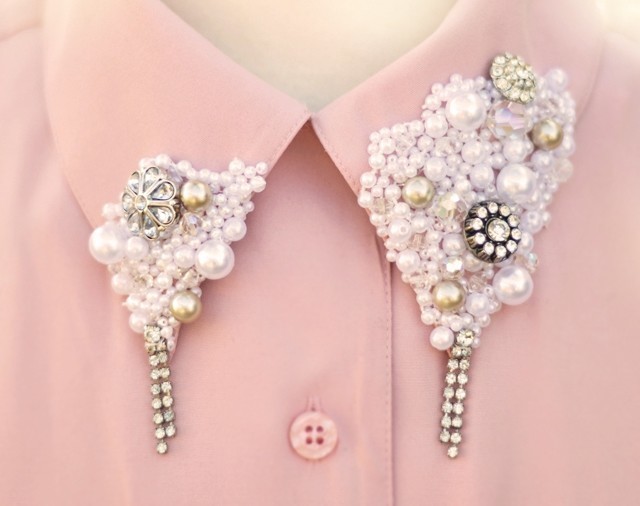
Collars and embellished collars have been making their rounds on the internet and blogs for the past couple of years now. I think we can point our fingers at Miu Miu and their pretty kitty & swallow collars for starting the trend. But because I thought I saw so many refashioned collars and collar necklaces floating around, I purposely did not do a DIY for one. You know I don't like to be a copycat. Apparently however, a Look 4 Less reader was on the hunt for a DIY embellished collar and couldn't find any that suited her. So I offered a hand and thought I'd give it my own spin using faux pearls, vintage rhinestone earrings & buttons, as well as vintage aurora borealis beads from an old broken necklace {as I did for my encrusted V-neck DIY}. Rather than cluttering up the entire collar though, I created a pretty visual pattern that begins on one side and ends on the other.
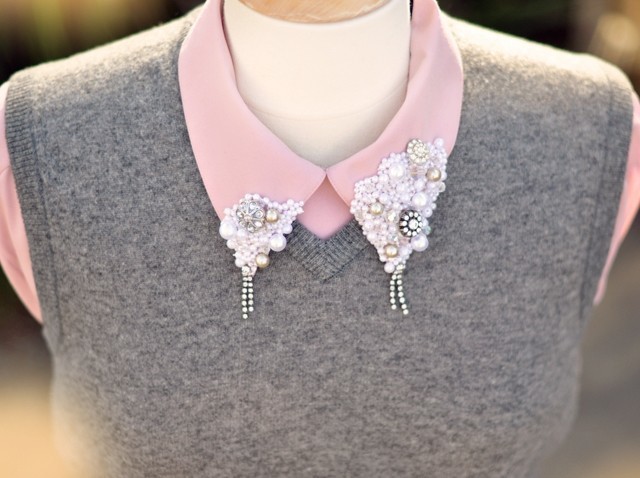
*NOTE* Once embellished, your shirt will have to be dry-cleaned or carefully hand-washed and hung dry. It's the price you pay for fashion OR you can also choose to remove your collar entirely from the rest of the blouse and wear it as a necklace of sorts, pairing it with any outfit you like.
Tags
-
 Key West Witch added Embellished Collar Diy to Sewing
30 Jun 03:12
Key West Witch added Embellished Collar Diy to Sewing
30 Jun 03:12
-
Key West Witch added Embellished Collar Diy to Party, party, party
30 Jun 03:12
-
 Carla B. favorited Embellished Collar Diy
24 Jun 01:40
Carla B. favorited Embellished Collar Diy
24 Jun 01:40
-
 Luna D. favorited Embellished Collar Diy
24 Apr 16:58
Luna D. favorited Embellished Collar Diy
24 Apr 16:58
-
June S. favorited Embellished Collar Diy
02 Dec 02:57
-
 Jack M. favorited Embellished Collar Diy
28 Sep 06:52
Jack M. favorited Embellished Collar Diy
28 Sep 06:52
-
 Hello Sweet Taco favorited Embellished Collar Diy
13 Feb 11:32
Hello Sweet Taco favorited Embellished Collar Diy
13 Feb 11:32
-
 carol.pardee.3 favorited Embellished Collar Diy
08 Dec 11:18
carol.pardee.3 favorited Embellished Collar Diy
08 Dec 11:18
-
 Nerd B. added Embellished Collar Diy to Molly Ringwald
08 Sep 20:54
Nerd B. added Embellished Collar Diy to Molly Ringwald
08 Sep 20:54
-
 Amanda Stewart favorited Embellished Collar Diy
25 Aug 13:50
Amanda Stewart favorited Embellished Collar Diy
25 Aug 13:50
You Will Need
-
 Step 1
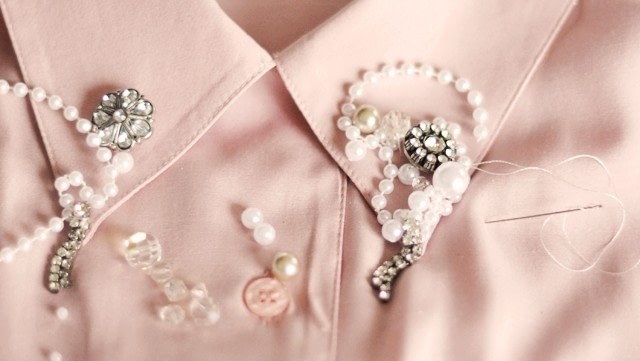
First, visually lay out your largest pearls or precious findings. Other than the vintage rhinestone earrings dangling from the ends, I chose not to match the two sides. Carefully hand stitch each into place {but not onto your shirt below}.
-
 Step 2
Using medium sized pearls or beads, begin filling in the spaces in between. Then with the smallest beads or pearls, filling in the even smaller spaces.
-
 Step 3
Adding large, medium, and small beads, pearls, and rhinestones gives it depth and texture.
-
 Step 4
Continue overlapping and filling in the blanks until you have a finished look you are pleased with.
*NOTE* Mine has a "dipped" feeling which I really love... but you may choose to embellish just the tips, just the edges, sporadically overall, or clustered entirely. You can also choose to add chains, studs, sequins, or even just cover your collar in an already-embellished ribbon. It's up to you ;)


but it's look beautiful
thanks