


About
Easy Kanzashi Flower How-To!
I am a hoarder, I save every scrap of fabric thats left over from other projects. Ive been wanting to make Kanzashi flowers for a while, so I started with my scrap pile. They are so easy to make! This might not be the real "traditional" method of making these flowers, but rather an easy way I came up with after many experiments ( I like feeling like a crafty scientist!).
Ok so here goes...
Kanzashi Flower How-To!
-
 Amanda P. favorited Easy Kanzashi Flower
13 Jan 15:38
Amanda P. favorited Easy Kanzashi Flower
13 Jan 15:38
-
 Key West Witch favorited Easy Kanzashi Flower
06 May 08:47
Key West Witch favorited Easy Kanzashi Flower
06 May 08:47
-
 Holwn G. favorited Easy Kanzashi Flower
01 Sep 05:23
Holwn G. favorited Easy Kanzashi Flower
01 Sep 05:23
-
 Abbey O. favorited Easy Kanzashi Flower
04 Jan 17:20
Abbey O. favorited Easy Kanzashi Flower
04 Jan 17:20
-
Svetlana C. favorited Easy Kanzashi Flower
07 Dec 13:18
-
 Ayjay favorited Easy Kanzashi Flower
10 May 12:16
Ayjay favorited Easy Kanzashi Flower
10 May 12:16
-
 judithchen added Easy Kanzashi Flower to craft ideas
07 May 08:41
judithchen added Easy Kanzashi Flower to craft ideas
07 May 08:41
-
judithchen favorited Easy Kanzashi Flower
07 May 08:40
-
Deborah P. favorited Easy Kanzashi Flower
07 Feb 19:23
-
Sandy D. favorited Easy Kanzashi Flower
22 Jan 18:38
-
 Step 1
Gather supplies:
-
 Step 2
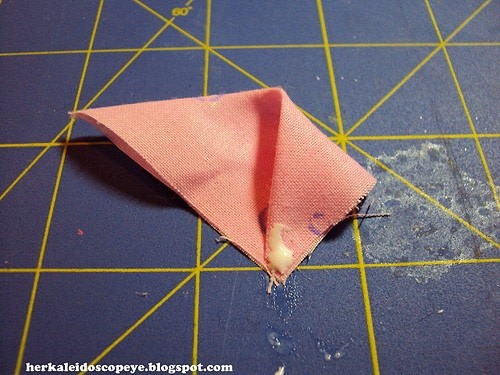
With thre right side down, place a glue dot on the tip of one of the ends. Stick together oposite ends so that you are left with a triangle. Now that you have the right side of the fabric on top, place a dot of glue on the corner that had glue before.
-
 Step 3
Now fold the left corner until the tip is glued to the bottom tip. Place a dot of glue over this union.
-
 Step 4
Fold the Right corner so the tip get glued to the bottom tip.
-
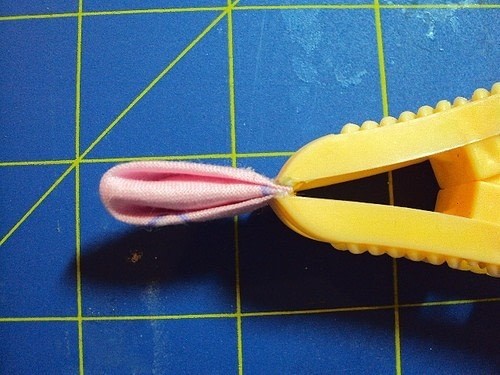
 Step 5
Secure with a clothes pin until the glue dries.
-
 Step 6
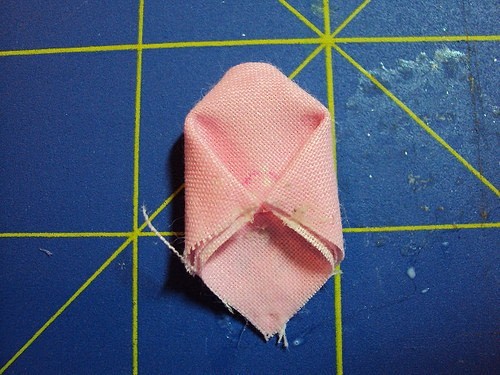
Turn it around and place a tip of glue on the right and left corners.
-
 Step 7
Fold the tips to the center and press.
-
 Step 8
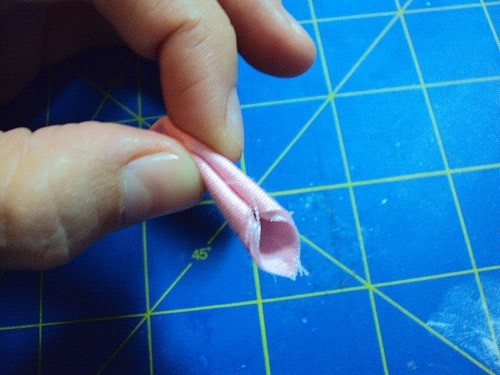
Now fold the fabric by the middle...
-
 Step 9
as shown.
-
 Step 10
Secure it with the Clothes Pin until it dries.
-
 Step 11
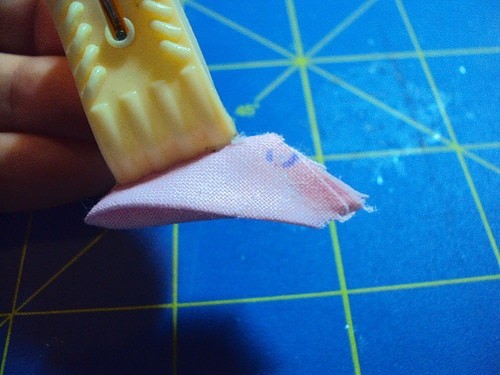
Cut the tip off the petal, make sure its straight!
-
 Step 12
Dab some glue on the freshly cut side...
-
 Step 13
and press it together with the clothes pin.
-
 Step 14
Repeat steps 1- 11 untill you have enough petals to make a flower. When you do, cut out a circle of the backing material of your choice. I used green craft felt.
-
 Step 15
Shape the petals with your fingers until they look good. Please make sure the glue is dry by then or they will unfold. Turn each petal around and place a dot of glue on the bottom. In this step I used hot glue to save time.
-
 Step 16
Add a button on the center or any embelishments you like. These flowers can be worn on anything. I glue this one to a head band. I made soem felt leaves to add more color:D
-
 Step 17
Now time to rock my new hair piece!
Comments and Criticism appreciated!


Many thanks! I'll try this right away and port the result