

About
Hack That Tote!
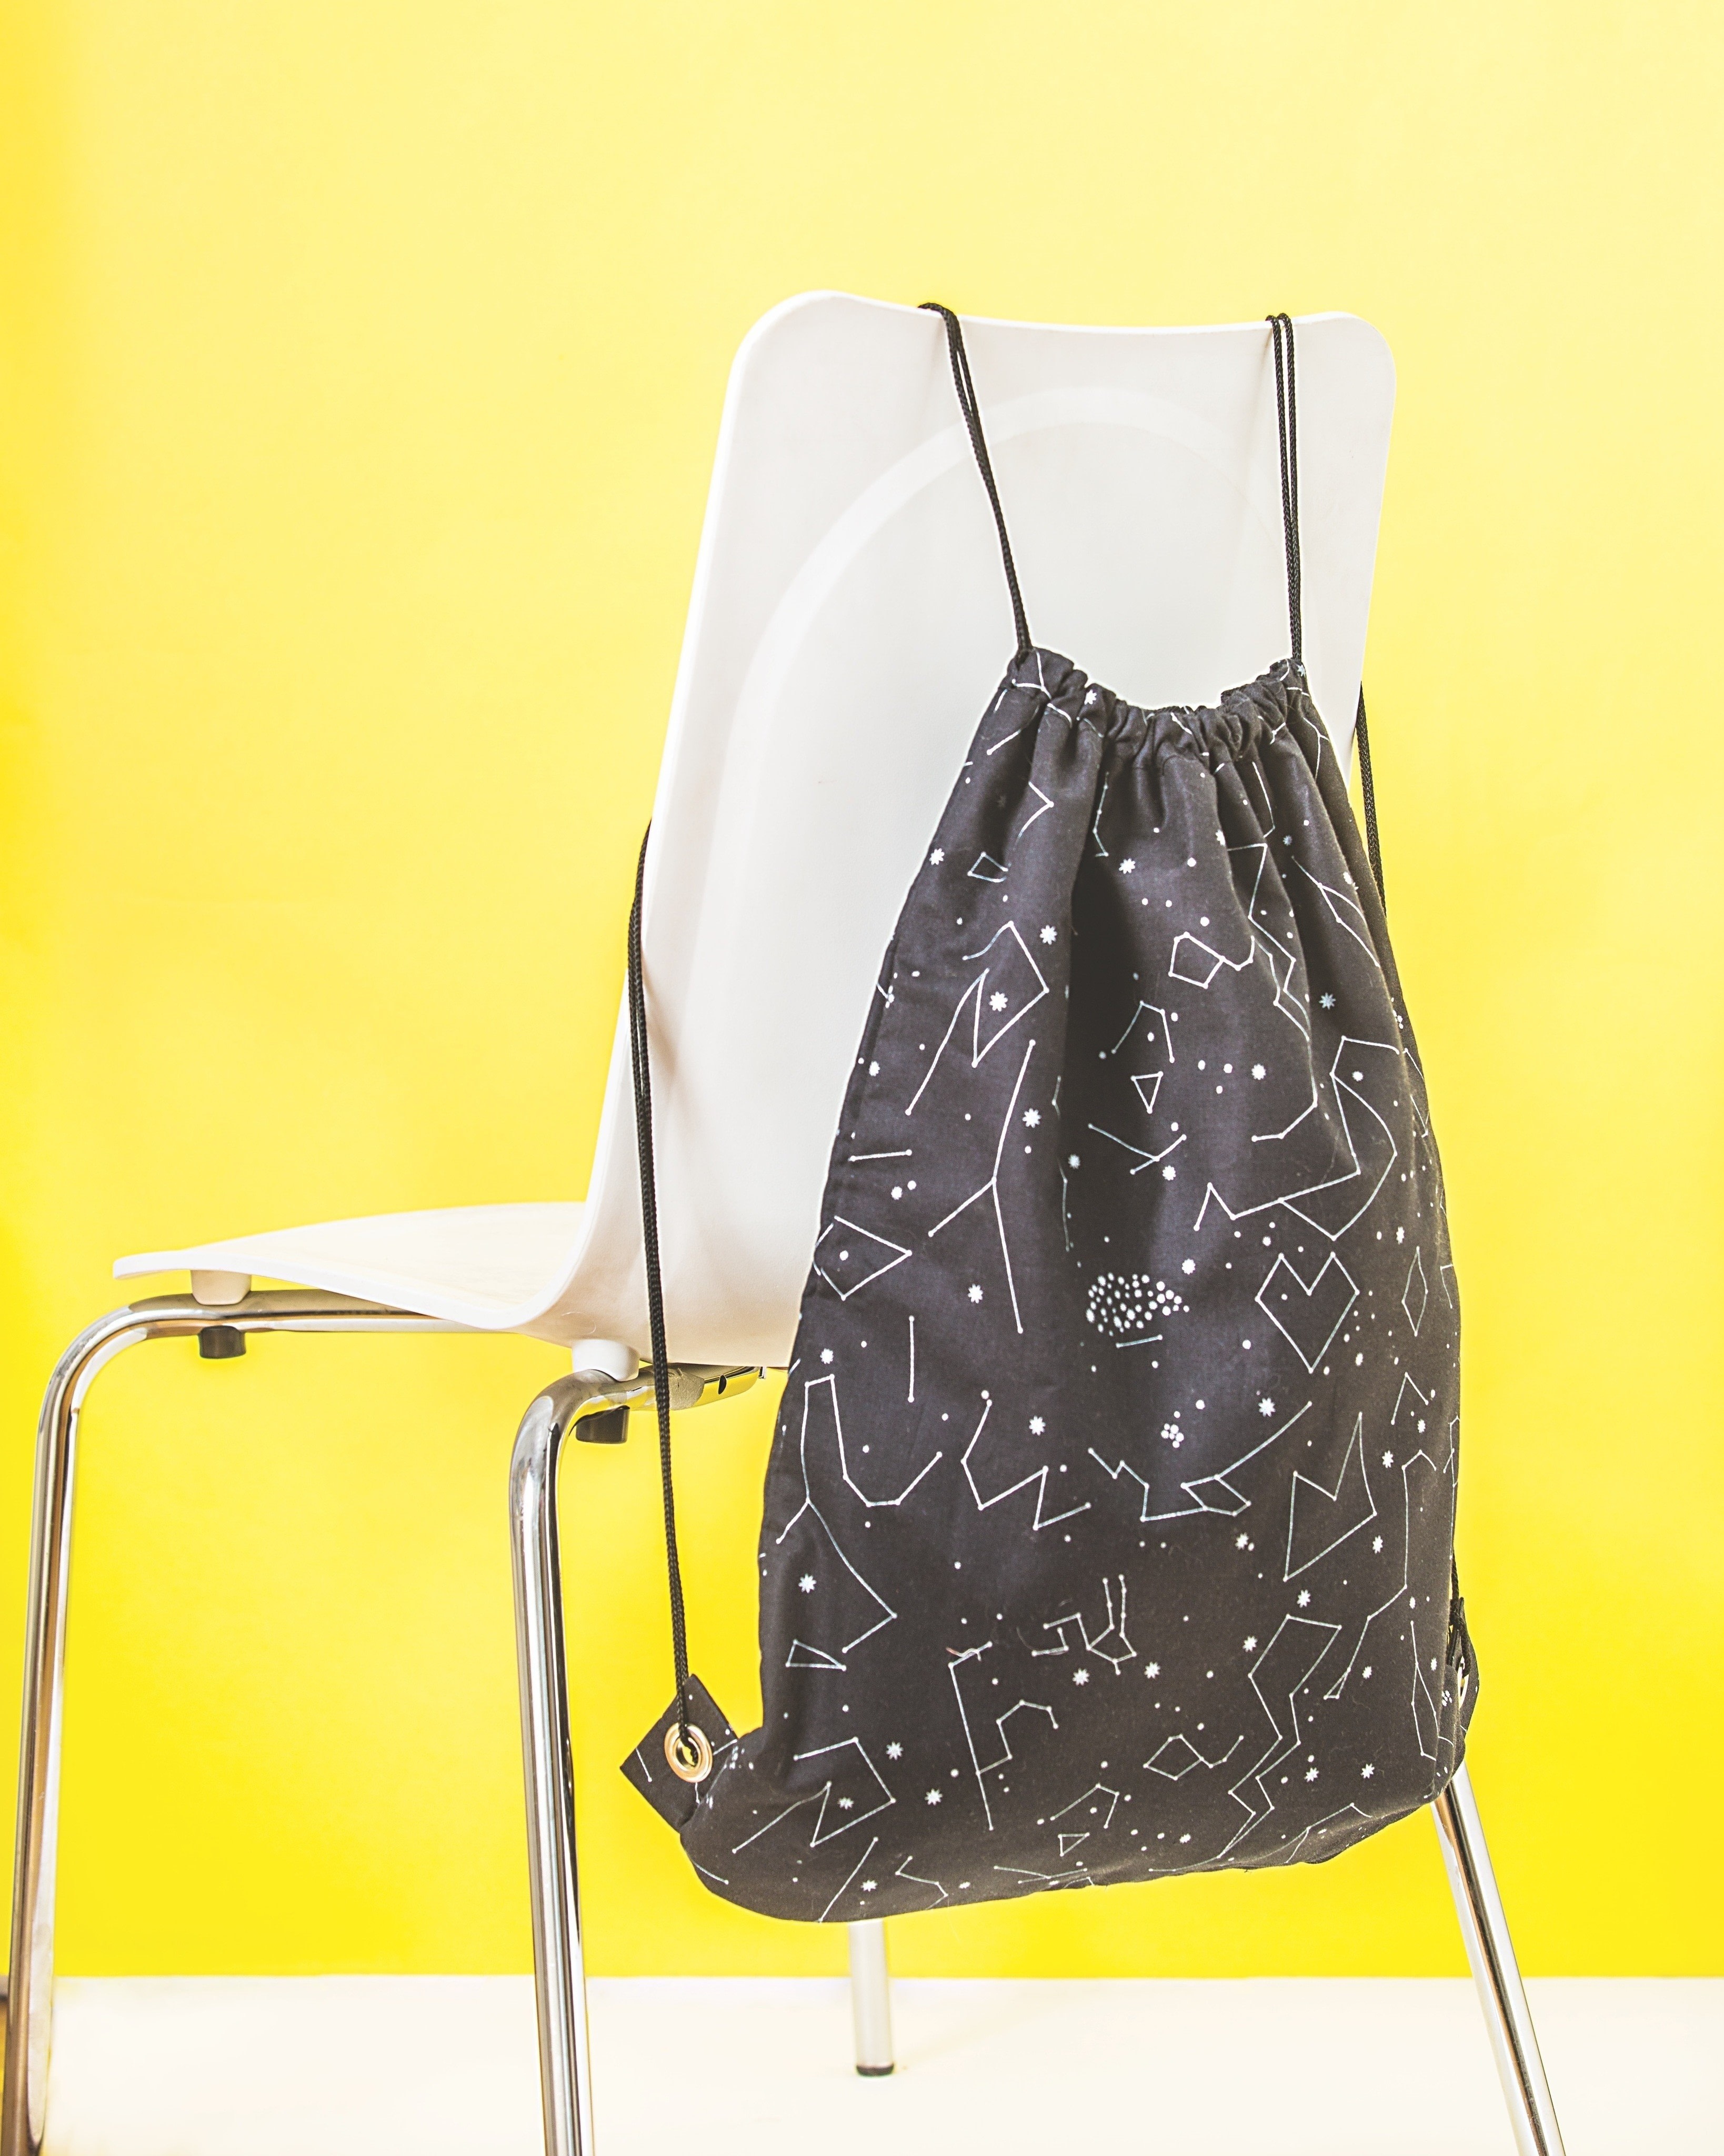
FINISHED BACKPACK: 16 ̋ wide × 211⁄4 ̋ high
Eliminating the cut-out corners of the Basic Tote Bag creates a flatter bag. A drawstring casing at the top edge and tabs with grommets work together to make this bag function
like a backpack.
Cutting
Tip
Adapt this pattern for lighter- weight fabrics by flat lining the exterior with a heavier fabric, such as canvas.
EXTERIOR
Body:
Cut 2 rectangles 17 ̋ × 22 ̋.
Drawstring casings:
Cut 2 rectangles 11⁄2 ̋ × 17 ̋.
Cord guides:
Cut 2 rectangles 3 ̋×4 ̋.
FUSIBLE INTERFACING
Cord guides:
Cut 2 rectangles 11⁄2 ̋ × 21⁄2 ̋.
All seam allowances are 1⁄4 ̋ unless otherwise noted. French seams eliminate the need for a lining. Refer to Anatomy of the Tote Bag Pattern and the Glossary as needed.
Downloads
- 2018-10-23-132246-11181_064a.eps 477 KB [ Download ]
-
 Luna D. favorited Drawstring Backpack
25 Apr 06:52
Luna D. favorited Drawstring Backpack
25 Apr 06:52
-
 lururu favorited Drawstring Backpack
04 Mar 12:52
lururu favorited Drawstring Backpack
04 Mar 12:52
-
 Ellen R. favorited Drawstring Backpack
01 Sep 16:14
Ellen R. favorited Drawstring Backpack
01 Sep 16:14
-
Ada A. favorited Drawstring Backpack
13 Jul 01:11
-
 Alex B. favorited Drawstring Backpack
10 Jul 02:40
Alex B. favorited Drawstring Backpack
10 Jul 02:40
-
 Search Press published her project Drawstring Backpack
29 Oct 09:00
Search Press published her project Drawstring Backpack
29 Oct 09:00
You Will Need
-
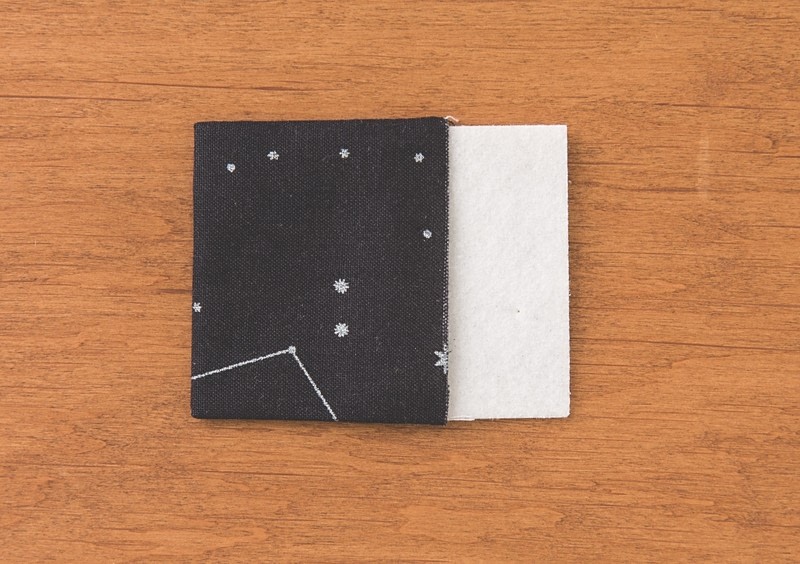
 Step 1
Press the cord guides in half, right sides together, matching the short edges.
Match cord guides, right sides together.
-
Step 2
Sew the short sides. Turn right side out and press.
-
 Step 3
Slip the fusible rectangles into the cord guides. Press to fuse.
Insert fusible into cord guides.
-
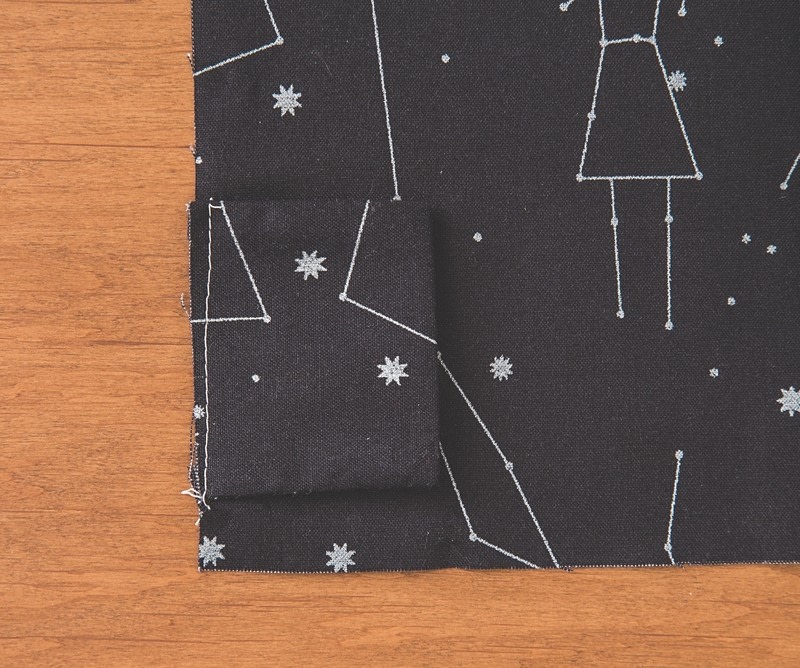
 Step 4
Place 1 cord guide on the bottom left corner of an exterior piece, 5⁄8 ̋ up from the bottom, with the raw edges even on the left-hand side. Baste. Repeat on the opposite side with the remaining cord guide.
Baste cord guides to exterior.
-
 Step 5
Match the bag exterior pieces, wrong sides together. Pin the sides and bottom. Sew. Trim the seam allowance to 1⁄8 ̋.
Match exterior bag pieces, wrong sides together.
-
 Step 6
Turn the bag right sides together and press the seam flat.
-
 Step 7
Sew the seams a second time, capturing the trimmed seam allowances inside the stitching, to create a French seam. Press. Leave the bag wrong side out and set it aside.
Sew seams second time to create French seam.
-
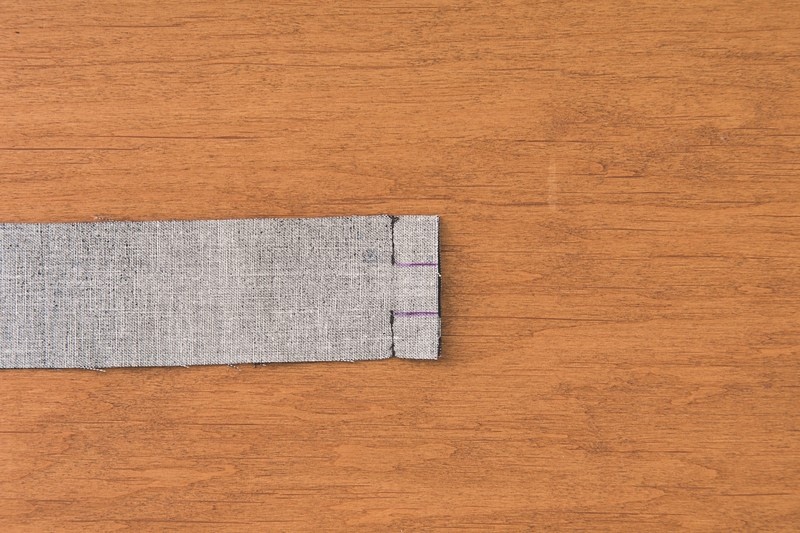
 Step 8
Match the short ends of the drawstring casing, right sides together, and pin. Using a 1⁄2 ̋ seam allowance, sew the first and last 1⁄2 ̋ along the short end, leaving a 1⁄2 ̋ gap in the stitching to create the opening for the drawstring. Make sure to backstitch at the beginning and end of each line of stitches.
Match short ends of drawstring casing, leaving 1⁄2 ̋ gap.
-
 Step 9
Press open the seams. Press under the raw edge of the seam allowance.
Press under raw edge of seam allowance.
-
 Step 10
From the right side of the drawstring casing, topstitch along the seam allowances on both sides. Repeat on the other drawstring casing side seam.
Topstitch along seam allowance.
-
Step 11
Press 1 raw edge of the drawstring casing 1⁄4 ̋ to the wrong side.
-
 Step 12
Match the unpressed edge of the right side of the drawstring casing to the top edge of the wrong side of the backpack. Pin, starting at
the side seams. Sew. Trim the seam allowance to 1⁄8 ̋.Match drawstring casing to top edge of backpack.
-
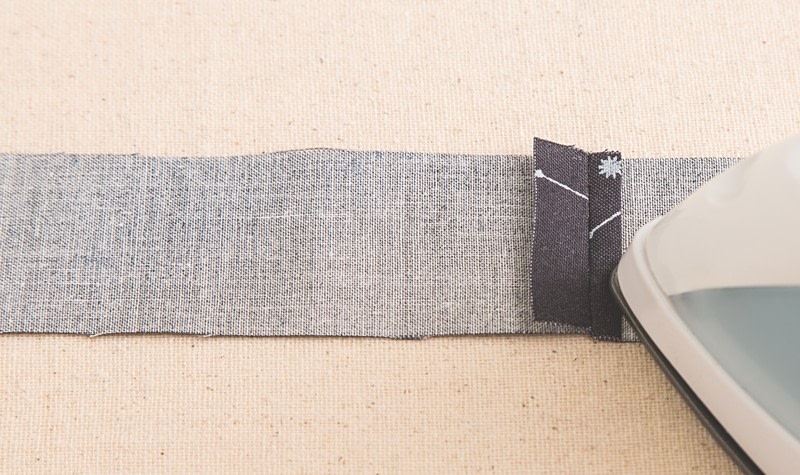
 Step 13
Press the drawstring casing over the seam allowance and flat against the top of the backpack. Pin and sew close to the folded bottom edge of the drawstring casing.
Press drawstring casing over front of backpack.
-
Step 14
Topstitch around the top edge of the drawstring casing.
-
 Step 15
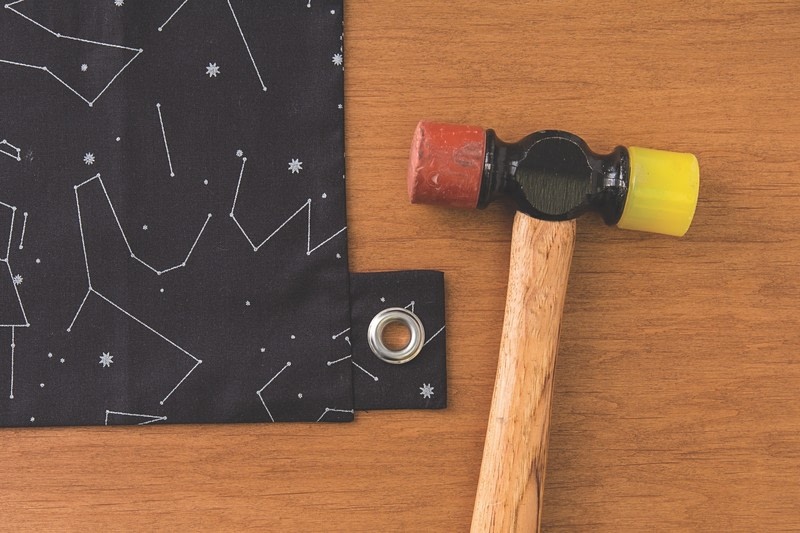
Follow the manufacturer’s instructions to install the grommets in the center of each cord guide.
Install grommets in cord guide.
-
 Step 16
Cut the cord into 2 equal-length pieces.
Set aside 1 piece. Use a bodkin or safety pin to feed 1 cord piece through the bottom of the cord guide, up through the bag front drawstring casing (from the left), around through the bag back drawstring casing (from the right), and then back down to the starting point. Knot. Repeat on the opposite side of the bag.