About
Make your own wrap skirt
Learn how to make your own wrap skirt using just your measurements! No pattern is needed, and you only need to know basic sewing techniques. This is a great beginner sewing project that will help you make a great spring/summer skirt.
Tags
-
 Key West Witch favorited Diy Wrap Skirt
07 Aug 21:46
Key West Witch favorited Diy Wrap Skirt
07 Aug 21:46
-
 Mz.Green Eyed Beauty favorited Diy Wrap Skirt
13 Apr 10:42
Mz.Green Eyed Beauty favorited Diy Wrap Skirt
13 Apr 10:42
-
 Tashianna S. favorited Diy Wrap Skirt
11 Apr 12:57
Tashianna S. favorited Diy Wrap Skirt
11 Apr 12:57
-
 Heather R. favorited Diy Wrap Skirt
29 Aug 01:33
Heather R. favorited Diy Wrap Skirt
29 Aug 01:33
-
 CreativeGirl79 favorited Diy Wrap Skirt
20 Aug 21:21
CreativeGirl79 favorited Diy Wrap Skirt
20 Aug 21:21
-
Rachel S. favorited Diy Wrap Skirt
19 Aug 07:10
-
 Crafterella featured Diy Wrap Skirt
14 Aug 23:00
Crafterella featured Diy Wrap Skirt
14 Aug 23:00
-
 RareJewel favorited Diy Wrap Skirt
07 Aug 15:10
RareJewel favorited Diy Wrap Skirt
07 Aug 15:10
-
 Carmen B. published her project Diy Wrap Skirt
01 Aug 09:00
Carmen B. published her project Diy Wrap Skirt
01 Aug 09:00
-
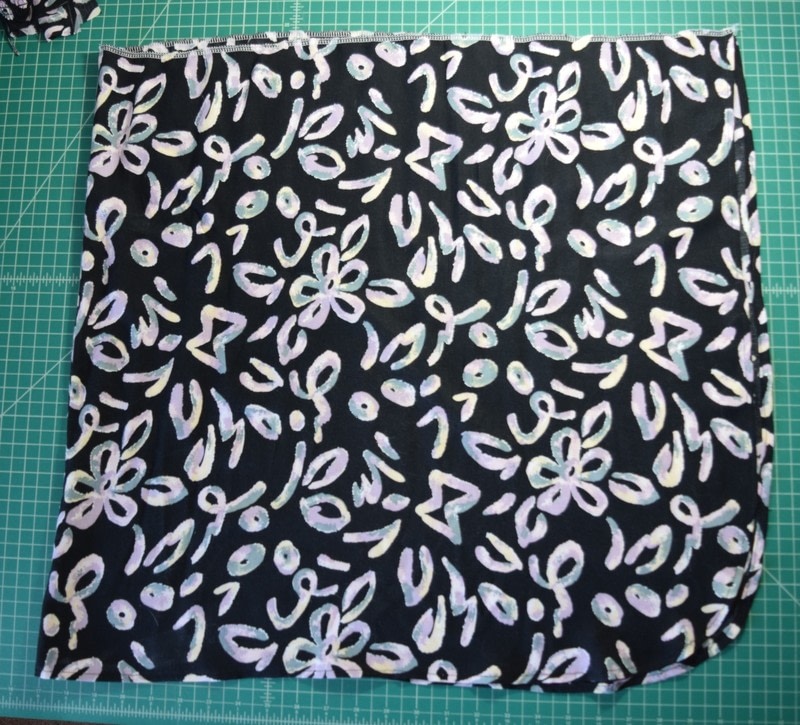
 Step 1
First, you need to take a few measurements: 1) distance around your waist and 2) length from waist to where you want the hem of your skirt to hit. Once you have your measurements you can cut out the pattern pieces using this diagram. You should end up with one large main skirt piece and two smaller waist tie pieces.
-
 Step 2
Next, I wanted the bottom corners of my skirt to be rounded, so I folded the main skirt piece in half (hamburger direction, with the ends of the short sides lined up on the right side). I smoothed out the wrinkles and then drew the shape of the curve I wanted on the bottom right corner. Then I cut along this curve, going through both layers of fabric. Just make sure you’re cutting the side OPPOSITE the fold.
-
 Step 3
Next, I did a rolled hem all the way around the sides and bottom edges of the skirt, leaving the top edge alone. To do a rolled hem, you fold the edge to the inside 1/4 inch, then fold it to the inside another 1/4 inch, hiding the raw edges inside the folds. Use your iron and pins as you fold to hold things in place.
-
 Step 4
Then just sew this hem in place with your sewing machine and give it another ironing for a nice finish. At this point I serged the raw edges along the top of the skirt and around the straps, but this turned out to be completely unnecessary because all the raw edges with be hidden in the finished skirt. I would recommend just skipping finishing the raw edges.
-
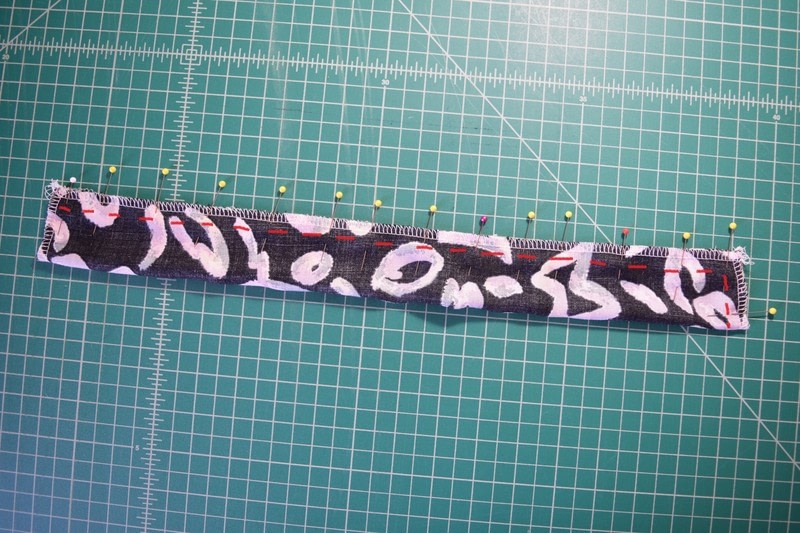
 Step 5
Next, we’ll make our ties for the skirt. First, fold one of your ties in half (hot dog direction), with the right sides together. Pin and sew along the long edge and ONE of the short edges. Sew 1/2 inch from the edges; I’ve marked the stitching lines in the photo.
-
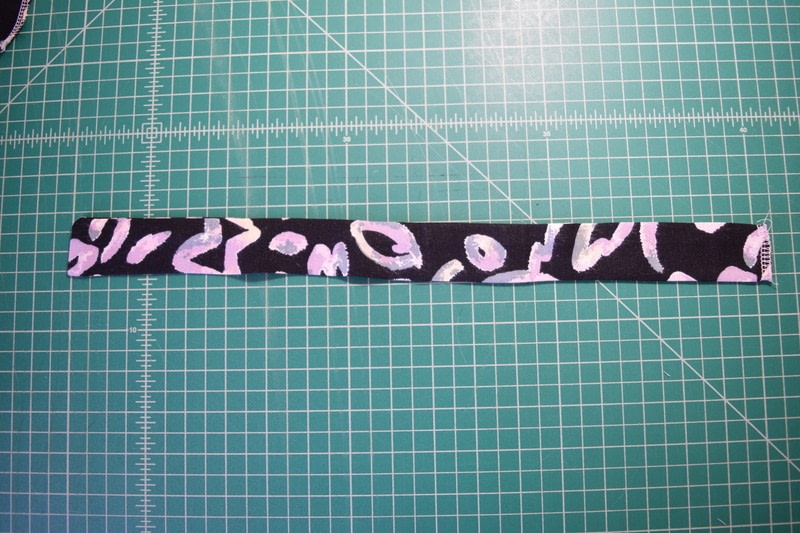
 Step 6
Next, trim the seam allowances close to the stitching, especially at the upper right hand corner. This will help with a crisp corner when you turn the strap right sides out. Next, turn the tie right sides out, pulling the corner out as best you can, then iron the tie flat.
-
 Step 7
Now just repeat this process with the other strap.
-
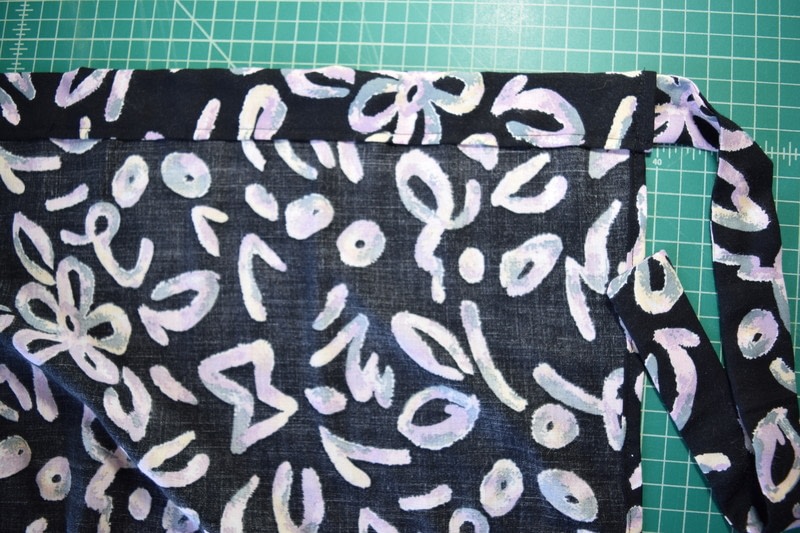
 Step 8
Now we need to finish the upper edge of the skirt and insert our ties.
First, fold 1/2 inch to the inside along the upper edge and iron this fold in place. -
 Step 9
Next, lay the skirt open in front of you with the folded edge to the top and with the wrong side of the fabric facing up. Then grab your shorter tie piece and place it along the right top corner of the skirt, with the open end to the inside of the skirt. Fold the top edge of the skirt down over the strap and pin it in place, encasing all the raw edges inside the waist band.
-
 Step 10
Now, pin the longer strap into the top left corner of the waistband in the same way. Then, pin the rest of the waistband down, making sure it is an even width all the way across.
-
 Step 11
Now, sew the waistband down along the lower folded edge, as well the right and left corners; going through all layers of fabric to encase the ties in the waist band.
-
 Step 12
Next, iron the waistband flat to give it a nice finish.
-
 Step 13
Our final step is to add two darts to the back of the skirt for a nicer fit. To figure out where you want your darts to be, it would be best to try on the skirt and pin (or have someone help you pin) where and how large you want your darts to be. For reference, here’s a diagram of what my darts looked like.
-
 Step 14
So to finish my skirt, I sewed my two darts in place and ironed them towards the edges of the skirt. And that's it! Just tie it on and go!