


About
DIY Shoe Box Charger For Your Devices
Learn how to quickly make a shoebox recharge station, housing all the ugly and tangling chargers for your devices behind a neat and beautiful cover.
The definitive guide is over at this location. Check it out for a thorough step by step.
http://www.instructables.com/id/How-to-DIY-Shoe-Box-Charging-Station-for-Your-Devi/
-
 Cathy M. favorited Diy Shoebox Charging Station
22 Jan 16:31
Cathy M. favorited Diy Shoebox Charging Station
22 Jan 16:31
-
 Audrey W. published her project Diy Shoebox Charging Station
03 Aug 19:20
Audrey W. published her project Diy Shoebox Charging Station
03 Aug 19:20
You Will Need
-
Step 1
The Materials You Need:
A power coupler
A cardboard box
Scissors
Office knife
Glue / Duct tape
Pencil / Pen
Ruler
Paper Clippers
Decorative hole frames / Washers / Spacers
Other decorative elements -
 Step 2
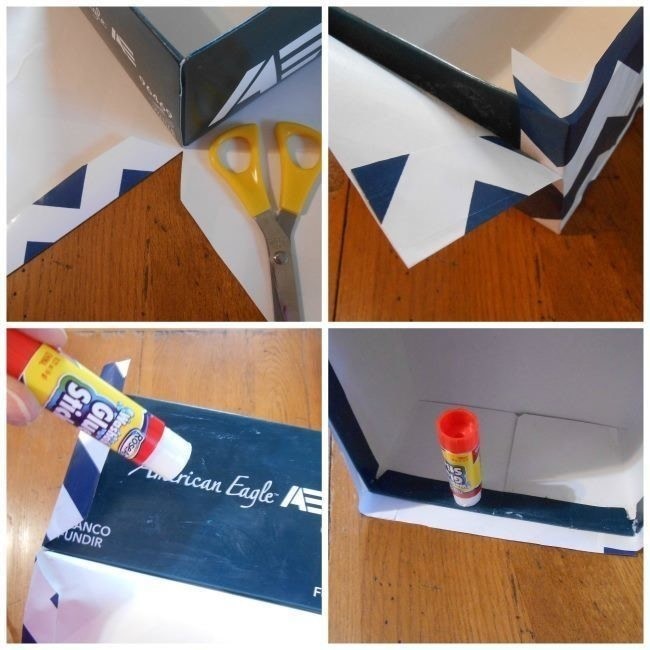
Get your shoe box and decorate it based on your taste. I wrapped mine in gifts paper.
I carefully traced the box on the back of the paper, leaving margins. The margins will then create overlapping flaps to go around the corners.
Watch out to not mess up the pattern of the paper. Assemble first, before gluing. -
 Step 3
I took my decorative rings, I spaced them out on the face side of the box and I traced them on the paper.
Then, I cut out the holes and glued the rings on. -
 Step 4
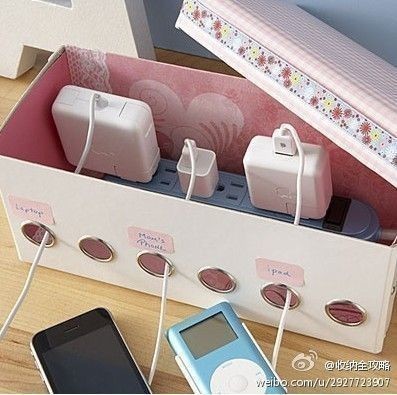
I made a hole on the back side for the power coupler and assembled the chargers with the coupler inside the box.
I pulled out the cords and labelled each hole to it's respecting device charger.
-
 Step 5
I'm done.