About
Transfer your favourite photos to create a mixed media painting!
The DIY Photo Transfer is an amazing project that enables you to take your favorite photos and create a unique art piece using a canvas and gel medium. Even if you don't consider yourself very creative I can assure you that as long as you follow the steps you will end up with a beautiful keepsake and new piece of art to adorn your walls.
Now, if you ARE the creative sort, then this is a project you can go WILD with. Once you have completed your transfer you can use acrylic paint to continue the creativity and there really is no limit to what you can create.
-
 Bek S. favorited Diy Photo Transfer
02 Aug 10:17
Bek S. favorited Diy Photo Transfer
02 Aug 10:17
-
 Minna O. favorited Diy Photo Transfer
10 May 05:54
Minna O. favorited Diy Photo Transfer
10 May 05:54
-
 Emma H. favorited Diy Photo Transfer
06 Mar 22:53
Emma H. favorited Diy Photo Transfer
06 Mar 22:53
-
 Kirsty B favorited Diy Photo Transfer
11 Feb 10:15
Kirsty B favorited Diy Photo Transfer
11 Feb 10:15
-
 Caroline M. favorited Diy Photo Transfer
08 Feb 12:11
Caroline M. favorited Diy Photo Transfer
08 Feb 12:11
-
 Yvonne R. favorited Diy Photo Transfer
08 Feb 03:40
Yvonne R. favorited Diy Photo Transfer
08 Feb 03:40
-
 Kepi favorited Diy Photo Transfer
06 Feb 17:47
Kepi favorited Diy Photo Transfer
06 Feb 17:47
-
 Shawnshawn D. favorited Diy Photo Transfer
06 Feb 03:22
Shawnshawn D. favorited Diy Photo Transfer
06 Feb 03:22
-
 madeline.chu.7 favorited Diy Photo Transfer
05 Feb 18:21
madeline.chu.7 favorited Diy Photo Transfer
05 Feb 18:21
-
 Harmonee.seal added Diy Photo Transfer to Want to Make
31 Jan 06:06
Harmonee.seal added Diy Photo Transfer to Want to Make
31 Jan 06:06
-
 Step 1
First, you will need to print out the photographs you would like to use for this project. When printing you must make sure to use a LASERJET printer or copier on plain paper, otherwise it will not transfer. (Sorry no inkjet printing)
PLEASE NOTE that when you transfer the photo your image will be reversed so make sure to have it print out the opposite of how you really want it to be.
-
 Step 2
If you already know the canvas size that you will be transferring your image on to then you may print out your image to fit the exact dimensions of your surface. Otherwise you can always break out that handy ruler to measure out and mark the photograph so you can cut it accordingly.
This step is optional because you can always just place the entire sheet of paper down and have the extra hang over the sides as it will all come off later regardless. Personally, I find it helpful to trim it down so I know exactly where I am placing the image and can ensure it will be straight.
-
 Step 3
Once you break off the protective wrapping from your canvas board you are ready to add the layer of Acrylic Gel Medium. Depending on the look you are going for you can choose matte (no shine) or a glossy gel medium, for this project we used glossy. Next, grab a paintbrush, the larger the better, and add a very generous coating of the gel medium.
-
 Step 4
I let my daughter help me out with this step since she loves painting so much, however when she was done I had to go over and smooth it down a touch. Any bumps or ripples may create air bubbles and will end up causing the image to not transfer properly. Wipe off the excess gel from the sides.
-
 Step 5
Next you will want to take your image and very carefully and slowly lay it face down onto the surface of the canvas. Working from the middle, press outwards until the entire piece of paper is lying flat. Try to press out any air bubbles to the edge and make sure the paper has as much contact with the gel medium as possible.
Let it dry OVERNIGHT
I know this may be hard to do but I promise you it is better safe than sorry, you will get a much better result by being patient.
-
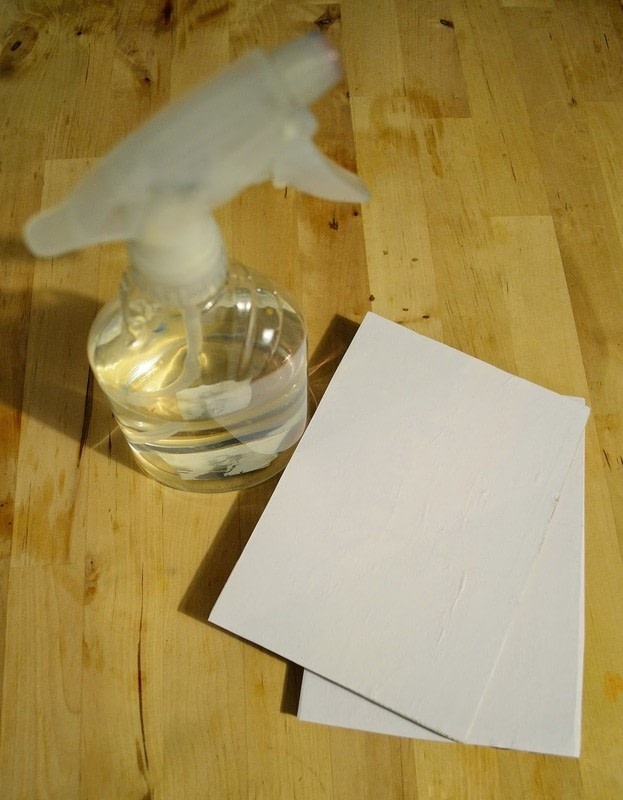
 Step 6
Once it has completely dried, fill up a spray bottle with water and spray the entire surface, don't be shy. You will want to make sure it stays wet through this step so if it starts to dry go ahead and spray again. Using your fingers GENTLY rub the surface so that the paper begins to peel off. I can't stress enough that when it comes to this project, patience is definitely a virtue.
-
 Step 7
You want to work slow and steady as you gently rub the remaining paper away, if you rub to hard or quick you could lose pieces of the photograph. If you are purposefully going for a worn look you can be a little more rough or simply take sandpaper at the end which will let you have more control over the final image.
-
 Step 8
Once you have completely removed all the paper and are happy with the final result, it is time for you to seal the image for longevity. Using the same Gel Medium you used in Step 3, give it another coat and let it dry completely before displaying.
It doesn't even have to end there either, you can take your creative license and go wild with ideas using acrylic to add a personal touch. For the piece with Eve on the beach I added some black acrylic paint on the bottom left for a vignette feel.