


About
Fun Paper Craft!
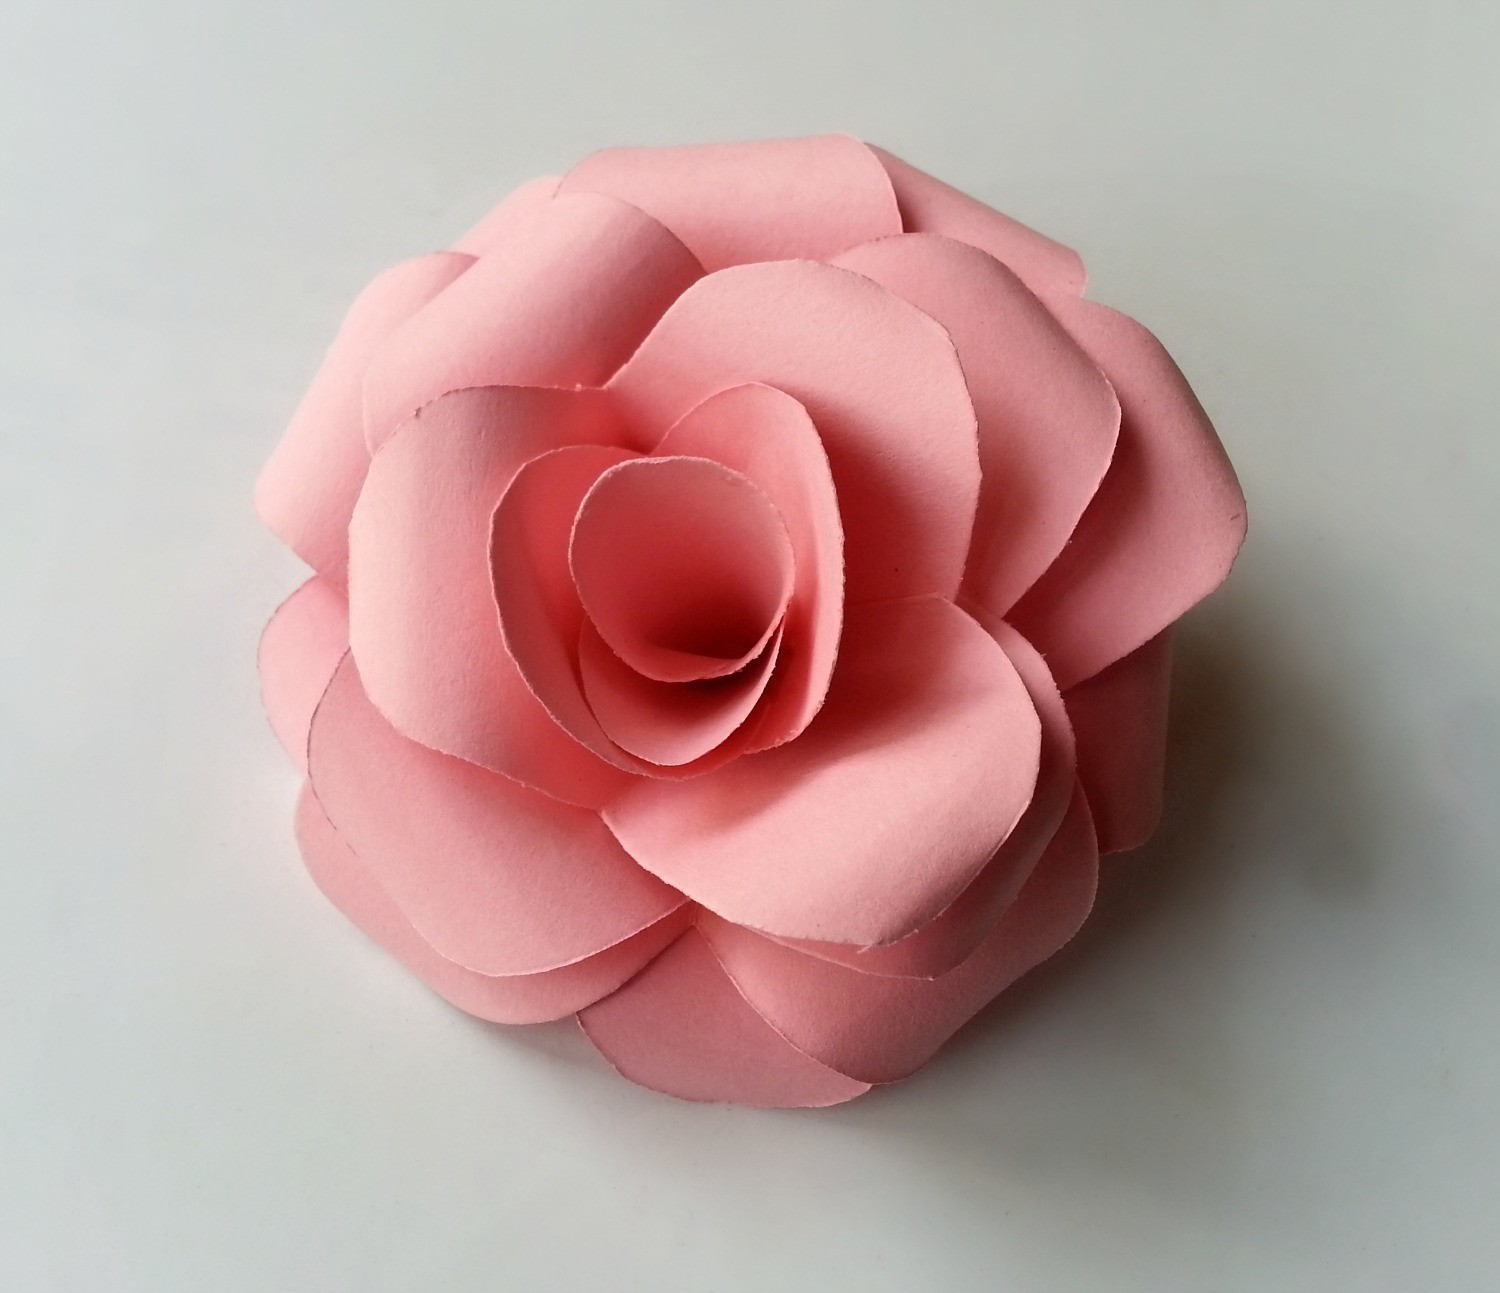
You can make these beautiful paper roses in only 10 minutes. Follow this tutorial and find out how to make them :)
Tags
-
 Key West Witch favorited Diy Paper Rose
26 Jun 22:56
Key West Witch favorited Diy Paper Rose
26 Jun 22:56
-
 Caden Kaslik favorited Diy Paper Rose
25 May 20:47
Caden Kaslik favorited Diy Paper Rose
25 May 20:47
-
 Elizabeth T. favorited Diy Paper Rose
25 Feb 04:25
Elizabeth T. favorited Diy Paper Rose
25 Feb 04:25
-
 VillainousNinja added Diy Paper Rose to Decor
20 Oct 01:01
VillainousNinja added Diy Paper Rose to Decor
20 Oct 01:01
-
VillainousNinja added Diy Paper Rose to Make this
12 Oct 22:50
-
 Andréa C. favorited Diy Paper Rose
06 Sep 19:54
Andréa C. favorited Diy Paper Rose
06 Sep 19:54
-
Bek S. favorited Diy Paper Rose
02 Aug 10:18
-
 earl c. favorited Diy Paper Rose
11 Jul 11:17
earl c. favorited Diy Paper Rose
11 Jul 11:17
-
 Laila A. favorited Diy Paper Rose
21 Feb 12:23
Laila A. favorited Diy Paper Rose
21 Feb 12:23
-
 Janay S. favorited Diy Paper Rose
30 Jan 08:32
Janay S. favorited Diy Paper Rose
30 Jan 08:32
You Will Need
-
 Step 1
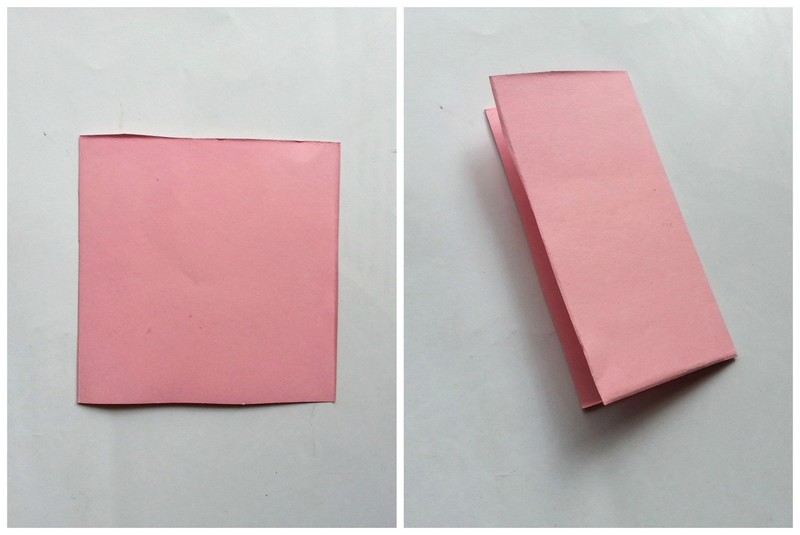
You will need 4 pieces of craft paper of the same size. I used 4 X 4 inches craft papers. Take a piece of craft paper and fold the paper into half.
-
 Step 2
Again fold the paper into even thirds.
-
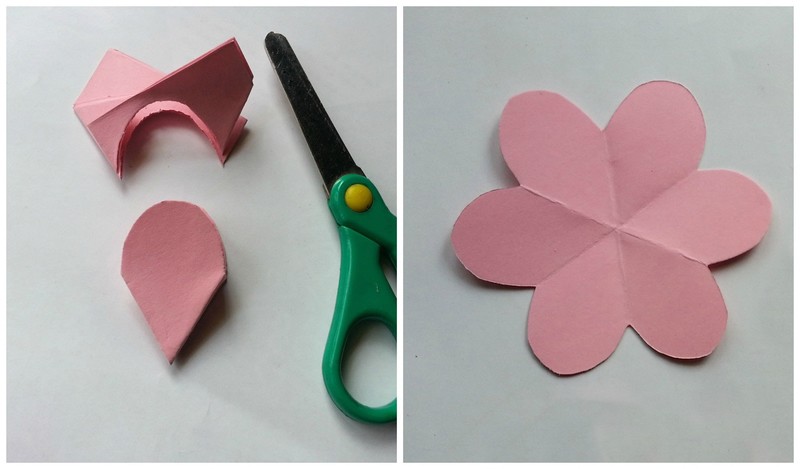
 Step 3
You can draw the pattern of the petal on the folded paper or you can simply cut the top of the folded paper into an arch shape.
-
 Step 4
Similarly cut 3 more as you'll need 4 of these. This way you'll get 6 petals on each paper.
-
 Step 5
Again cut the 6 petaled papers as shown in the 5th picture of this step.
-
 Step 6
Use the small paint brush or any small round object to create curves on the petals.
-
 Step 7
This is how the pieces will look like after creating curves on the petals.
-
 Step 8
Apply glue on one side of the petaled papers and join it with the other side.
-
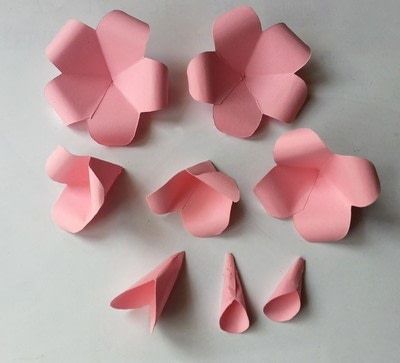 Step 9
Now we have - 2 pieces with 5 petals, 1 with 4 petals, 2 with 3 petals, 1 with 2 petals and 2 with 1 petal.
-
 Step 10
Start gluing the pieces (petaled papers), one on the top of the other one. Try to arrange them nicely to create a beautiful pattern. The ones with more petals should be on the bottom and the ones with fewer petals should be on the top. Allow the glue to dry. Add stems and leaves if you wish. Done!


Comments

