About
Design your own cute functional drawstring bags!
Make your own custom drawstring bags any size. Cute and functional pouches are perfect for organizing your knick-knacks!
-
 Carrie Alice added Diy Drawstring Bags to Crafty
28 Jul 04:04
Carrie Alice added Diy Drawstring Bags to Crafty
28 Jul 04:04
-
 Sveta favorited Diy Drawstring Bags
02 Apr 08:23
Sveta favorited Diy Drawstring Bags
02 Apr 08:23
-
 Chudames favorited Diy Drawstring Bags
23 Sep 14:47
Chudames favorited Diy Drawstring Bags
23 Sep 14:47
-
 Buttercup favorited Diy Drawstring Bags
22 Aug 23:05
Buttercup favorited Diy Drawstring Bags
22 Aug 23:05
-
 HylianWriter534 favorited Diy Drawstring Bags
04 Aug 01:04
HylianWriter534 favorited Diy Drawstring Bags
04 Aug 01:04
-
 erin f. favorited Diy Drawstring Bags
20 Jul 07:41
erin f. favorited Diy Drawstring Bags
20 Jul 07:41
-
 Toxic Cupcake Killjoy favorited Diy Drawstring Bags
18 Jul 20:30
Toxic Cupcake Killjoy favorited Diy Drawstring Bags
18 Jul 20:30
-
 Alissa B. favorited Diy Drawstring Bags
17 Jul 20:39
Alissa B. favorited Diy Drawstring Bags
17 Jul 20:39
-
 amyistheparty favorited Diy Drawstring Bags
15 Jul 16:05
amyistheparty favorited Diy Drawstring Bags
15 Jul 16:05
-
 Home Made by Carmona published her project Diy Drawstring Bags
16 May 22:34
Home Made by Carmona published her project Diy Drawstring Bags
16 May 22:34
You Will Need
-
 Step 1
Fold rectangle in half and crease using your fingernail.
-
 Step 2
Fold first upper edge over to create a lip, crease using your finger nail.
-
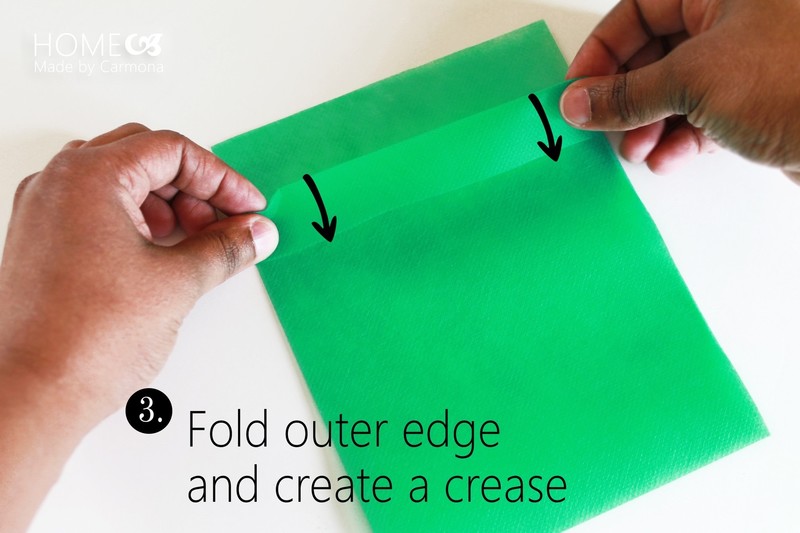
 Step 3
Do the same to the opposite side to create a lip. Both lips should face outward.
-
 Step 4
Sew across each lip.
-
 Step 5
Sew to sides right up to the lip seam. Stop at the seam.
-
 Step 6
Flip inside out!
-
 Step 7
Cut a rectangle to create the desired custom bag size.
-
 Step 8
Next insert ribbon or twine as your drawstring, and decorate! Geometric patterns are easily cut from sponge and applied, or apply designs using stencils or even tape!
See more decorating ideas at my blog.