


About
DIY Dress
I made this dress for my little sister, it was my first attempt in sewing a dress. Hope you like it :)
Tags
-
 Key West Witch favorited Diy Cute Floral Dress
26 Jun 22:46
Key West Witch favorited Diy Cute Floral Dress
26 Jun 22:46
-
 Rhonda G. favorited Diy Cute Floral Dress
18 Apr 03:04
Rhonda G. favorited Diy Cute Floral Dress
18 Apr 03:04
-
 sara d. favorited Diy Cute Floral Dress
25 Mar 20:29
sara d. favorited Diy Cute Floral Dress
25 Mar 20:29
-
 Muhaiminah Faiz published her project Diy Cute Floral Dress
10 Mar 16:18
Muhaiminah Faiz published her project Diy Cute Floral Dress
10 Mar 16:18
-
 Step 1
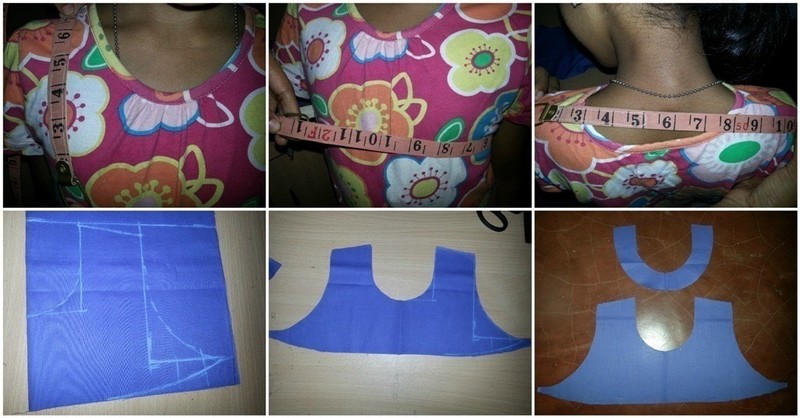
Draw the design of the dress on a paper. This is what I drew. The parts you need to cut;
1) 2 pieces for the sleeves,
2) 2 pieces for the upper body part (back and front)
3) 2 pieces for the lower part ( back and front)
4) 2 pieces for the neck lining. -
 Step 2
Upper body part: I used plain blue fabric for the upper part. To cut these parts you'll need to measure the shoulder, chest and length of the upper part. . Use chalk to mark the outlines and cut the parts carefully. While cutting this part, make sure you keep at least 0.5 inch extra ( for sewing).
-
 Step 3
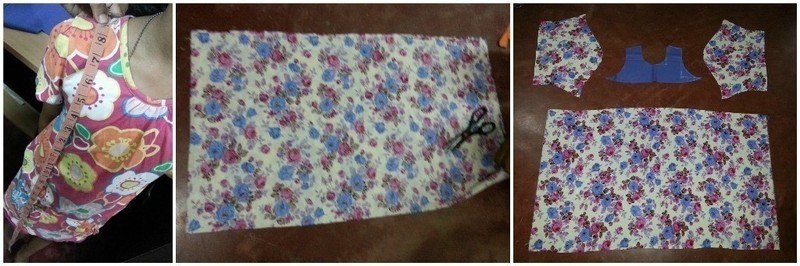
Sleeves: I used the floral fabric for the sleeves. Measure the length of the arms as you want. Make sure you keep enough fabric for shirring and the sleeves to look fluffy.
-
 Step 4
Lower body part: I used floral fabric for the lower part. Measure the length of the dress (your choice, but I think long dresses look good with this pattern). Subtract the length of the upper body from the original length of the dress to measure the length of the lower part. Cut out 2 rectangular pieces for the lower part and make sure you have enough fabric for shirring.
-
 Step 5
Neck lining: Cut out 2 U shaped pieces for the neck lining. Fold the outer edges of the neck lining ('U' shaped fabric cutout) and sew around it.
-
 Step 6
Now, place the neck lining on the upper body part (as shown in the picture), and attach them together by sewing around the edges.
-
 Step 7
Then, turn the lining to the other side of the upper body part and sew around the open edges (I used thread and needle).
-
 Step 8
Similarly, sew the other part and then join both parts together on the shoulder. I also attached a pink lace with the upper body part.
-
 Step 9
Take the floral fabric pieces (cut out for the lower body part) and fold any one edge and sew matching lace(see picture).
-
 Step 10
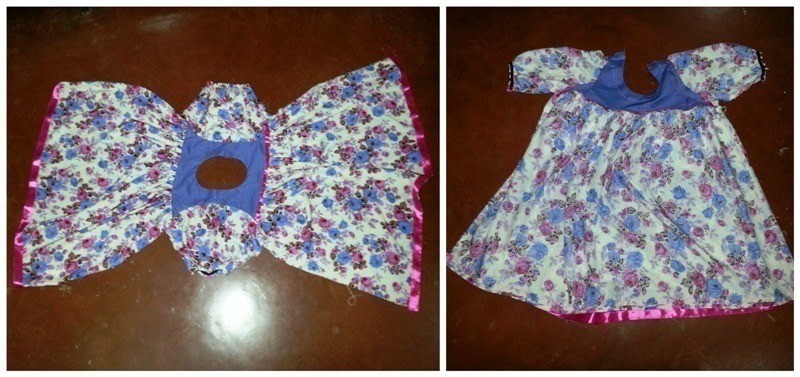
Now, sew these 2 pieces with the upper part. Create small folds on the lower parts fabric (for shirring) while sewing it with the upper part. Similarly sew the other side
-
 Step 11
Take a piece of elastic lace (or you can also use elastic thread, that's another technique). The elastic lace has to be half of the sleeves cuffs length (see picture). You'll have to sew the elastic lace on the wrong side of the sleeves. Start sewing from one side. Stretch the elastic lace and sew over the stretched elastic lace. After you're done sewing you'll see the elastic lace has shirred the sleeves cuff.
-
 Step 12
Now, attach the sleeves with the dress. Sewing the sleeves might seem a little tricky if you're a beginner! In that case, it's better to take help from a good sewing tutorial website
-
 Step 13
Now that we've attached all parts together, all you need to do is sew around the sides. It's better to sew twice around the sides. I also attached a bow with the dress, it looks sooo cute! There, cute floral dress is ready.


 1
Watercolor Art »
Watercolor Paints Made From Make Up
1
Watercolor Art »
Watercolor Paints Made From Make Up
