


About
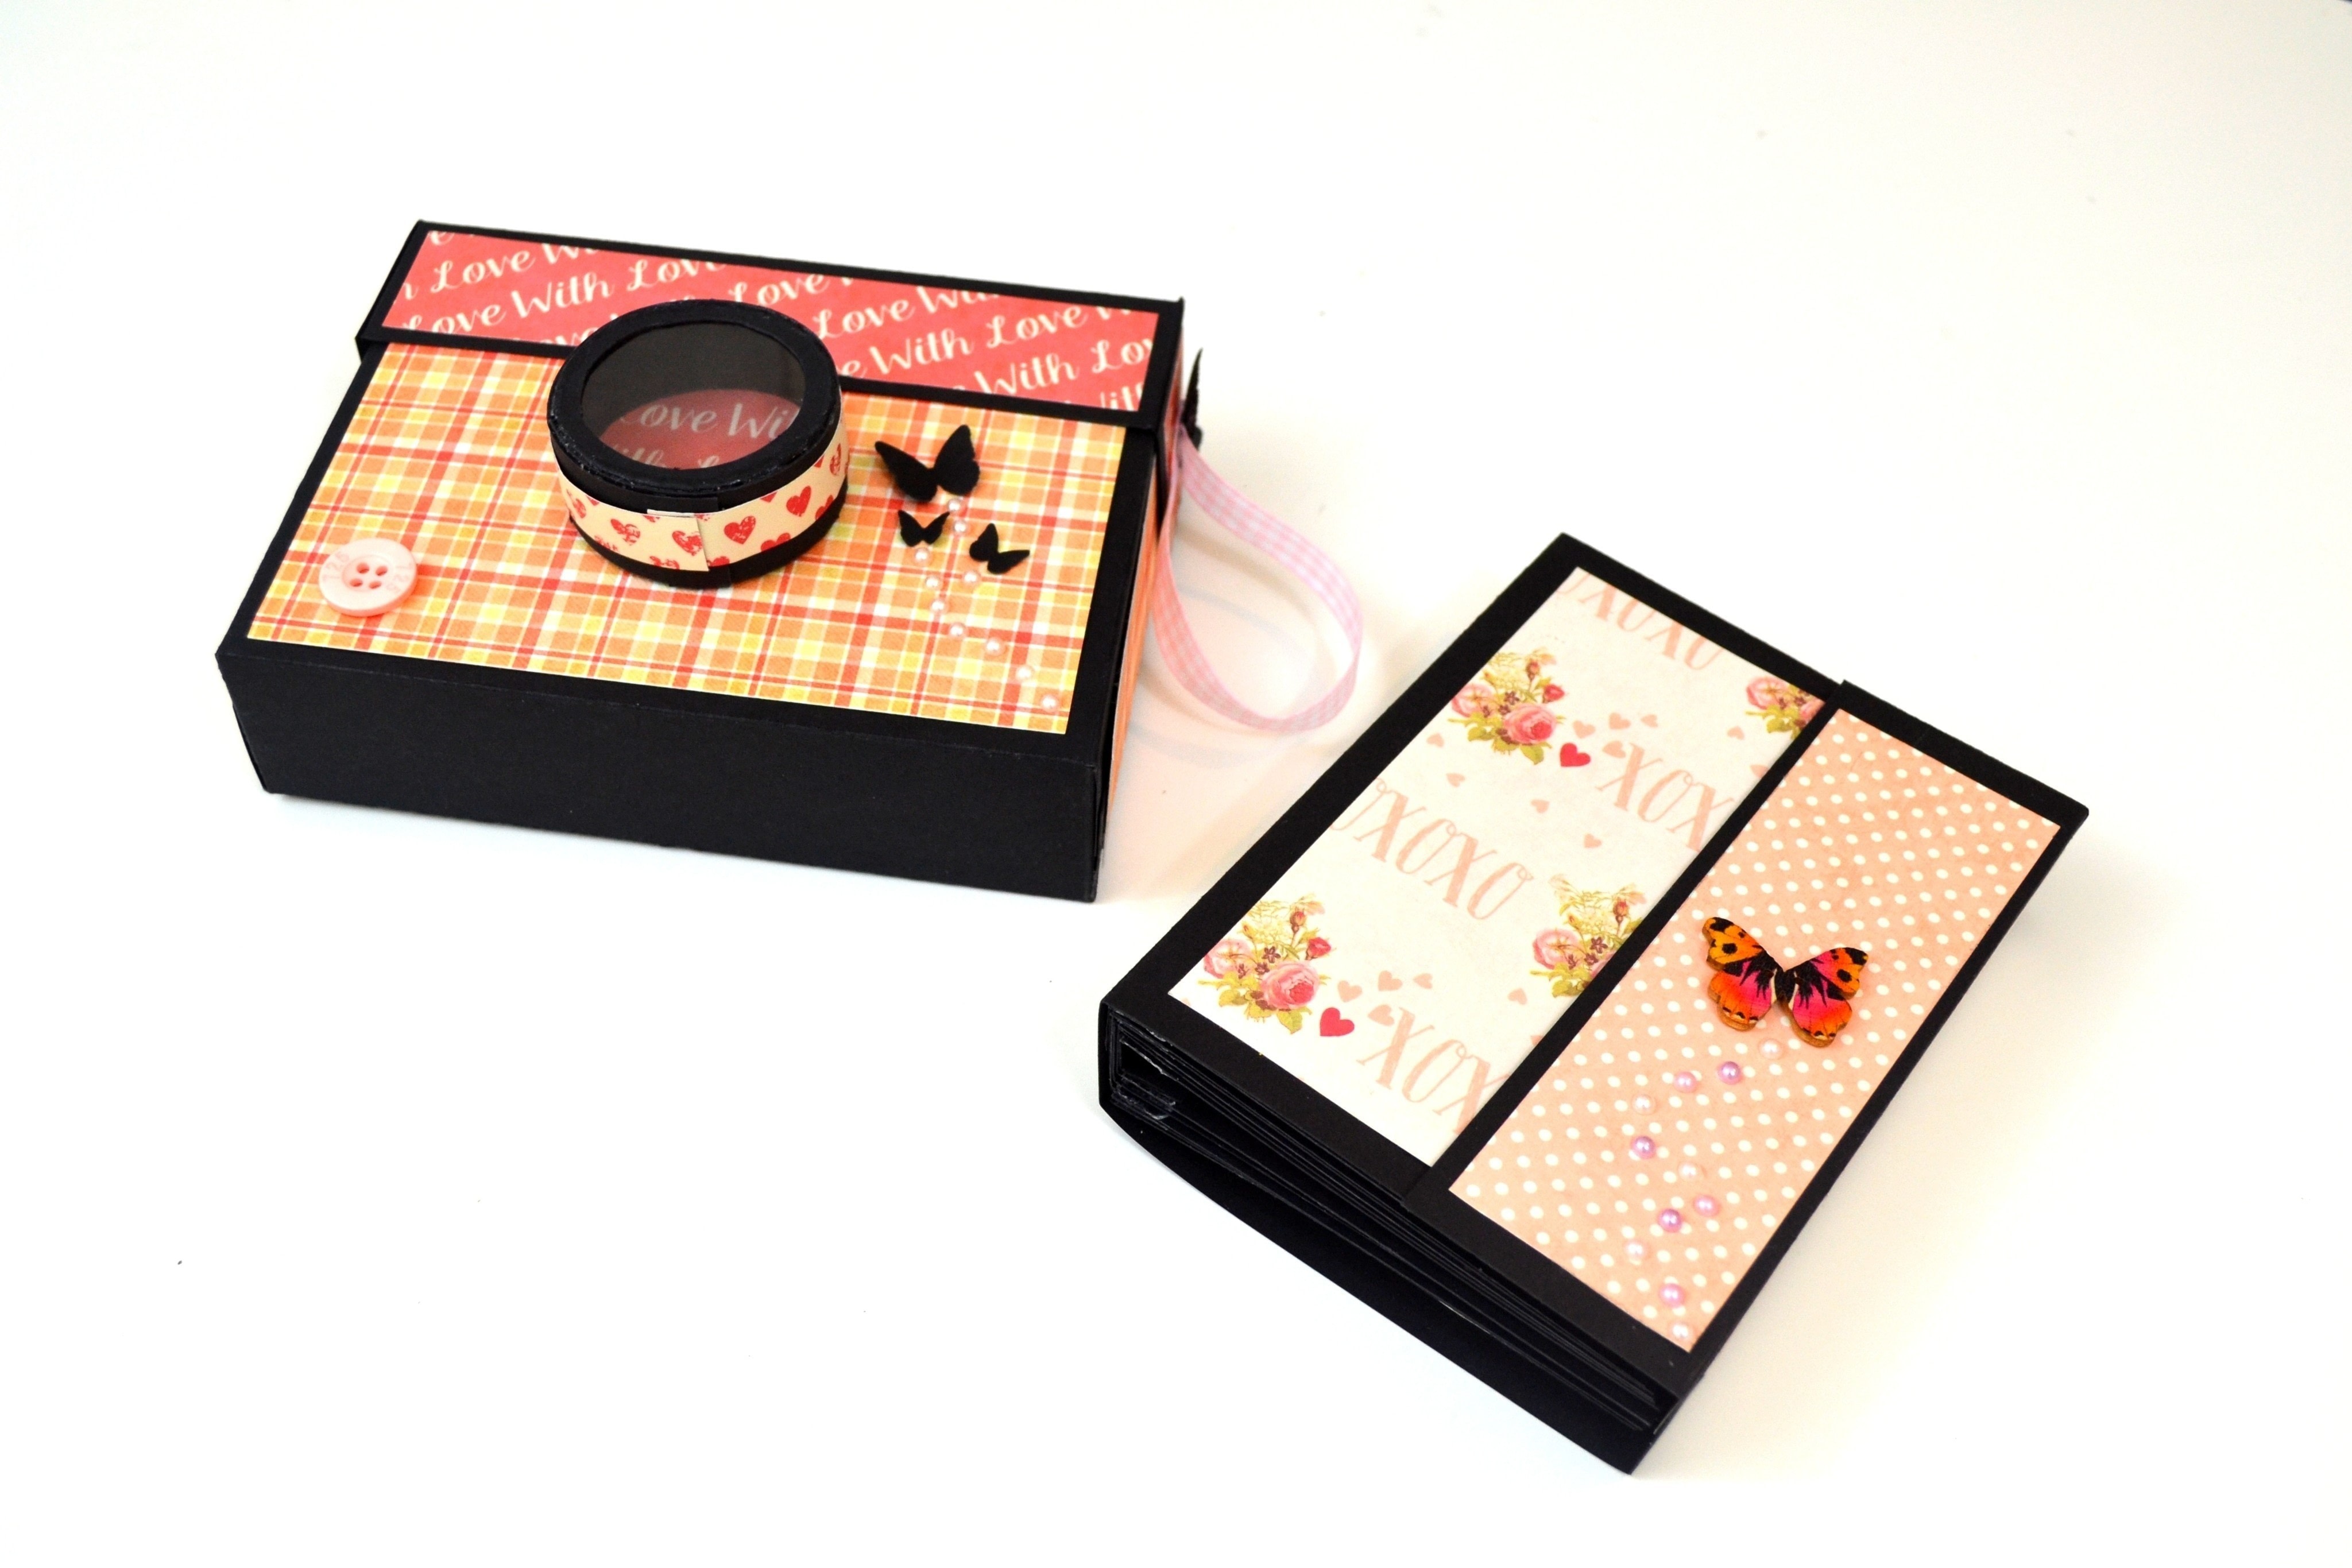
Learn how to make this lovely Camera Box - Step by step Tutorial
I know that it's still a little bit of time until Valentine's Day but I wanted to make sure that I won't need to rush and come with a last minute gift. I did this album for my husband, I love him and wanted to give him something special, something made by hand, something unique :)
I'm sure you gonna love this Creative Gift Idea.
If you'll do it, the recipient of your Camera Box will love your creation! In this step by step tutorial you will learn how to make this Photo Album that you can give it like a gift for Valentine's Day, Mothers Day, Birthdays etc.
With this handmade Album you can prove to your loved ones that you care about them & you are willing to create special gifts and not just buy them. Remember, without love we are lost ! :)
★ ★ ★ ★ ★ ★ ★ ★ ★ ★ ★ ★ ★ ★ ★ ★ ★ ★ ★ ★ ★ ★
Subscribe to our channel: www.giuliasart.co.uk
Visit our Shop on Etsy: www.giuliasart.co.uk
Watch more awesome crafts here: www.giuliasart.co.uk
Your Likes, Comments & Share motivate us to prepare more craft ideas and tutorials for you. So please like, share, and comment.
Tags
-
 Aaron B. commented on Diy Crafts How To Make A Camera Box Mini Album
01 Mar 10:10
Aaron B. commented on Diy Crafts How To Make A Camera Box Mini Album
01 Mar 10:10
-
 Jaimie C. commented on Diy Crafts How To Make A Camera Box Mini Album
12 Feb 16:24
Jaimie C. commented on Diy Crafts How To Make A Camera Box Mini Album
12 Feb 16:24
-
 SilverSnake S. favorited Diy Crafts How To Make A Camera Box Mini Album
24 Aug 10:35
SilverSnake S. favorited Diy Crafts How To Make A Camera Box Mini Album
24 Aug 10:35
-
 RareJewel favorited Diy Crafts How To Make A Camera Box Mini Album
21 May 08:47
RareJewel favorited Diy Crafts How To Make A Camera Box Mini Album
21 May 08:47
-
 JadeSucksAtLife favorited Diy Crafts How To Make A Camera Box Mini Album
01 Mar 13:34
JadeSucksAtLife favorited Diy Crafts How To Make A Camera Box Mini Album
01 Mar 13:34
-
 Giulia's Art published her project Diy Crafts How To Make A Camera Box Mini Album
28 Feb 10:37
Giulia's Art published her project Diy Crafts How To Make A Camera Box Mini Album
28 Feb 10:37
-
Step 1
Watch the whole tutorial on youtube:
For some people it's easier to watch a video than following step by step photos.
So if you are one of them I hope that this video will help you !
-
 Step 2
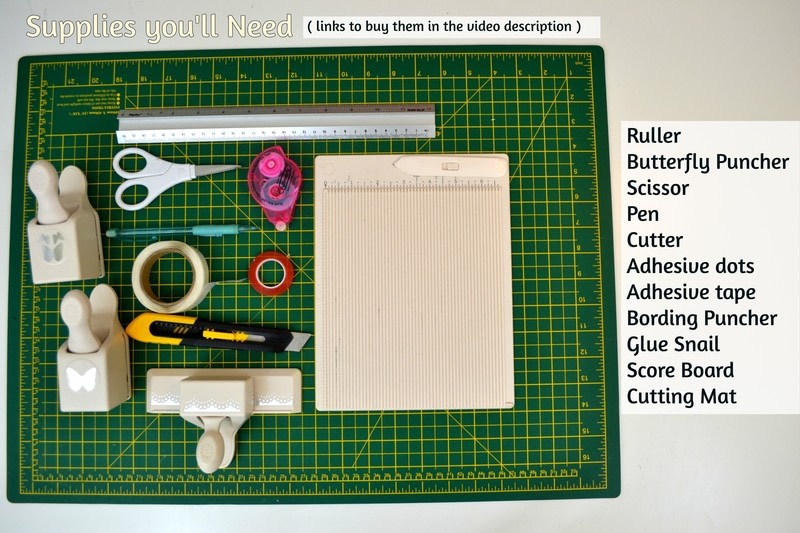
Gather Your Tools & Supplies!
You need:
Double sided adhesive tape
Glue dots
Glue snail
Score board
Cutting mat
Cutter
Exact-o-knife
Sccisors
Butterfly puncher
Ruler
Pencil -
 Step 3
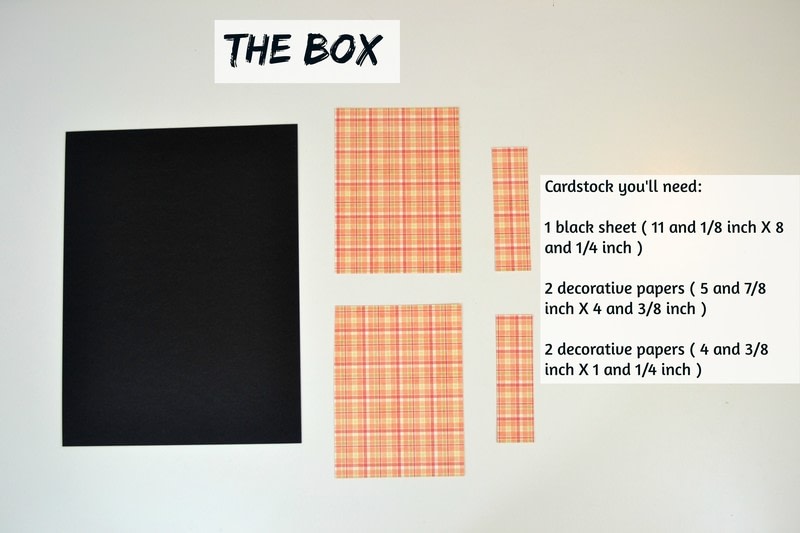
Step 3: Making the Box ( Dimensions )
To make the box you will need :
Black cardstock
Decorative paper -
 Step 4
Making the Box ( Signing and Cutting the Black Cardstock )
Sign the card on the long side.
Unite the points.
Sign on the short side.
Unite the points.
Score along the lines.
Cut little V shapes on the small rectangles. -
 Step 5
Making the Box ( Assembling It )
With a bone folder, fold along the lines.
Add adhesive tape on the small rectangles.
Also add adhesive tape on two long rectangle.
Stick the long side ( the one with the adhesive tape on ) on the small rectangle.
Now stick the other rectangle on top of the previous one.
Repeat the process for the other side and you should obtain the box. -
 Step 6
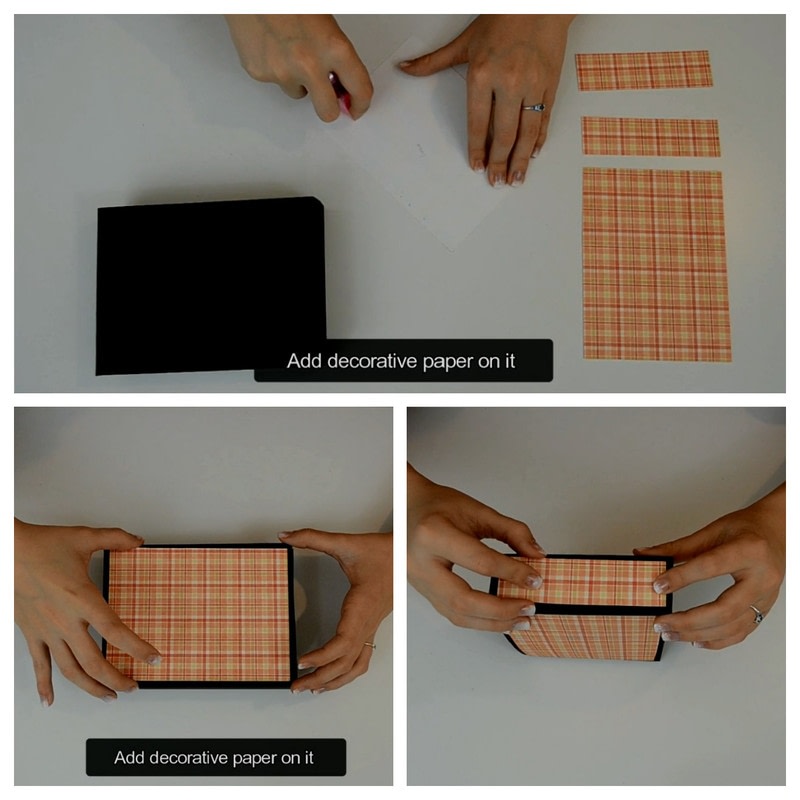
Making the Box ( Add the Decorative Paper )
With a glue snail, stick the decorative paper on the box.
-
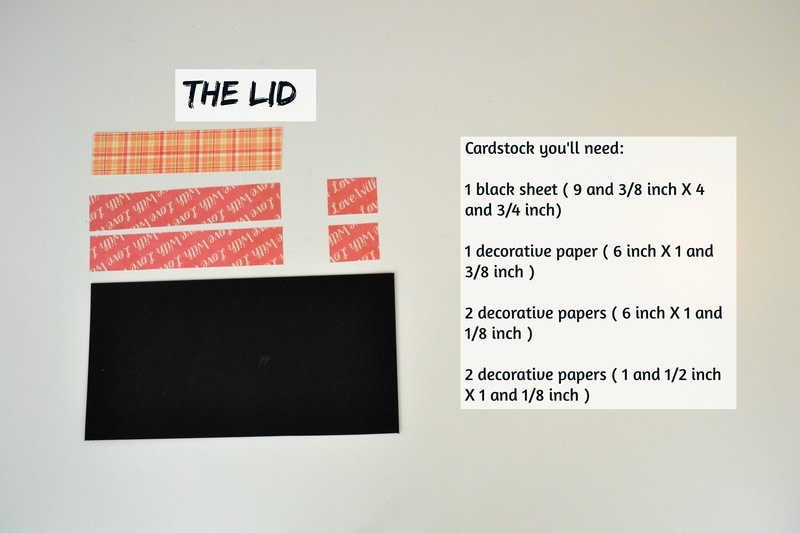
 Step 7
Making the Lid ( Dimensions )
To make the lid you will need:
Black cardstock
Designed paper -
 Step 8
Making the Lid ( Signing and Cutting the Black Cardstock )
Sign the black cardstock along the sides.
Unite the points.
Cut little V shapes same as I did. -
 Step 9
Making the Lid ( Assembling It )
Score along the lines.
Fold along the scored lines.
Add adhesive tape on all the corners.
Stick the sides together.
Stick the middle rectangle on top of them.
Repeat the process for the other side, then you should obtain the lid :) -
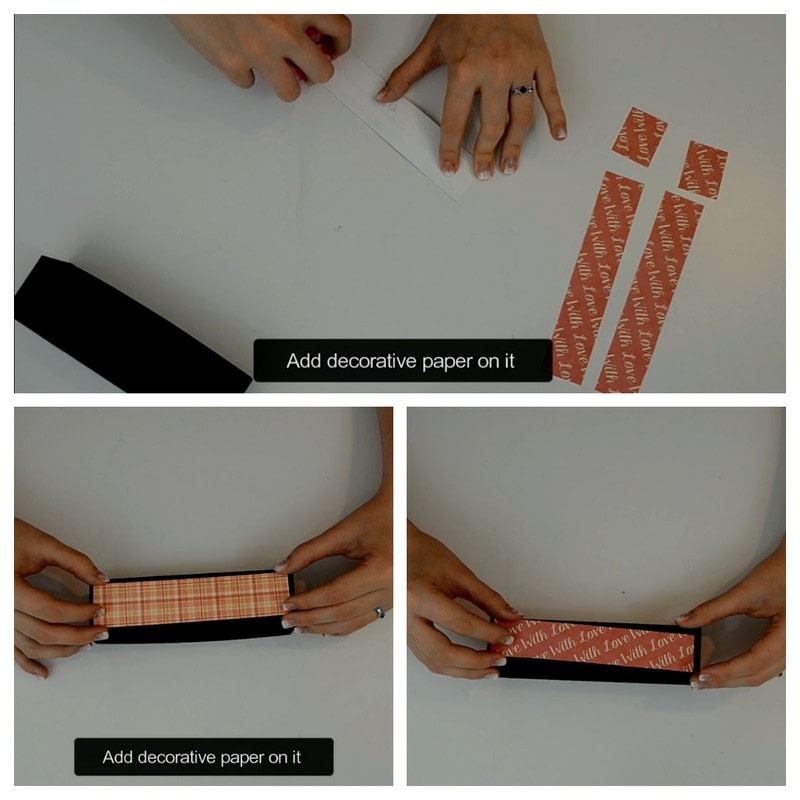
 Step 10
Making the Lid ( Add the Decorative Paper )
With a glue snail, add the decorative paper on the lid.
-
 Step 11
Making the Lens ( Dimensions )
To make the lens you will need:
Decorative paper
Black cardstock
Transparent sheet. -
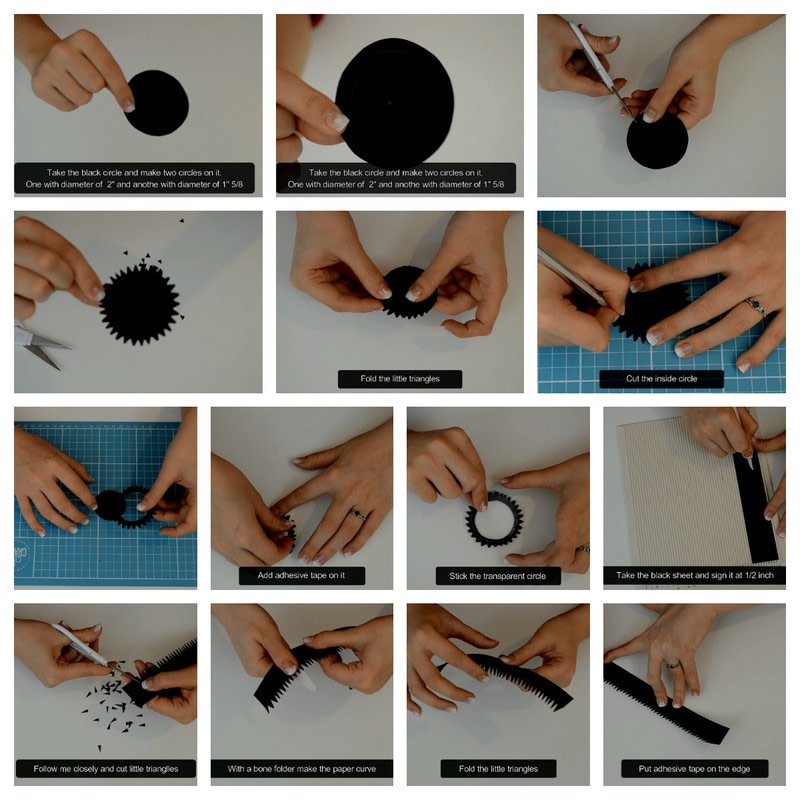
 Step 12
Making the Lens ( Preparing the Parts )
Take the black cardstock circle and draw other two concentric circle.
Cut small triangle up to the middle circle.
Fold the little triangle.
With a cutter or an exact-o-knife, cut the inside circle.
Add adhesive tape on the inside of the circle.
Add the transparent circle.
Take the black cardstock strip and score it at 1/2".
Cut small triangles on the small side of stripe.
with a bone folder make it curve.
Add adhesive tape on the edge of it. -
 Step 13
Making the Lens ( Assembling It )
Stick the decorative circle on top of the triangles.
Cut off the extra triangles.
Add some adhesive tape at the end of the strip to close the cylinder.
Now take off the protective film from adhesive tape and stick the triangles from the circle inside the cylinder. -
 Step 14
Making the Lens ( Add the Decorative Paper )
Add adhesive tape on the decorative strip and stick it on the side of the lens.
-
 Step 15
Attaching the Lens to the Box
Using some glue dots, attache the lens to the box.
-
 Step 16
Decorating the Camera Box
Using glue dots, add some buttons on the top of the lid as well as on the box.
With a butterfly puncher, make some butterflies on the side of the lens
Also add some half pears nearby butterflies.
On the side of the lid stick a piece of ribbon.
On top of it, add a big butterfly. -
 Step 17
Making the Photo Album for the Camera Box.
Watch the video tutorial here:
https://www.youtube.com/watch?v=UTVs4p3rDbc -
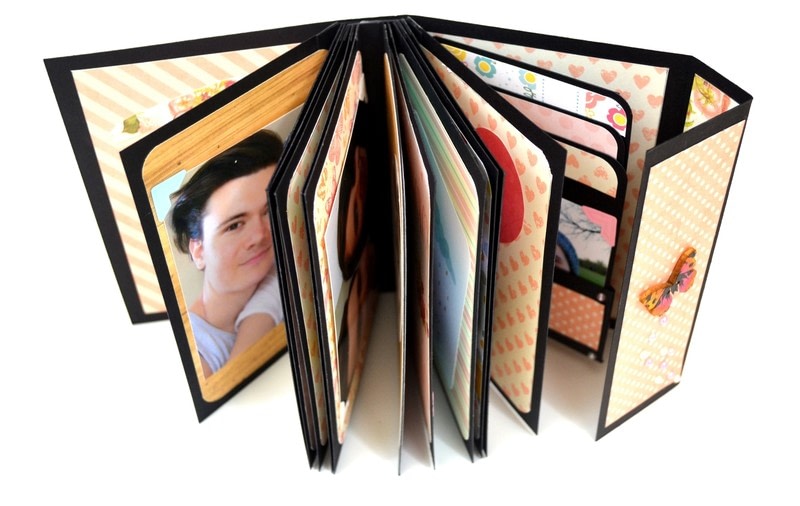
 Step 18
That's It!
Now you know how to do a Camera Box - Photo Album :)
-
 Step 19
More Project Videos!
Perhaps you'll like some of my other crafts.
Check them out at: http://giuliasart.com
Write me your comments about this project on my Youtube video(comments section)!
Thanks :)


Comments


