


About
"Why Buy it if you can make it?!"
Tags
-
 Rebecca C. favorited Diy: Cosmic Shirt
10 Jul 04:42
Rebecca C. favorited Diy: Cosmic Shirt
10 Jul 04:42
-
 olivoyle favorited Diy: Cosmic Shirt
29 May 09:45
olivoyle favorited Diy: Cosmic Shirt
29 May 09:45
-
 tmissy76 favorited Diy: Cosmic Shirt
09 Apr 05:04
tmissy76 favorited Diy: Cosmic Shirt
09 Apr 05:04
-
SexyMonie S. favorited Diy: Cosmic Shirt
21 Feb 20:07
-
 Mei-Ling W. favorited Diy: Cosmic Shirt
10 Feb 09:23
Mei-Ling W. favorited Diy: Cosmic Shirt
10 Feb 09:23
-
 Elentine added Diy: Cosmic Shirt to T-shirt recon
08 Feb 00:27
Elentine added Diy: Cosmic Shirt to T-shirt recon
08 Feb 00:27
-
Christine B. favorited Diy: Cosmic Shirt
21 Jan 02:35
-
 TwinkleTime favorited Diy: Cosmic Shirt
23 Oct 01:16
TwinkleTime favorited Diy: Cosmic Shirt
23 Oct 01:16
-
 Layne H. added Diy: Cosmic Shirt to likes
28 Sep 15:19
Layne H. added Diy: Cosmic Shirt to likes
28 Sep 15:19
-
Layne H. favorited Diy: Cosmic Shirt
28 Sep 15:18
-
 Step 1
What You Will Need:
Bleach
Nail Polish [your choice of shade]
Brush or Spray Bottle
Black Cotton Shirt -
 Step 2
box to separate the back and front
-
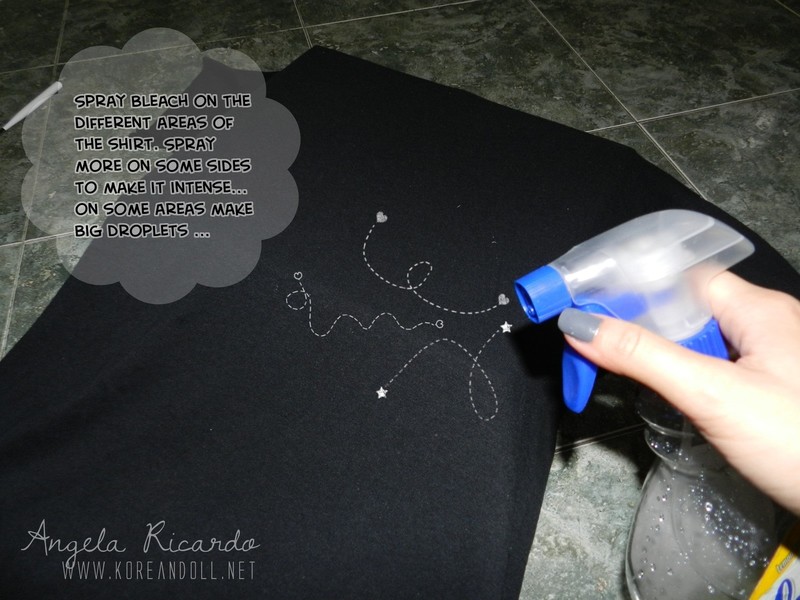
 Step 3
spray on different areas
-
 Step 4
some were sprayed one, while some where droplets
-
 Step 5
start swishing nail polish
-
 Step 6
I have used 3 different colors
-
 Step 7
optional but highly suggested "sparkly" nail polish
-
 Step 8
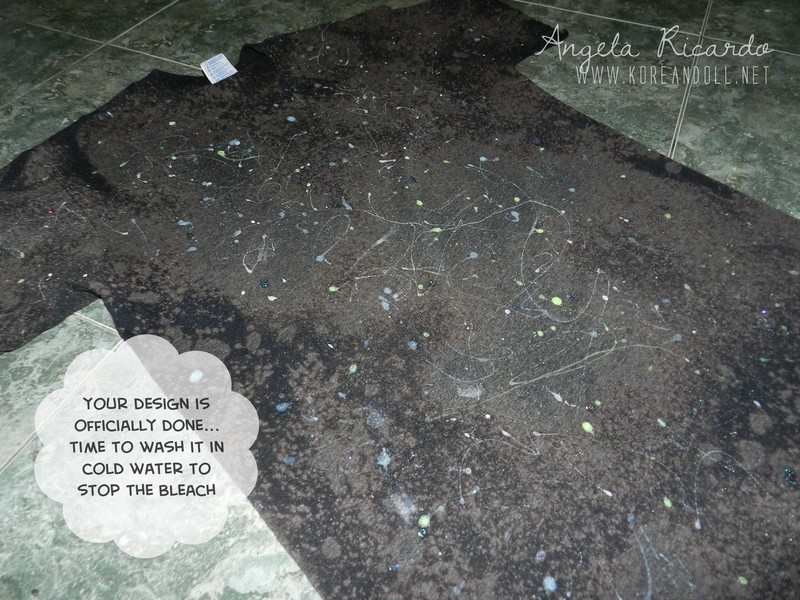
as time passes by the bleached areas gets more visible.
-
 Step 9
wash out the shirt with cold water to stop the bleach
-
 Step 10
design gets more visible as it dries up
-
 Step 11
close up of design
-
 Step 12
dried up shirt!
-
 Step 13
sheer the bottom
-
 Step 14
and knot away
-
 Step 15
Finish Product!


make sure to leave the bleach for a longer time to make sure it lightens. Depending on the material of your fabric it can take longer or faster. The longer you leave the lighter that orange shade will get.
TC! xox