


About
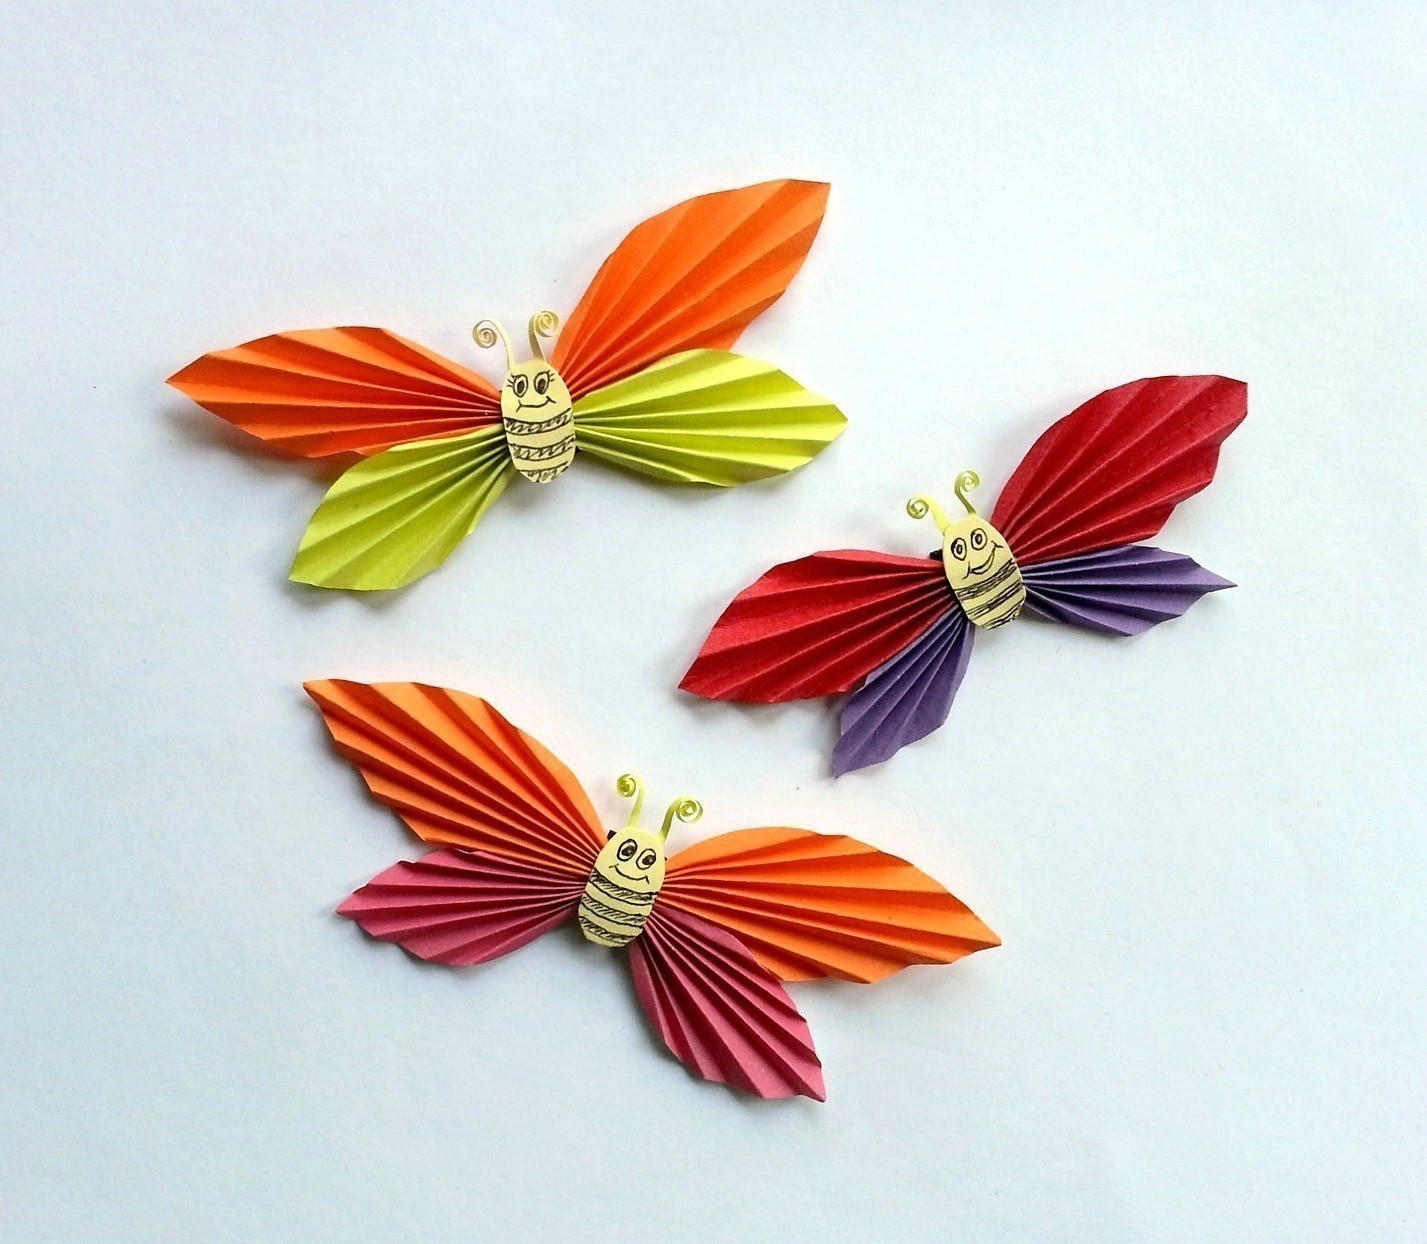
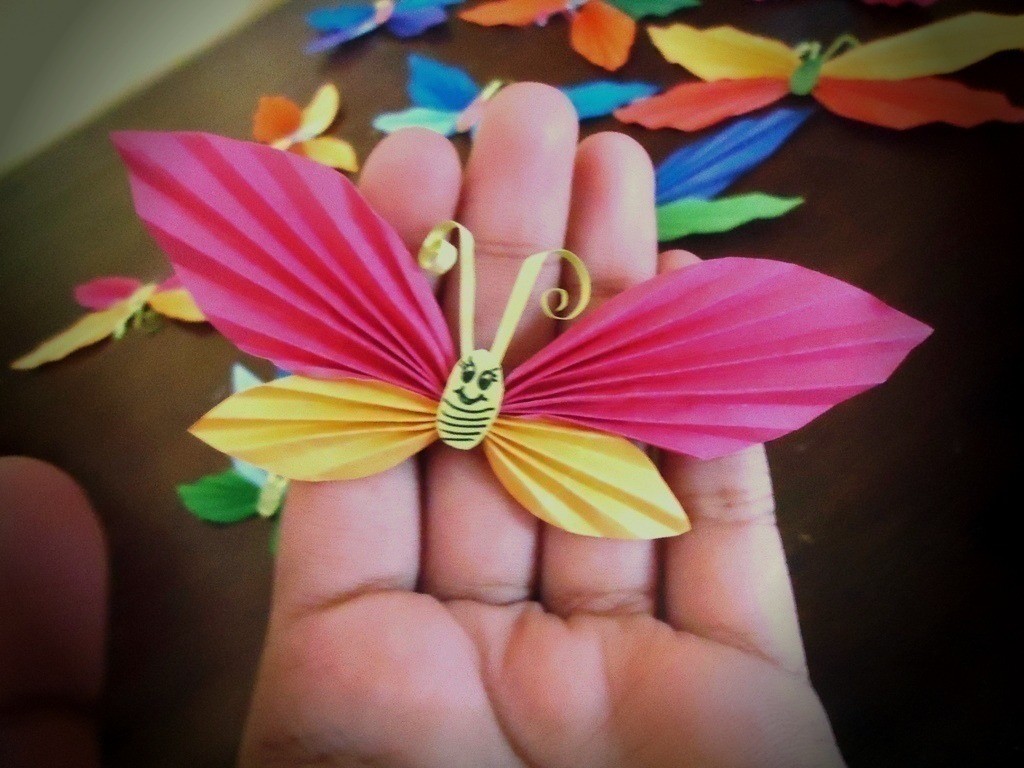
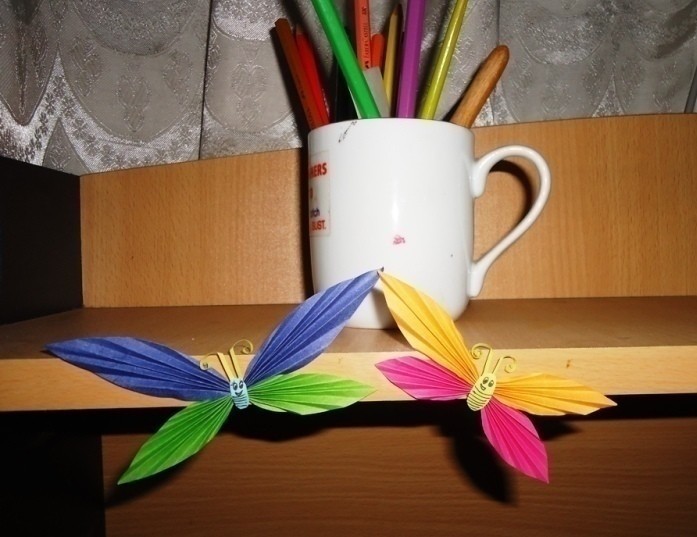
Paper Butterfly Stickers with Smileys!
I made these butterflies a while ago for decorating my room and my friends started requesting me to make these paper butterflies for them. I've lost count on how many of these butterflies I've made so far!
Here's the tutorial, I hope it's helpful :)
Tags
-
 Key West Witch favorited DIY Paper. Butterfly
26 Jun 22:57
Key West Witch favorited DIY Paper. Butterfly
26 Jun 22:57
-
 Caden Kaslik favorited DIY Paper. Butterfly
25 May 20:49
Caden Kaslik favorited DIY Paper. Butterfly
25 May 20:49
-
 Sheri P. favorited DIY Paper. Butterfly
15 Mar 08:04
Sheri P. favorited DIY Paper. Butterfly
15 Mar 08:04
-
 Rachel I. favorited DIY Paper. Butterfly
15 Mar 07:47
Rachel I. favorited DIY Paper. Butterfly
15 Mar 07:47
-
Connie R. added DIY Paper. Butterfly to Diy paper butterfly
14 Sep 07:36
-
Connie R. favorited DIY Paper. Butterfly
14 Sep 07:34
-
Joni M. favorited DIY Paper. Butterfly
09 Aug 02:52
-
 Muhaiminah Faiz entered her project DIY Paper. Butterfly to Petits Pixels
26 Jul 16:37
Muhaiminah Faiz entered her project DIY Paper. Butterfly to Petits Pixels
26 Jul 16:37
-
Christina G. favorited DIY Paper. Butterfly
23 Jul 07:08
-
 Chrissy-Pie favorited DIY Paper. Butterfly
17 Jul 19:46
Chrissy-Pie favorited DIY Paper. Butterfly
17 Jul 19:46
You Will Need
-
 Step 1
You'll need to cut out 6 pieces of paper.
Notice that I've marked each pieces with letters,
A- upper wing,
B-lower wing,
C-antenna,
D-body wrapping
and the small blue paper for the body. -
 Step 2
Use two different colors for the wings (upper and lower). Designing the wings might look attractive.
Fold the A and B paper in half, draw an outline for the wings and cut it. -
 Step 3
After you've cut the wings, start folding them horizontally as shown in the picture.
After folding, squeeze them in the middle and tie with the paper D to attach them (use glue). -
 Step 4
Drawing the smilies is fun! they look so cute :)
Take the paper C's and twirl them in half.
Glue the plain side of the antenna at the back of the butterfly's body -
 Step 5
Now simply glue the smiley faced butterfly body with the wings!
-
 Step 6
Cut a small piece of double-sided tape and attach it at the back of the paper butterfly.
Now you can stick these cute paper butterflies anywhere you want.


