


About
why be simple when you can have FUNKY!
i picked up a halloween gingerbread house kit for 10 cents.
all i needed to do was change the icing and the decorations.
why stop there? with the use of graham crackers, wafer cookies and a little imagination i created a funky little house.
Tags
-
 Step 1
gather your supplies.
a box of graham crackers to build your extra levels.
wafer cookies to be used for steps, or support.
lots of icing "glue".
many different types of candies. you never know where you might end up using something.
coconut to be use as snow.
-
 Step 2
usually, when assembling a gingerbread house, it requires a few hands to help hold up pieces.
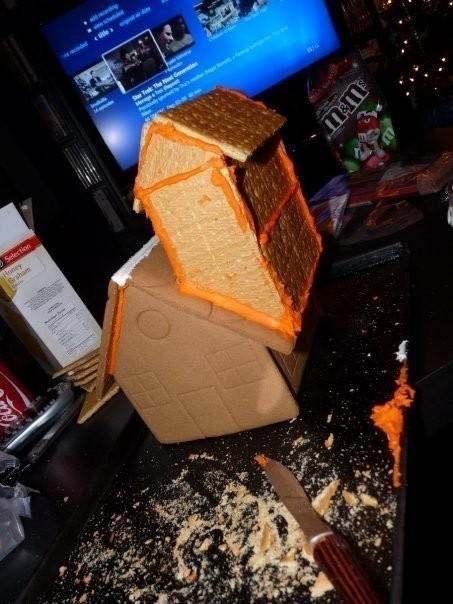
my kit came with an "easy assembling tray"...which definitely made it simple to do.
when you build the basic structure, let it sit for a bit to harden. last thing you want is to start building your second level and have it all fall apart.
from previous experience, i know that you use a lot of icing when building the house. we chose to use up the orange icing that came with the kit, and we would go over the orange with white icing for finish.
-
 Step 3
be gentle with the graham crackers. you don't want to have to "glue" it all together in small pieces, it won't be very strong and could fall apart.
use a butter knife to "score" the parts you want to cut. apply minimal pressure, and keep scoring until the piece breaks off cleanly.
a second set of hands helps with this part. as you can see, our second level slid down the roof a little. we did our best to keep trying to correct it, but it chose to sit there. so we decided to just make do.
-
 Step 4
after your second level starts to harden...work on the roof.
in our case we used christmas colored m & m's.
i wanted a wrap around deck, so i "glued" down the chocolate wafers, and laid the planks of graham crackers over top.
-
 Step 5
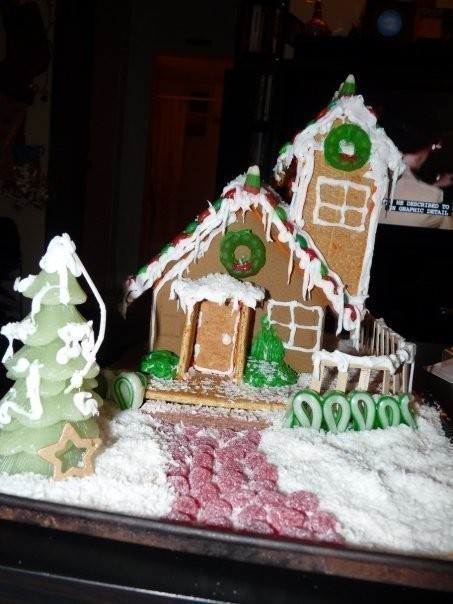
finished project.
i bought some green jelly "wreaths". affixed them to the house, and used red icing to pipe little bows on them.
i cut red ju-jubes in half and placed them down to form a pathway to the house.
i used a ribbon-like candy to serve as bushes.
the tree in the front is a candle i added for decoration.
the railing around the deck was made out of popsicle sticks and glue gun.


I see you have got some helping arms too.LOL