About
Hi Mr. Princess. Make this and your wardrobe will turn into a castle.
I found a whole box in the garage filled with coathangers. Most of them where this old sort without a clear finish, you know, the sort that most likely will give you splinters. I don't like the idea of hanging my clothes on something that might damage them so I decided to fix them, both functionally and esthetically.
This is my take on it, feel free to do whatever you want with this "how to". Not all coathangers looks the same.
Just a heads up. I'm not that good with patterns, neither reading them nor writing them.
Enjoy anyhow.
On another note. Why does it say "by Emma The Princess" on the picture? Because that's one of my nicks. I go by Eutanasi, Suicide Sue or Emma The Princess. So I haven't stolen it or something like that.
-
 ZombieUnicorn favorited Crocheted Coathanger
14 Jan 22:52
ZombieUnicorn favorited Crocheted Coathanger
14 Jan 22:52
-
 EmmaThePrincess entered her project Crocheted Coathanger to Kawaii Box
29 Sep 20:44
EmmaThePrincess entered her project Crocheted Coathanger to Kawaii Box
29 Sep 20:44
-
 ebretherick favorited Crocheted Coathanger
07 Feb 01:29
ebretherick favorited Crocheted Coathanger
07 Feb 01:29
-
 l33tingl4dy favorited Crocheted Coathanger
25 Aug 17:21
l33tingl4dy favorited Crocheted Coathanger
25 Aug 17:21
-
Eutanasi entered her project Crocheted Coathanger to Dremel Multi-Tool Contest
19 Mar 19:34
-
 SilverSnake S. favorited Crocheted Coathanger
31 Aug 18:00
SilverSnake S. favorited Crocheted Coathanger
31 Aug 18:00
-
 Step 1
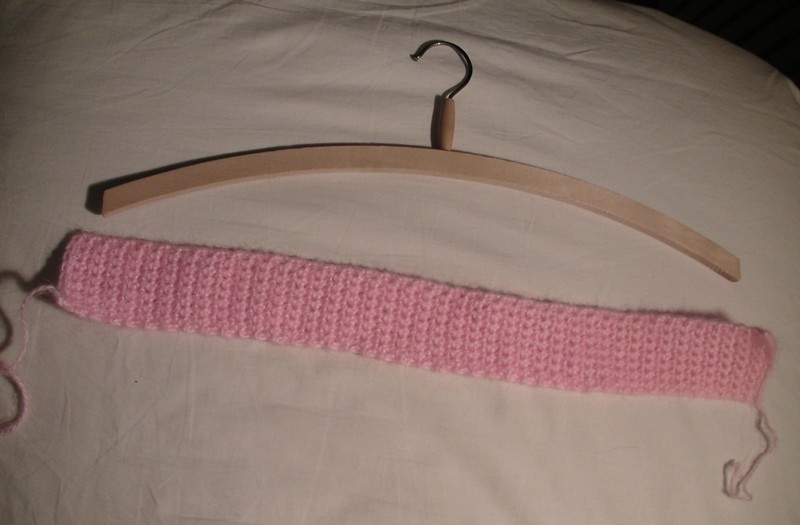
First measure your coathanger. Mine was 44 cm long and 5 cm in circumference.
Put on the amount of stitches that you think you might need. You can either do them lengthwise or widthwise.
I did mine widthwise because I think the first row is so tricky and I prefer 8 stitches per row to 50. It would be more practical to do them lengthwise though, since the elasticity would be to your advantage then.
-
 Step 2
Now take your piece and make sure that it covers your coathanger. Does it? Great.
I pinned it with safety needles (since I just happened to have like 200 of them close by) to make it stay put.
-
 Step 3
Then sew it together with the same kind of yarn you. Sew the top first, then the sides. Make sure that you get the short sides even.
-
 Step 4
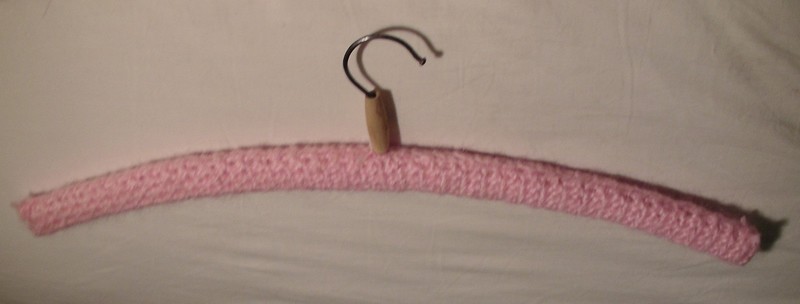
This is what your coathanger should look like now. You could stop here if you want to, but as you can see, I've got this annoying wooden piece still showing. That piece has no purpose except for being decorative and I think it fails at that.
-
 Step 5
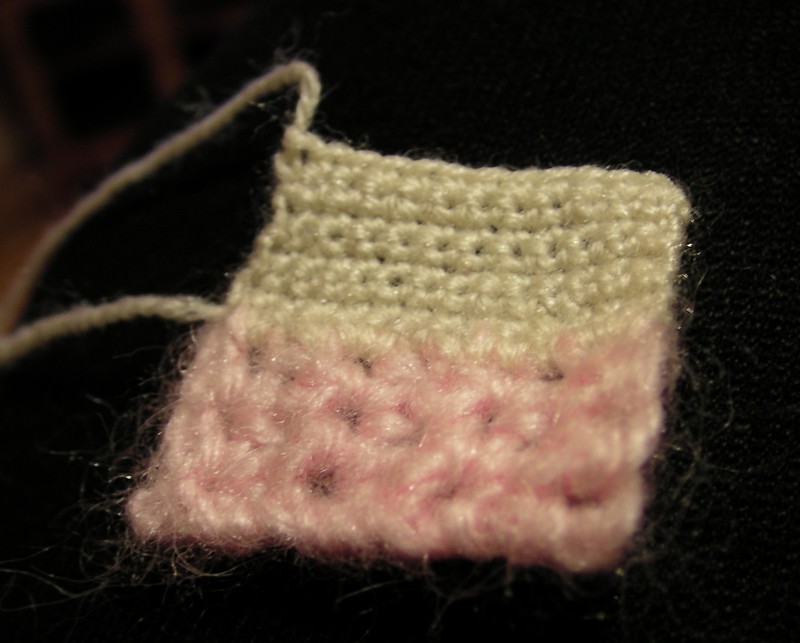
Crochet a piece big enough to fit around the wooden piece. I did it three stitches high.
-
 Step 6
Then crochet the rest with white.
-
 Step 7
The rest?
Yes, you want it to be high enough to cover the entire wooden piece. -
 Step 8
Gather some white lace and sew it on to the front (the side you want showing)of the piece. Attach it so that the white is covered, use the line between the two colors as a base for the lace.
-
 Step 9
This is what the back looks like of step 8.
-
 Step 10
Sew it around the wooden piece. Sew the white with the white yarn and the pink with the pink yarn.
-
 Step 11
Add a pretty bow, and you're done!