Christmas Tree Baubles
Extract from Rag Rugs, Pillows, and More • By Elspeth Jackson • Published by CICO Books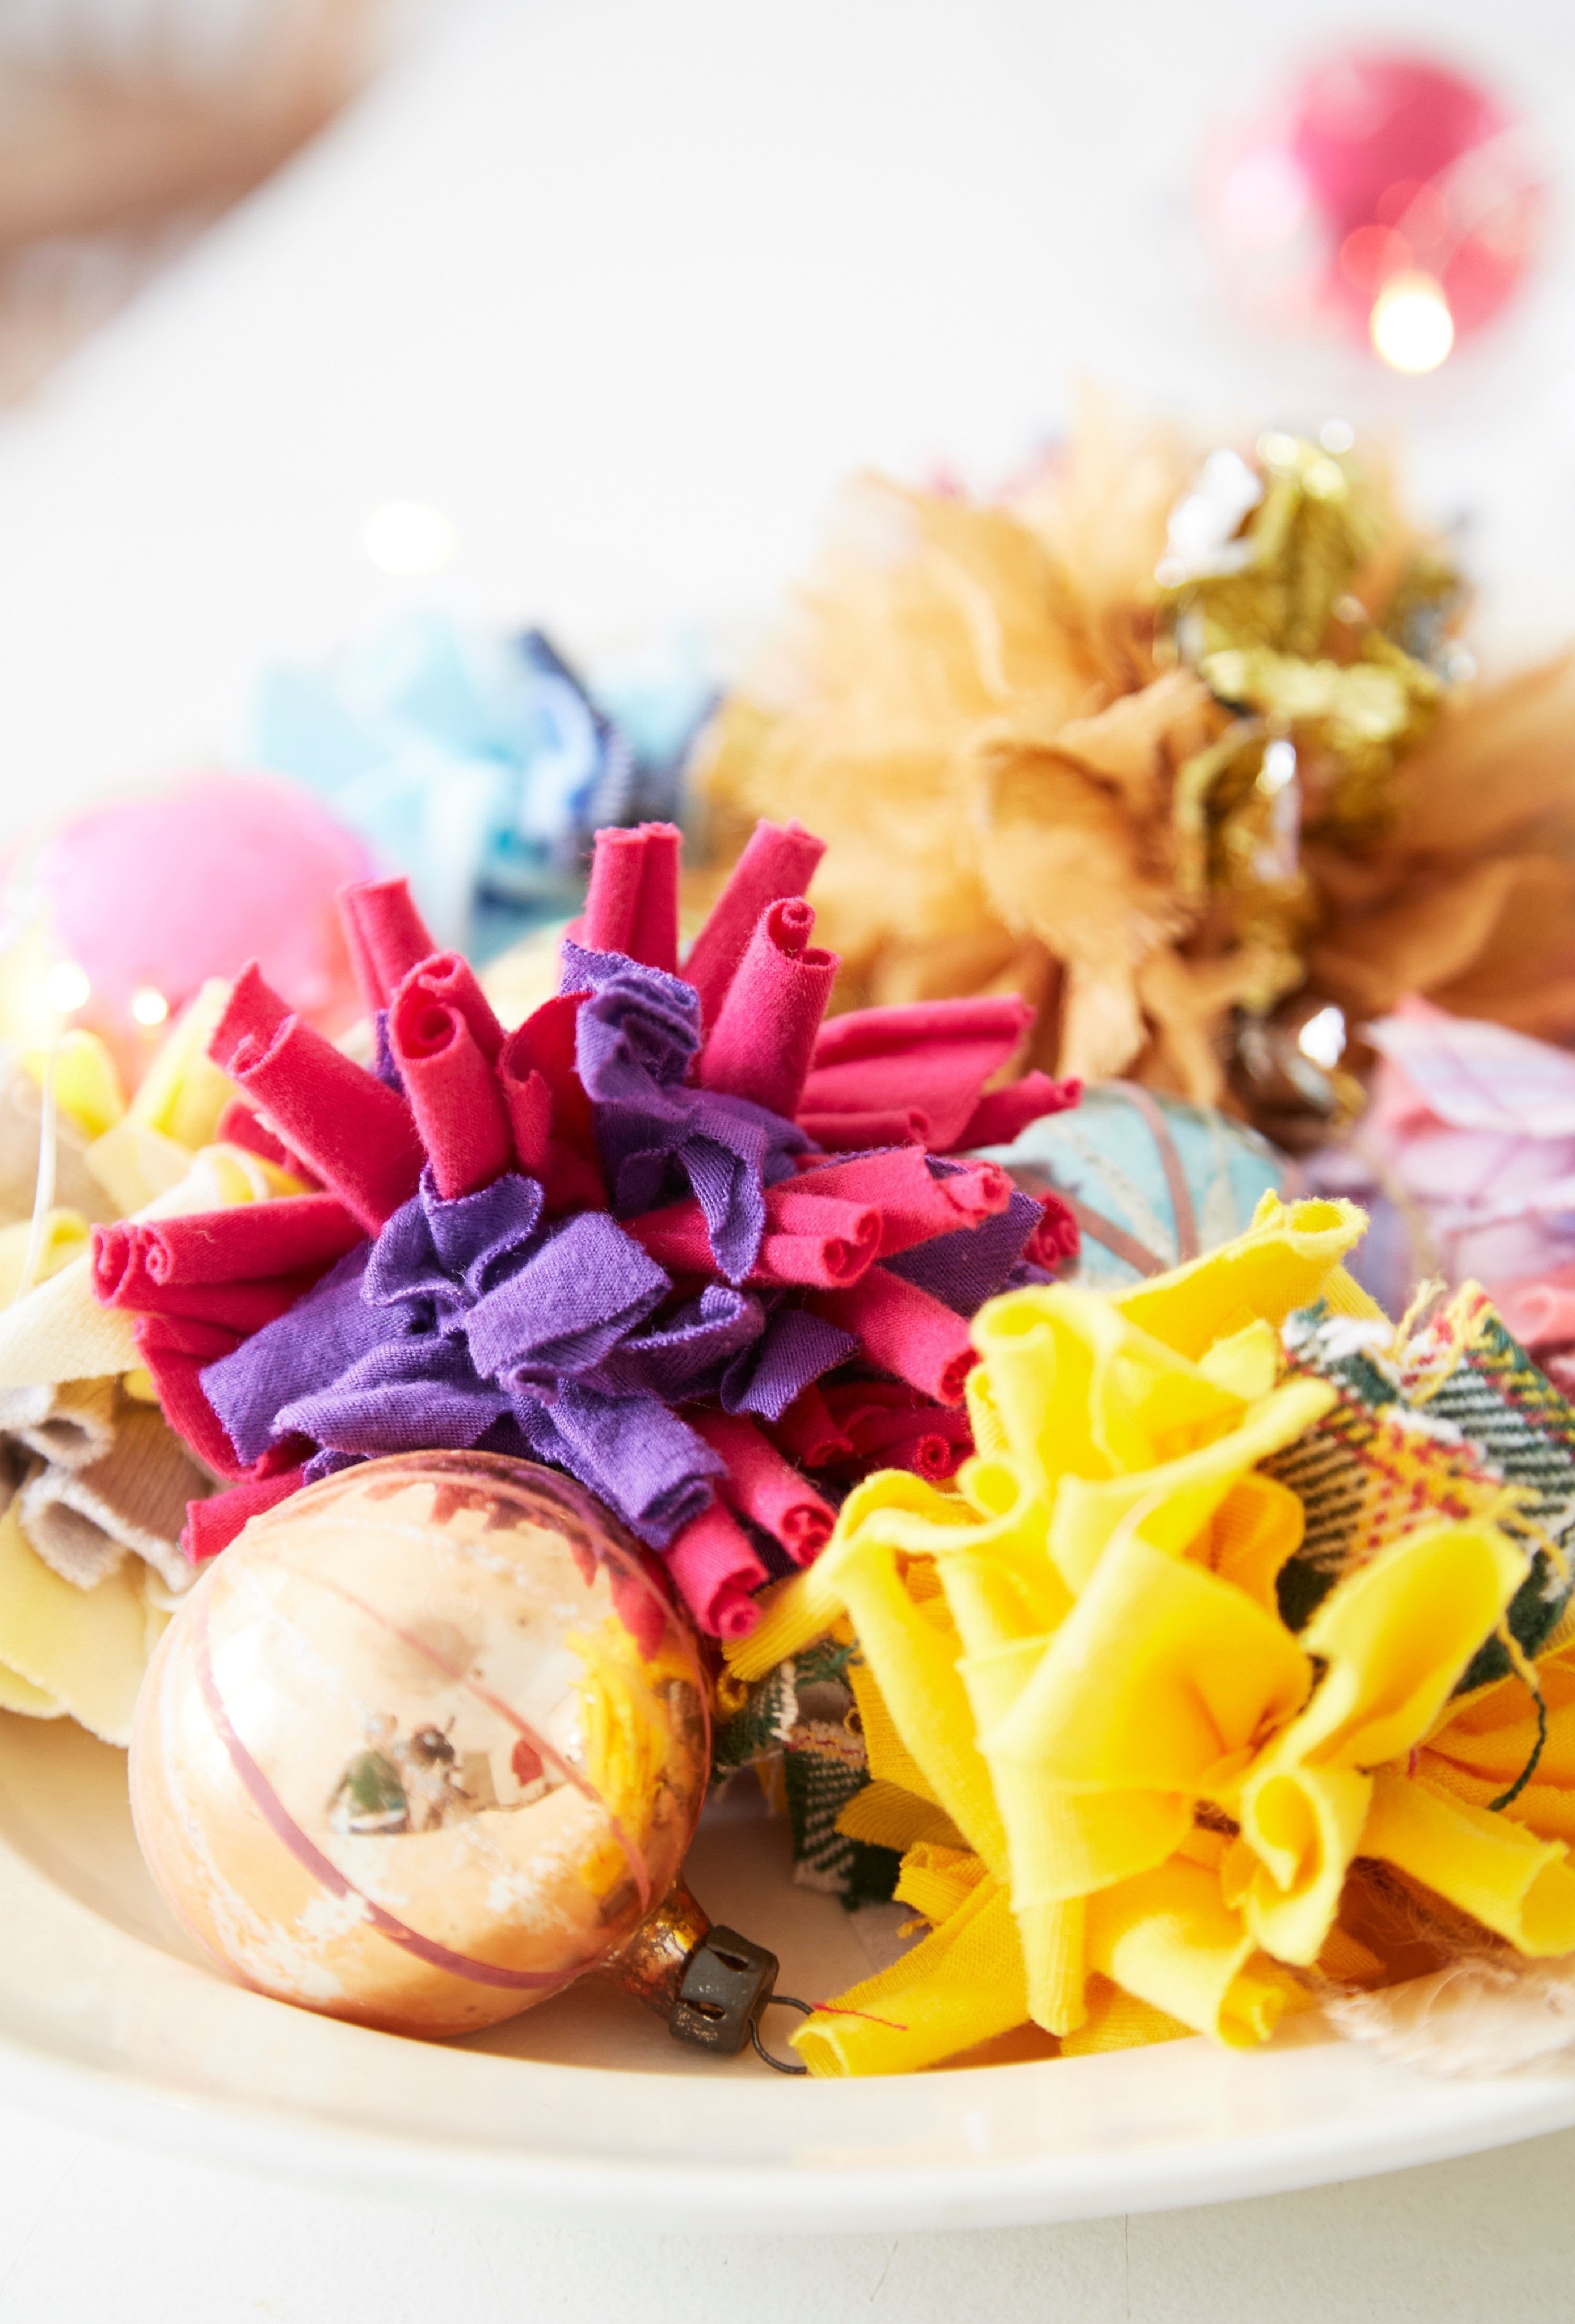


About
Rag Rugs, Pillows, & More
My cats have a field day when Christmas arrives and the decorations come out. They love to bat the vintage baubles off the Christmas tree (surely they’re playthings after all?) and have broken dozens over the years. And so the rag rug bauble was born. Originally they occupied the lower branches as a way for the cats to continue to have their fun, but over the years they’ve made their way further up the tree to places of prominence.
COLOR PALETTE
Anything goes!
Tags
© 2024 Elspeth Jackson / CICO Books · Reproduced with permission. · Rag Rugs, Pillows & More by Elspeth Jackson, published by CICO Books (£12.99) Photography by Emma Mitchell © CICO Books For more information please visit www.raggedlife.com
-
 Key West Witch favorited Christmas Tree Baubles
20 Aug 22:21
Key West Witch favorited Christmas Tree Baubles
20 Aug 22:21
-
 Rainbow Wyvern favorited Christmas Tree Baubles
14 Dec 15:30
Rainbow Wyvern favorited Christmas Tree Baubles
14 Dec 15:30
-
 leann.g.costello favorited Christmas Tree Baubles
07 Nov 21:35
leann.g.costello favorited Christmas Tree Baubles
07 Nov 21:35
-
 Shawnshawn D. favorited Christmas Tree Baubles
07 Nov 02:08
Shawnshawn D. favorited Christmas Tree Baubles
07 Nov 02:08
-
 MARIA A. added Christmas Tree Baubles to FIBER WORKS
07 Nov 00:56
MARIA A. added Christmas Tree Baubles to FIBER WORKS
07 Nov 00:56
-
 Alecia B. favorited Christmas Tree Baubles
05 Nov 13:40
Alecia B. favorited Christmas Tree Baubles
05 Nov 13:40
-
 Crafterella featured Christmas Tree Baubles
03 Nov 23:00
Crafterella featured Christmas Tree Baubles
03 Nov 23:00
-
Ella S. favorited Christmas Tree Baubles
01 Nov 23:30
-
 Emma H. favorited Christmas Tree Baubles
31 Oct 13:32
Emma H. favorited Christmas Tree Baubles
31 Oct 13:32
-
 Ryland Peters & Small published his project Christmas Tree Baubles
31 Oct 09:00
Ryland Peters & Small published his project Christmas Tree Baubles
31 Oct 09:00
-
 Step 1
Christmas Tree Baubles
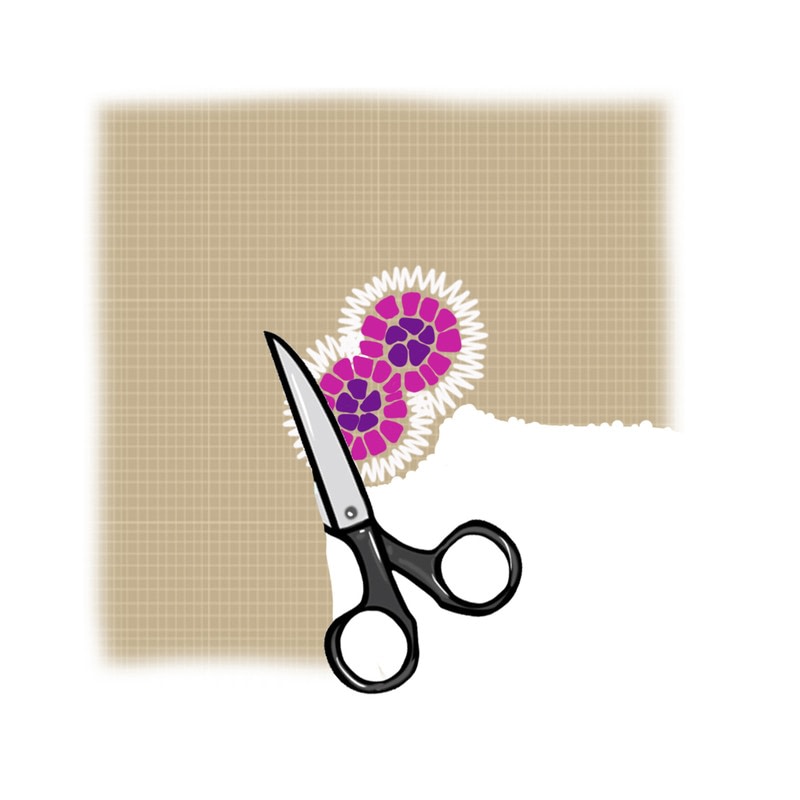
1 Copy the template onto cardboard. Leaving at least 2 in (5 cm) between the edge of the burlap/hessian and the template, draw around the template using the marker pen. Use the sewing machine to hem twice around the template using placeholder hemming stitch to create a secure border. Cut off any loose threads.
2 Choose two fabrics for the bauble. Use your gauge and fabric scissors to cut your fabric into short strips for shaggy rag rugging.
3 Using the fabric you have chosen for the outside of the bauble, shaggy rag rug one row closely around the inside of the hemming. Make sure that the rag rugging meets in the center of the figure-eight shape (here the rag rugging is shown from the reverse side of the burlap).
4 Use your second fabric to fill in the rest of the shape, also using the shaggy technique. The shape should now be fully rag rugged, with no empty holes in the burlap.
TIP
Use other materials for your baubles, such as ribbon, candy wrappers, and sparkly fabrics, for a festive look. -
 Step 2
5 Trim the excess burlap from around the hemming, making sure not to snip any of the stitches or the rag rug pieces. This is best done with everyday scissors from the non-shaggy side of the burlap.
-
 Step 3
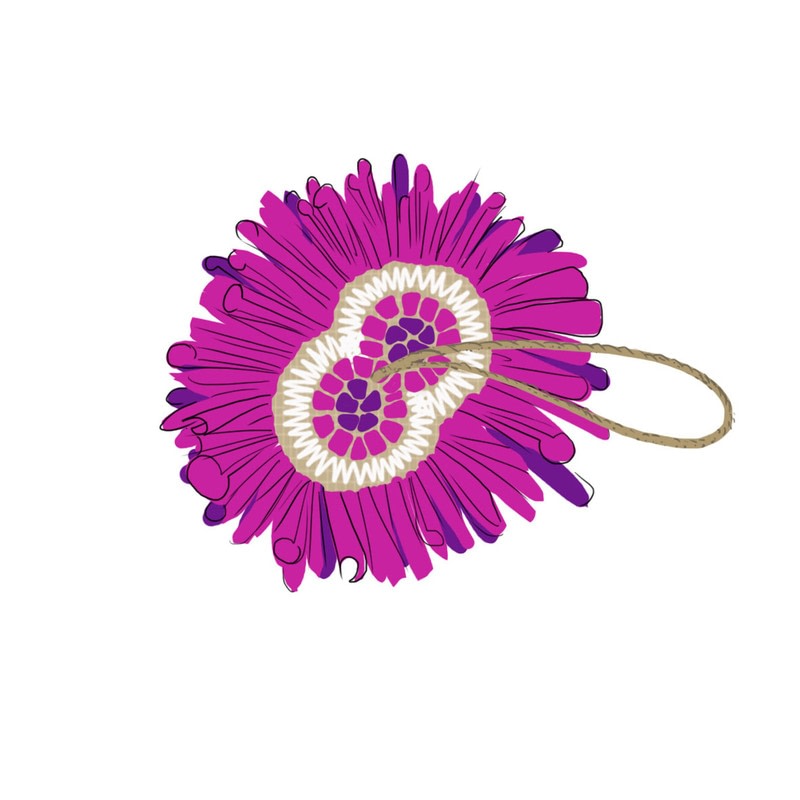
6 To make the hanging loop, tie three strands of burlap or twine together in a knot at one end. Braid/plait the strands and tie a second knot at the bottom. Trim the ends if necessary.
7 Use the glue gun to glue the braid into a loop on the non-shaggy side of the rag rugging. Glue the bauble together by folding the figure-eight in half, sandwiching the loop between the two sides of the burlap. Fluff up the bauble and trim any ends that look out of place.
-
Step 4
PLACEHOLDER HEMMING
1 Leaving at least 2 in (5 cm) between the frayed edge of the burlap and your design, draw your project on the burlap. If your design is a square or rectangle, first follow the “working in straight lines” method to ensure that the edges of your design are in line with the weave of the burlap.
2 Adjust the settings on your sewing machine so that the stitch width is at its widest setting (mine goes up to 6.0) and your stitch length is at its default setting (mine is 2.0). Zig zag stitch around the piece.
-
Step 5
SHAGGY RAG RUGGING
1 Cut your fabric into long strips, about ¾ in (2 cm) wide. Cut the long strips into shorter pieces approximately 2¾ in (7 cm) long, using the gauge. You should now have a pile of short strips to practice with.
2 Hold the latch hook in your main hand. Even though the latch hook has a handle, it is usually easier to hold it further down, nearer the hook, as this gives you more control.
3 Pick up one of the short strips of fabric in your other hand. Hold the top of the strip between your index and middle fingers and the bottom of the strip between your fourth finger and thumb. The part of the strip between your fingers should be taut. This is the part you will be hooking onto on the underside of the burlap.4 Hold the strip of fabric under the burlap in the location where you would like to begin. Insert the hook into your chosen hole from the top of the burlap through to the underside. The latch should be underneath the burlap and still be open at this stage. Hook onto the taut part of the fabric strip.
5 Let go of the top of the strip and pull one end of the strip up through the hole. It is important that you are still holding onto the other end of the fabric strip underneath the burlap or you will pull the entire strip through to the top.
6 Adjust the strip with your fingers so that about half of it is up through the burlap and half is still below.
7 Insert your hook into the next hole (in whichever direction you fancy—up, down, left, right, or diagonal) from the top of the burlap to the underside again. Hook onto the strip.
8 Pull the other end of the strip up through the burlap so that the two ends are pointing upward. There should be one strand of burlap between the two ends of the strip.
9 Repeat steps 3–8 to continue this method. Your first four strips should be close together to tighten the burlap and secure everything in place. For these first strips, I recommend you rag rug the end of the new strip into a hole that already has one end of a strip in. After the first four pieces, you can miss out one to three holes between one strip and the next.