


About
Fun Warning Sign for celebrating Christmas
Hi there!
Thanks for taking a look at this fun Christmas project.
What?
This is not just a paper warning sign, this is a Christmas warning sign.
Why?
I was driving around with my boyfriend. We were listening to a radio station playing Christmas songs, when we drove by a deer crossing road sign. I thought: "the only thing that sign is missing, is a Christmas hat..." and that was when this idea was born.
How?
If you have left-over paper, markers or paint and some glue, this project is self explanatory. Just to help you along (and because I took pictures of the process) I made this how-to :)
I hope you like it. Let me know if you've made a sign of your own or if you have any questions or comments.
Have a great holiday! :D
Xxx,
Cindy
Tags
-
 Lesley H. added Christmas Road Sign Deer Crossing to Christmas
03 Dec 19:40
Lesley H. added Christmas Road Sign Deer Crossing to Christmas
03 Dec 19:40
-
 MissCindy replied to a comment on her project Christmas Road Sign Deer Crossing
16 Feb 12:22
MissCindy replied to a comment on her project Christmas Road Sign Deer Crossing
16 Feb 12:22
-
 Mnemosyn commented on Christmas Road Sign Deer Crossing
14 Feb 12:21
Mnemosyn commented on Christmas Road Sign Deer Crossing
14 Feb 12:21
-
Mnemosyn favorited Christmas Road Sign Deer Crossing
14 Feb 12:20
-
 Cake Eater Sarah favorited Christmas Road Sign Deer Crossing
15 Dec 05:00
Cake Eater Sarah favorited Christmas Road Sign Deer Crossing
15 Dec 05:00
-
MissCindy replied to a comment on her project Christmas Road Sign Deer Crossing
23 Dec 20:24
-
 Abi k. commented on Christmas Road Sign Deer Crossing
19 Dec 17:08
Abi k. commented on Christmas Road Sign Deer Crossing
19 Dec 17:08
-
MissCindy published her project Christmas Road Sign Deer Crossing
17 Dec 14:35
-
Step 1
You have to find a picture of the road sign you'd like to 'Christmafy' ;)
I used the Dutch warning sign for deer crossing over, but you can use an other one or the one they use in your country.
-
 Step 2
To make sure my sign was a good copy, I used a grid for my picture and on my paper.
I did this using paint. I made the grid in a new picture and copied it on my picture.
If you add numbers, you know where to draw you lines.If you are good at copying without a grid, just do that, it saves you an enormous amount of time! But if you know your deer will come out funny, just use a grid.
-
 Step 3
Make the same grid on scale on your paper as you did in step 2.
Draw the right lines in the right boxes (like you probably did when you were little). -
 Step 4
Make the main triangle. Make sure your deer fits. You can use your scale to see how big this must be.
Cut out the deer and erase the lines in the white areas. Use a test piece of paper to see if the pencil lines are visible through the marker (or paint) you use. If it is, than you have to erase every pencil line..
-
 Step 5
Cut out three pieces of paper that will make the border of the sign. Make sure they are big enough.
-
 Step 6
Colour the deer and the borders.
This can take up quite some time if you use markers.. As you can see, markers leave marks that show where you've coloured. To try to avoid this, you have to go over it (at least) twice: horizontally and vertically..I used 1 black and 3 (!!) red markers to get my end result.
-
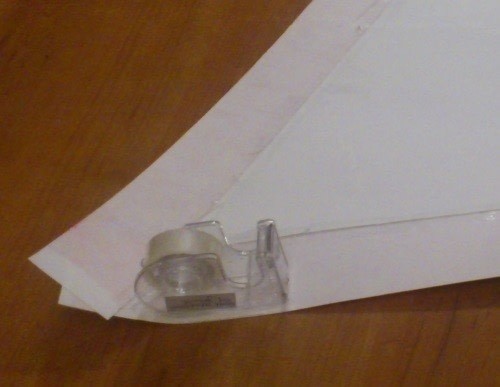
 Step 7
When you are done with colouring, you can attach the deer and the borders on the triangle. I used glue for the deer and tape for the borders.
-
 Step 8
Make sure the edges of your triangle are rounded (like real road signs). I used my protractor for this. I drew half a circle on the back of the sign and cut the excess off.
-
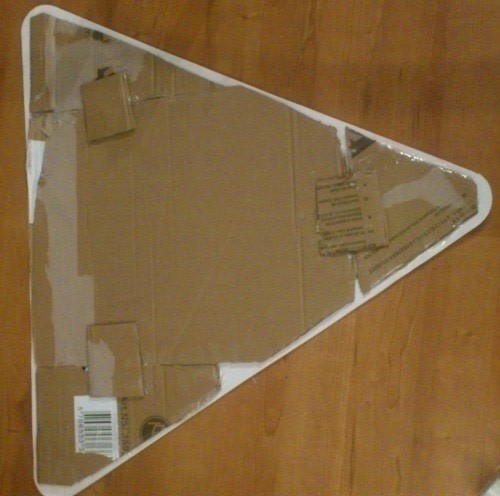
 Step 9
I used cardboard and tape to make sure the sign is firm enough to hang on the wall this Christmas (and hopefully many to come).
Make sure you can hang your sign on your wall. I did that by adding a fishing wire through the back of the sign, but before the cardboard. That way the wire rests on the cardboard.
-
 Step 10
Hang it somewhere you like and you're the owner of a handmade Christmas sign! :D Hopefully you like it as much as I do!


Comments


