


About
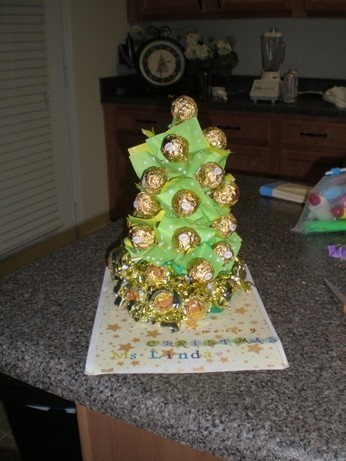
A pretty tree that has some tasty ornaments (:
I made this for my boyfriend's mom for Christmas. This is my first tutorial ever and I hope it's easy for you guys to follow. Thanks for looking and enjoy making some Christmas trees (:
Tags
-
 Bonnie B. added Chocolate Tree to Omnomnom
06 Dec 14:51
Bonnie B. added Chocolate Tree to Omnomnom
06 Dec 14:51
-
 anna wyz favorited Chocolate Tree
30 Nov 02:47
anna wyz favorited Chocolate Tree
30 Nov 02:47
-
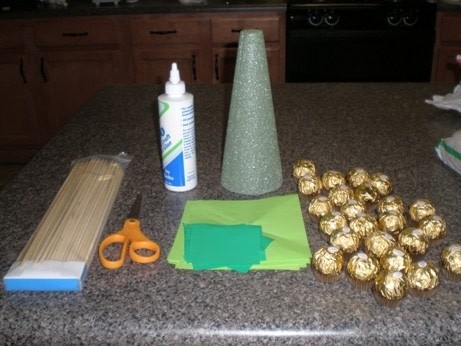
 Step 1
Gather your supplies and find a comfortable work area.
-
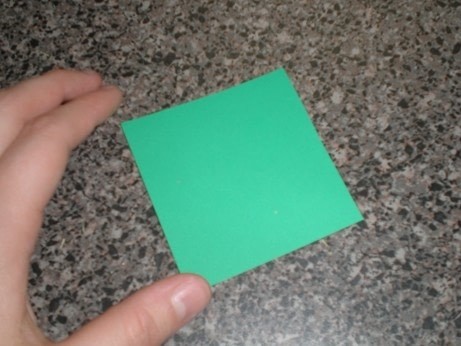
 Step 2
Take a piece of square paper and place the side you would like showing face up.
-
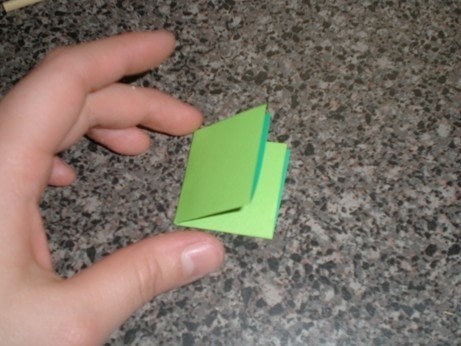
 Step 3
Fold the piece in half.
-
 Step 4
Fold it in half again.
-
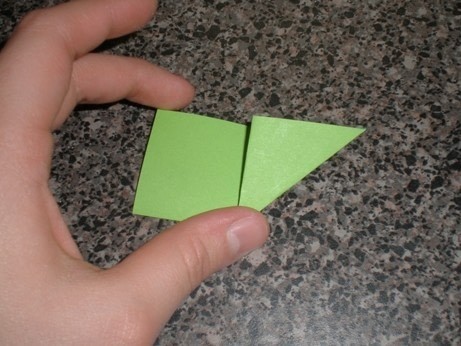
 Step 5
Unfold the last step and fold a corner up.
-
 Step 6
Unfold and repeat on the other side.
-
 Step 7
Unfold the last step.
-
 Step 8
Stick your thumb inside the fold making the paper open up. Make sure you hold down the fold your thumb is on. You will be squashing the paper, so you want these folds to stay in place.
-
 Step 9
Push the fold your thumb is on down so that the two folds meet and the paper becomes flat. It should be like a corner of a cube.
-
 Step 10
Make the diagonal folds meet so you create a flap.
-
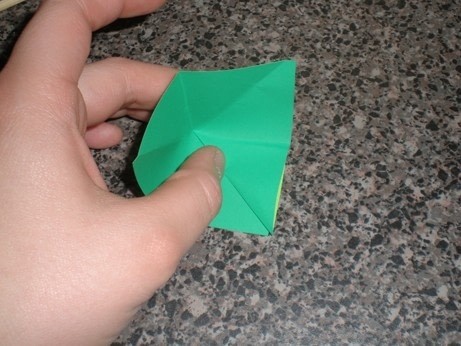
 Step 11
Take the final diagonal fold and push it in so it meets the other three.
-
 Step 12
This is the final "branch" of the tree. It doesn't have to be perfect and you'll get good at making these since you'll need a lot for this project.
-
 Step 13
Cut up the skewer into medium lengths. Too short and the candy will fall off, too long and the skewers will bump into each other in the styrofoam. Take a piece of the skewer and push it in the middle of the "branch."
-
 Step 14
Push the "branch" into the styrofoam base. I like working from the bottom up, but it doesn't matter.
-
 Step 15
Make more branches and keep putting them in the tree. Try to give them a little space since you want there to be room for the candy. Glue sides together to cover gaps and to keep the paper from slipping.
-
 Step 16
Keep working! (:
-
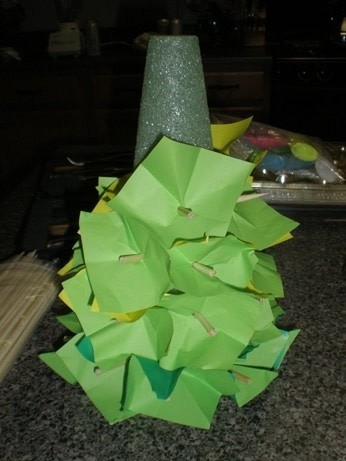
 Step 17
More progress. Don't feel restricted to make the rows even. I just placed branches where I felt it needed it. Any gaps can be covered by pulling the paper and gluing the sides of two branches together.
(I had to switch the sides of my paper because I ran out of the dark green paper. Whoops!)
-
 Step 18
Finally! Done covering the base.
-
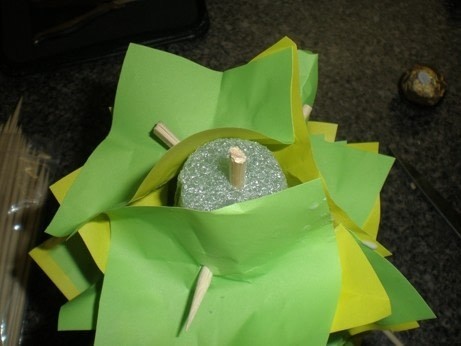
 Step 19
Glue sides of the top branches together to cover any gaps. Push a skewer in the top of the base.
-
 Step 20
Now the fun part! Start putting the chocolates onto the skewers. I find it easier to twist them on instead of pushing. It made the skewer go deeper into the base instead of going into the candy. Also, you may find it easier to take the skewer out to put the candy on. Try if it you're having trouble.
-
 Step 21
Tada! A beautiful tree with edible ornaments (:
(I ran out the the good chocolate and had to put bon bons on the bottom. I like to think of them as presents at the bottom of the tree since they're wrapped differently. (: )
-
 Step 22
Optional: Make a pretty placemat with some scrap paper and stickers. (:


Comments


