

Button Up Badge Necklace
Extract from Making Stuff: An Alternative Craft Book (Interior Design) • By Black Dog Publishing • Published by Black Dog Publishing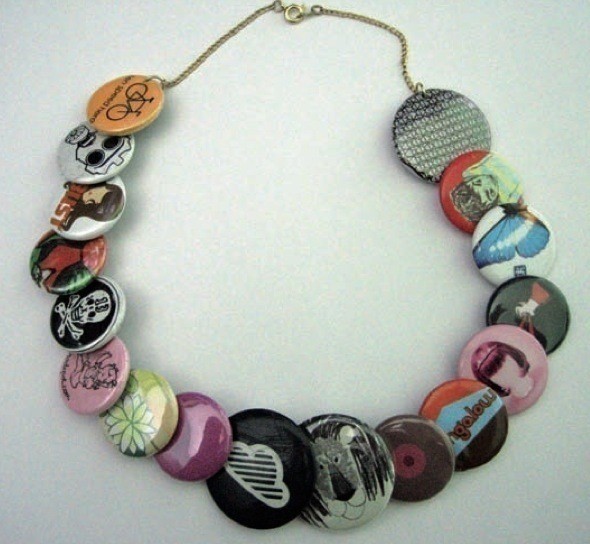

About
Eye-catching piece of badge jewellery.
I know — it’s a badge, but across the Atlantic they call it a button. you can pick up badges for free all over the place, but if you prefer a classy brooch on your lapel what do you do with all those old badges? with a few tools you can fashion up an eye-catching piece of badge jewellery.
<b>Project by Victoria Woodcock from the book Making Stuff: An Alternative Craft Book.</b>
<img src="http://img.coplusk.net/books/0000/0119/1904772617.01.LZZZZZZZ_153x200.jpg">
-
 Key West Witch added Button Up Badge Necklace to Jewelry Necklaces
30 Jun 13:13
Key West Witch added Button Up Badge Necklace to Jewelry Necklaces
30 Jun 13:13
-
Key West Witch added Button Up Badge Necklace to Jewelry
30 Jun 01:07
-
 satilanna added Button Up Badge Necklace to Jewelry
12 May 18:00
satilanna added Button Up Badge Necklace to Jewelry
12 May 18:00
-
 Nicky Frazier N. favorited Button Up Badge Necklace
24 Jul 00:22
Nicky Frazier N. favorited Button Up Badge Necklace
24 Jul 00:22
-
Step 1
Collect some badges. The best ones to use are the ones with a metal back and a pin sprung into place with a metal half circle. You can also use the ones made with a plastic back and a safety pin set into the plastic. Homemade ones with the plastic circle holding the pin aren’t going to work.
-
Step 2
Arrange your badges, by twizzling the backs so that the clasps are all on the same side. Using a pair of pliers, pull the pin out to the side of the badge and snip off the sharp pinpoint with a pair of wire-cutters—you don’t want this sticking into your neck.
-
Step 3
Position the badge, facing up, on a block of wood or a chunky magazine, and using the hammer, knock the nail through the badge about 3–4 mm away from its edge, on the opposite side to where the pin sticks out. Remove the nail, leaving a small, clean hole. Repeat for each badge.
-
Step 4
Push the pin on one badge through the hole on the front of another and then twist the pin around the edge of the badge to secure. Hold the pin with the pliers and turn it under the badge and then clasp the edge of the badge and the pin underneath, squeezing together to tighten up the join. This should result in the badges overlapping slightly with one another.
-
Step 5
The last badge in the chain needs a hole on both sides to attach the clasp. Place a couple of jump rings (these are the connecting hoops used in jewellery-making) through the holes on either end: use the pliers to pull the hoop apart, attach it to the badge, slip on a length of chain and close the hoop. Attach a clasp with jump rings at the ends of the chain, and button up!
Comments

