


About
Sweet!!!! Finally some time for sewing!
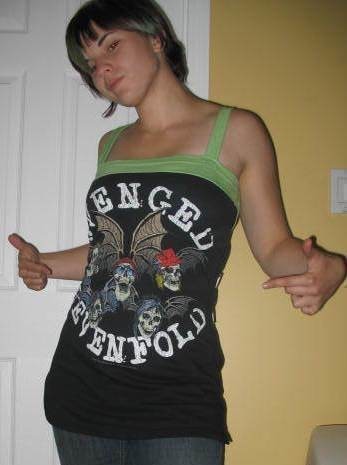
I'm so busy with work that I havent had much time for sewing, but my brother had gotten me this awesome Avenged Sevenfold shirt when he went to see them play (damn finals!!!!), sadly as it is with most tour shirts, sizes were limited and the original shirt was sadly too big and really unflattering. So I asked my brother's permission to change it, and with a slightly guilty conscious I made the first cut, this is the first time I've done a shirt design fully from what I thought of, and I love it.
Let me know what you think...
Sorry No befores....I always forget.... Three shirts were involved, a Black Avenged Sevenfold one, a green thrifted shirt, and a white thermal shirt with skulls on it.
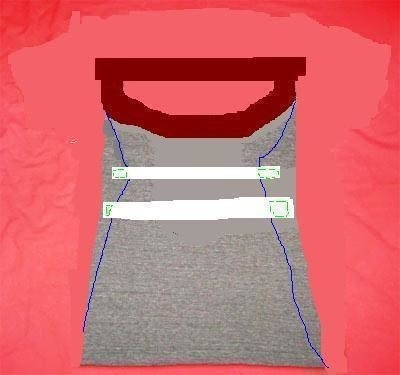
I never actually took the sides of the shirt in, but rather I sewed the sleeve holes up, and then where that bunched out on the sides I attached the straps made out of the thermal shirt. I also did some little pleats in the middle where the bottom green band meets the black shirt (you can't see it well in this photo...sorry:( ) It was my first time with pleats and I am happy they turned out well :D. And because the shirt is long and because I have a bit of a booty, I put slits in the bottom of the shirt.
Tags
-
 Angechiladas favorited Black Avenged Sevenfold Tank Top
22 Apr 23:33
Angechiladas favorited Black Avenged Sevenfold Tank Top
22 Apr 23:33
-
 Julie A. added Black Avenged Sevenfold Tank Top to to make
18 Jul 00:38
Julie A. added Black Avenged Sevenfold Tank Top to to make
18 Jul 00:38
-
 mel M. favorited Black Avenged Sevenfold Tank Top
19 Aug 23:05
mel M. favorited Black Avenged Sevenfold Tank Top
19 Aug 23:05
-
 ThatLittleWhiteRabbit favorited Black Avenged Sevenfold Tank Top
27 Jul 12:47
ThatLittleWhiteRabbit favorited Black Avenged Sevenfold Tank Top
27 Jul 12:47
-
 Dark Rose favorited Black Avenged Sevenfold Tank Top
11 Jul 10:11
Dark Rose favorited Black Avenged Sevenfold Tank Top
11 Jul 10:11
-
Dark Rose commented on Black Avenged Sevenfold Tank Top
11 Jul 10:11
-
 C.Rami favorited Black Avenged Sevenfold Tank Top
16 Mar 20:20
C.Rami favorited Black Avenged Sevenfold Tank Top
16 Mar 20:20
-
 Taba__tina favorited Black Avenged Sevenfold Tank Top
05 Oct 13:32
Taba__tina favorited Black Avenged Sevenfold Tank Top
05 Oct 13:32
-
 sjanera favorited Black Avenged Sevenfold Tank Top
10 Sep 04:39
sjanera favorited Black Avenged Sevenfold Tank Top
10 Sep 04:39
-
 Tristin C. favorited Black Avenged Sevenfold Tank Top
27 Aug 23:19
Tristin C. favorited Black Avenged Sevenfold Tank Top
27 Aug 23:19
You Will Need
-
 Step 1
Step 1 - cut off sleeves of the shirt and then cut off the top of the shirt as well
-
Step 2
Although this how to is drawn right now, I will add detail photographs of my shirt at a later date to help explain the drawings and text.
-
 Step 3
Which leaves you with this
- at this point you can sew up the remaining sleeve holes
-
 Step 4
Step 2 - Take your second shirt and cut a strip off the bottom - about 3 inches - this will become the top band of the shirt. - Always remember to keep about 1/4" - 1/2" on either side for hemming
-
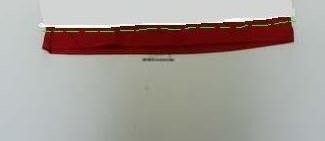
 Step 5
Step 3 - Still using the second shirt mark out a half moon/banana shape (I used newspaper to create a pattern for this, again make this strip about 3" this will become the bottom band in the back of the shirt
- For this one you only need to cut out one piece not two
-
 Step 6
Step 4 - Mark two strips at the top of the shirt, The thickness of these can vary depending on how thick you want the straps - Just remember to add 1/4" - 1/2" on either side for hemming.
- Make sure to cut through both layers of shirt, which will create nice straps for you
-
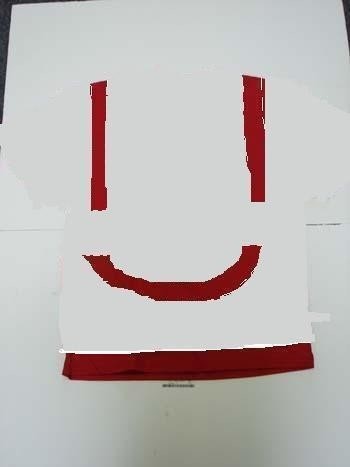
 Step 7
This is what you are left with
---its a happy face :D
-
 Step 8
- Hem the cut edge of the bottom of the shirt - the original hemmed edge will become the top of the band.
-
 Step 9
Take that newly hemmed band and pin it to the top of the front of the first shirt. Only pin the front of the shirt, not the back.
When pinned, sew two lines of straight stitching to attach the two pieces together.
-
 Step 10
Take your banana shape piece and hem both the top edge and the bottom edge.
- I recommend again using two lines of straight stitching
-
 Step 11
Now here is where things get tough
- Step 1 - Take your banana band and pin it to the back of the top band of the shirt - Sew together with two lines of straight stitching.
- Step 2 - Take the bottom of your banana band and pin it to the back of the first shirt - You will have material over the top of the banana band, we will cut it off later. Also because my shirt was too large for me in the middle of the banana band I created pleats in the first shirt. - Now you can sew the bottom of the banana piece to the back of the first shirt.
-
 Step 12
- Cut the remaining material from the first shirt to create the peek a boo in the back.
- This is what you will have
-
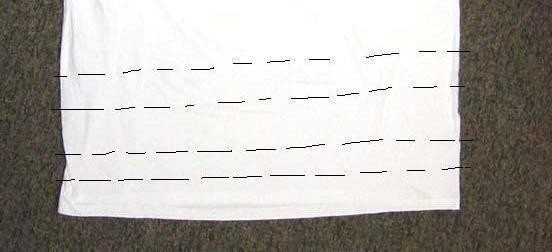
 Step 13
Now we take the third shirt and mark out two strips along the bottom at the thickness you want (allowing for a 1/4" hem on all sides once again) (do not use the hemmed edge - it will just get in your way)
- cut these two strips out you only need one layer of each strip.
-
 Step 14
This is what you are left with
-
 Step 15
Now hem all around each of these strips with one line of straight stitching
-
 Step 16
You will now take these hemmed strips and fold the ends over into the middle of the strip to create a reinforcing (This step is not mandatory, it just helps create a stronger strap)
-
 Step 17
pin these folded edges to hold them in place.
-
 Step 18
Take your first shirt, and where you sewed the sleeve holes up there will be two pointed pieces.
Take these pieces and fold them into the centre of the shirt (this will shape the bodice of the shirt, so make sure to fold it in with your shape and size in mind)
-
 Step 19
Take your two hemmed straps and pin them into place onto your first shirt.
You can now attach your straps to the folded pieces on the edge of the shirt.
And Voila Done!
-
Step 20
At this point you can add the shoulder straps if you want, if sewed tightly enough this should create a good tube top as well.
-
Step 21
Alright so thats the shirt tutorial - first one - any constructive criticism is greatly appreciated


Also, sorry this is really ridiculously late in coming...I've been completely MIA thanks to thesis.
I have two problems with it, though:
A) I could never bring myself to cut up a thermal, as they are half a step from impossible to find in this particular location. But that's an easy to fix thing
B) (the real problem) I have these two AWESOME Guns N Roses shirts that my brothers got me a couple of Xmases ago. The thing is, like you say, for some reason there seems to be this international idea that only rather large men listen to good music (around here, any music.. nothing comes under XL), so of course, they're huge and I want to resize them. But the designs take up the entire front of the shirts... And who in they're right mind would chop Slash?
Ideas?