


About
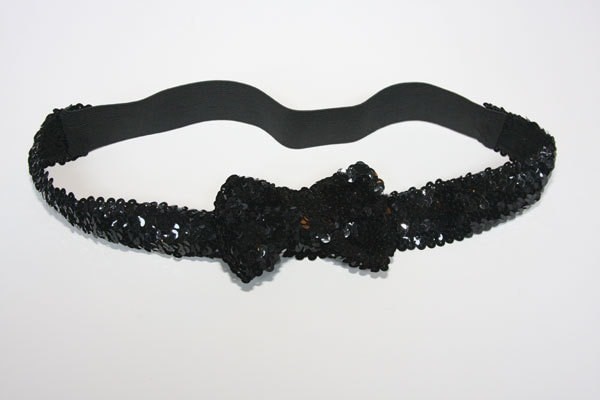
Gossip Girl-style Black Sequin Bow Belt
Throw on over a little party skirt or add a bit of feminine pizzazz to a regular white tee!
-
 Key West Witch favorited Black Sequin Bow Belt
26 Jun 07:07
Key West Witch favorited Black Sequin Bow Belt
26 Jun 07:07
-
 Ms Dorito added Black Sequin Bow Belt to Cruella
12 Jun 01:04
Ms Dorito added Black Sequin Bow Belt to Cruella
12 Jun 01:04
-
Ms Dorito added Black Sequin Bow Belt to Cruella
12 Jun 00:36
-
Ms Dorito added Black Sequin Bow Belt to Cruella
12 Jun 00:02
-
 mmotse03 favorited Black Sequin Bow Belt
07 Dec 02:58
mmotse03 favorited Black Sequin Bow Belt
07 Dec 02:58
-
 Xfluffy_unitatoX favorited Black Sequin Bow Belt
17 Nov 01:49
Xfluffy_unitatoX favorited Black Sequin Bow Belt
17 Nov 01:49
-
 bemeself favorited Black Sequin Bow Belt
15 Jun 19:34
bemeself favorited Black Sequin Bow Belt
15 Jun 19:34
-
 Jennifer M. favorited Black Sequin Bow Belt
22 Dec 08:42
Jennifer M. favorited Black Sequin Bow Belt
22 Dec 08:42
-
 Crafterella added Black Sequin Bow Belt to Blair Waldorf
06 Dec 00:21
Crafterella added Black Sequin Bow Belt to Blair Waldorf
06 Dec 00:21
-
 zoegirl221 favorited Black Sequin Bow Belt
21 Sep 17:37
zoegirl221 favorited Black Sequin Bow Belt
21 Sep 17:37
-
 Step 1
Cut 2 lengths of the sequin trim, about 6" long each.
-
 Step 2
Hand-stitch the long edges together to make a single piece 2" wide by 6" long, overlapping the sequins as you go to camouflage where the pieces are sewn together.
-
 Step 3
Fold the short ends of the 6" piece together to make a loop. Hand-sew the ends together.
-
 Step 4
Place a rubber band around the center of this loop to create a bow shape. (I had to loop it twice over to make it tight enough.)
-
 Step 5
Cut a short piece of the trim about 3-4" long.
-
 Step 6
Wrap this piece around the rubber-band to disguise it, and hand-stitch the ends together at the back of your bow. (I also folded the long edges of the short piece towards the center because I liked the proportions better.)
-
 Step 7
Hand-stitch the bow onto the center of your remaining trim.
-
 Step 8
Try on the belt to make sure the trim doesn't go all the way around your waist, even when stretched. (We need it to be shorter so the elastic can be the closure area at the back.) Cut the ends of the sequin trim to shorten it if necessary. Fold the end of the trim under itself, place on top of the end of the elastic, and hand-stitch down. (Tip: Heat-sealing the edges of the elastic once you cut them with an open flame will prevent fraying.)
-
 Step 9
Do the same to the other end of the trim and the other end of the elastic piece.
-
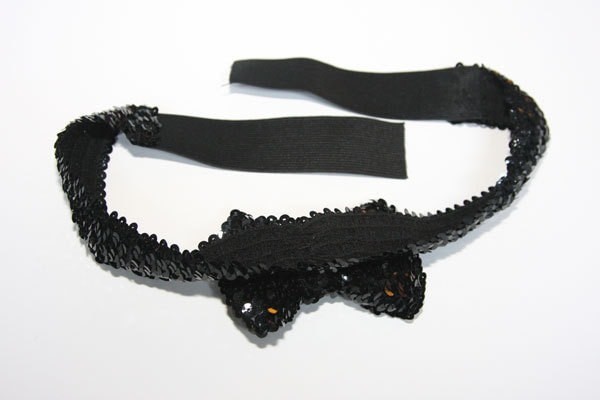
 Step 10
Cut the elastic piece in the center, and try on the belt.
-
 Step 11
Fold the elastic under itself at the point where it overlaps about 1/2 - 1" at your back. Trim the elastic with about 1" extra, heat-seal the edges, and fold under.
-
 Step 12
Stitch down.
-
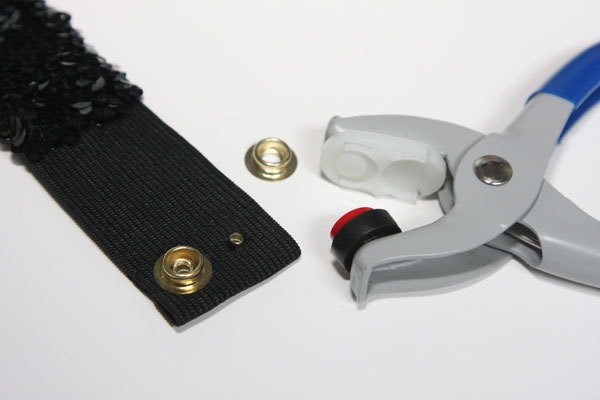
 Step 13
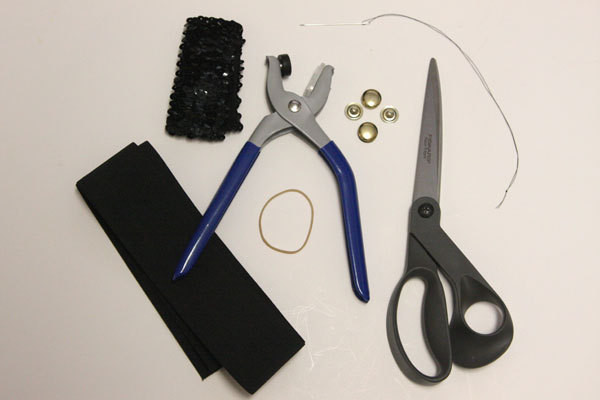
Create the closure for the back: I chose to use heavy-duty snaps, but if you don't have a snap-setter you can use sew-on snaps, or a piece of velcro instead.
-
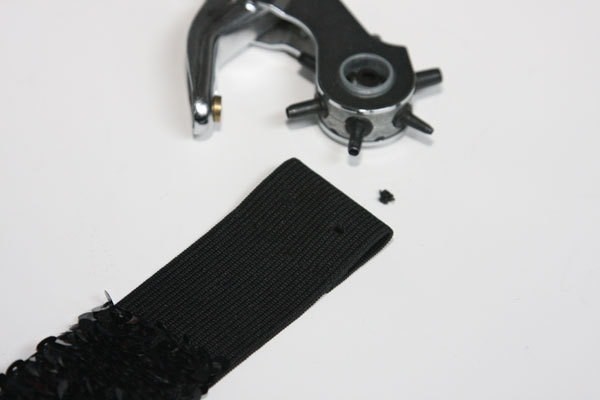
 Step 14
If you're using the heavy-duty snaps, make holes for the snaps with an awl, small scissors, or hole punch, and set the snaps according to their directions.


Comments


