About
Quilling Art
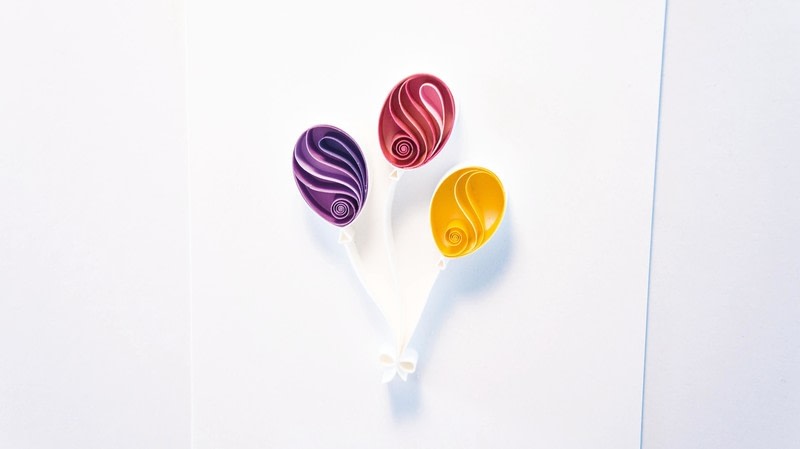
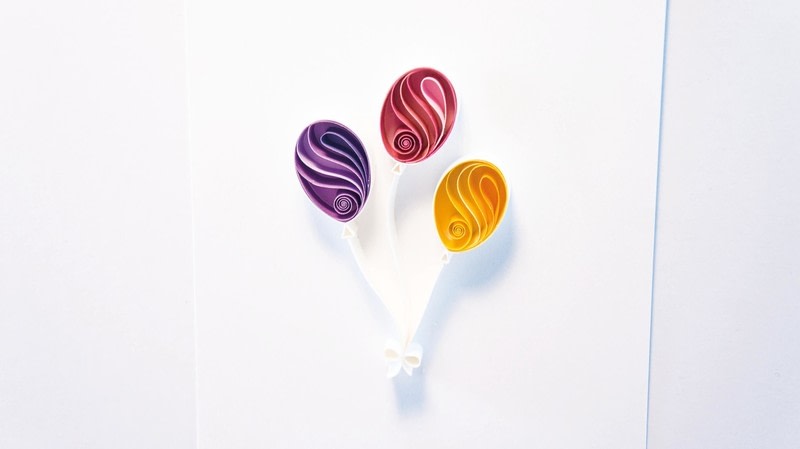
These balloons are ideal to make for a birthday celebration. Adding various shapes at the top makes them look ready to fly off into the air!
Tags
Downloads
- 2018-04-30-151110-Template+Birthday+Balloons.jpg 502 KB [ Download ]
-
 Maddalena C. favorited Birthday Balloons
06 Sep 07:40
Maddalena C. favorited Birthday Balloons
06 Sep 07:40
-
 GMC Group published her project Birthday Balloons
16 May 09:00
GMC Group published her project Birthday Balloons
16 May 09:00
You Will Need
-
 Step 1
To create your base, place a sheet of blank cardstock under the template, then trace the outline onto it. (Here, the outline has been darkened for clarity.)
-
 Step 2
Use strips of cardstock to prepare the outline.
-
 Step 3
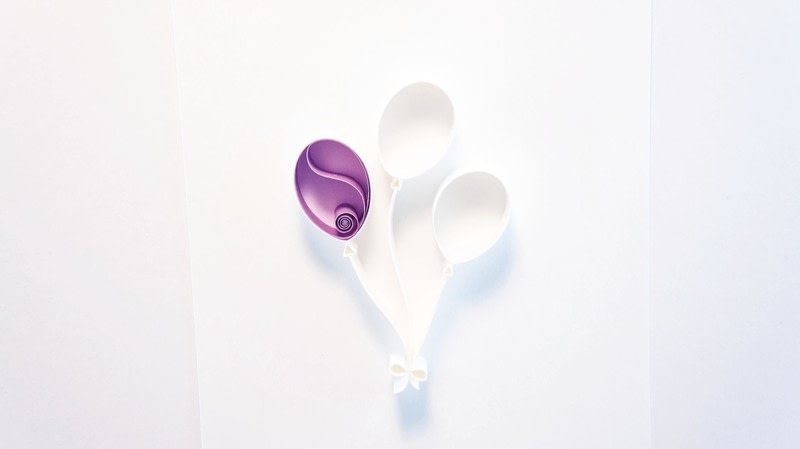
Make an open coil using a purple strip.
-
 Step 4
Apply a thin layer of glue to the bottom of the coil and place it inside the left balloon, with no gap between it and the outline.
-
 Step 5
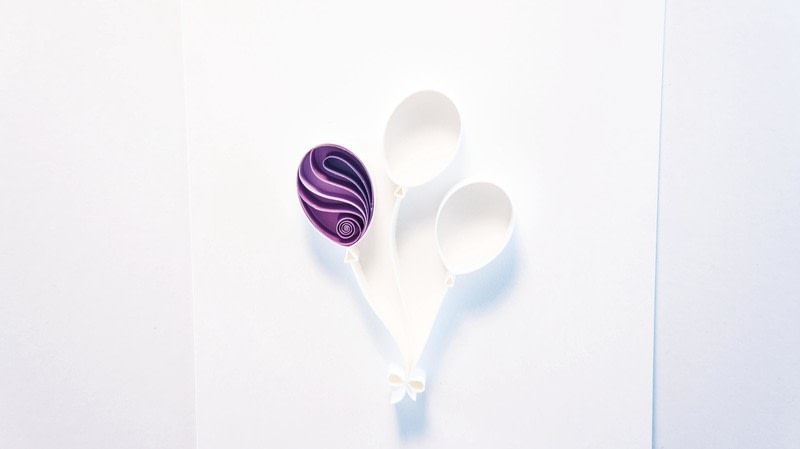
Make an S shape using a purple strip. Apply a thin layer of glue to the bottom of the shape and place it as shown.
-
 Step 6
Create a purple S shape. Apply a thin layer of glue to the bottom and place it to the left of the lilac shape.
-
 Step 7
Create another purple curve. Apply a thin layer of glue to the bottom and place it to the left of the lilac shape.
-
 Step 8
Prepare a bent drop shape using a dark purple strip. Apply a thin layer of glue to the bottom of the shape and place it to the right of the first purple S shape.
-
 Step 9
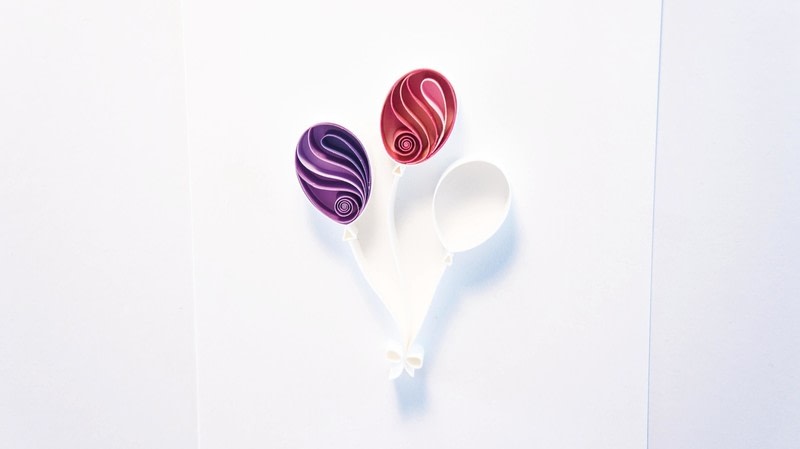
Make an open coil using a dark pink strip. Apply a thin layer of glue to the bottom of the coil and place it inside the middle balloon, with no gap between it and the outline.
-
 Step 10
Make an S shape using a dark pink strip. Apply a thin layer of glue to the bottom of the shape and place it as shown.
-
 Step 11
Make another S shape using a pink strip. Apply a thin layer of glue to the bottom of the shape and place it to the left of the dark pink one.
-
 Step 12
Create a dark pink curve. Apply a thin layer of glue to the bottom and place it to the left of the pink strip.
-
 Step 13
Prepare a bent drop shape using a light pink strip. Apply a thin layer of glue to the bottom of the shape and place it to the right of the first dark pink S shape.
-
 Step 14
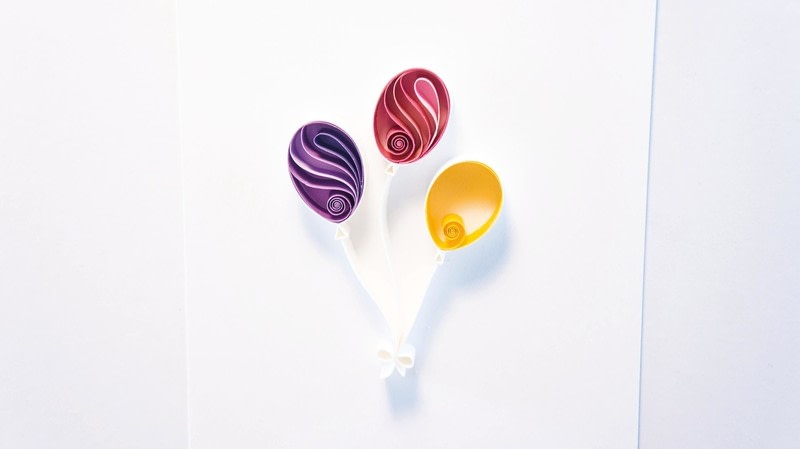
Make an open coil using a yellow strip. Apply a thin layer of glue to the bottom of the coil and place it inside the right balloon, with no gap between it and the outline.
-
 Step 15
Make an S shape using a yellow strip. Apply a thin layer of glue to the bottom of the shape and place it as shown.
-
 Step 16
Make another S shape using a light yellow strip. Apply a thin layer of glue to the bottom of the shape and place it to the left of the yellow one.
-
 Step 17
Create a yellow curve. Apply a thin layer of glue to the bottom and place it to the left of the light yellow strip.
-
 Step 18
Prepare a bent drop shape using a dark yellow strip. Apply a thin layer of glue to the bottom of the shape and place it to the right of the first yellow S shape.
-
 Step 19
Using various coloured 1⁄8in (2mm) wide papers, prepare S shapes, zigzag shapes and swirls.
-
 Step 20
Stick them above the balloons as shown. Cut out a few small triangles using various colours and stick them around the shapes. Your birthday balloons are complete!