


About
Turn bouncy balls in to an elegant necklace.
While the world may not revolve around you, we are all spinning together on a giant sphere that’s orbiting the sun.
The word sphere hairs from the Greek sphaira, which means globe or ball. It's round and immaculate silhouette, and perfect circular formation, lends it to symmetrical art, fashion, and everyday masterpieces.
Everyone should round out their world with 360 degrees of decadence. Don't forget to stop, breath, and look up for heavenly glove pendant lamps and bulbous balloons, which are sure to make you smile. Find pleasure in everyday ball-like items turned into bold baubles by combing playful profile from everyone's favorite bouncy toy with a sheer touch of style. Gather together colorful round ingredients to create an out-of-this-world accessory.
From the book PS I made this... by Erica Domesek. $18.95, published by Abrams Image.
-
 Key West Witch added Big Ball Necklace to Jewelry
30 Jun 04:17
Key West Witch added Big Ball Necklace to Jewelry
30 Jun 04:17
-
 Aïcha P. added Big Ball Necklace to Bijoux
19 Apr 19:49
Aïcha P. added Big Ball Necklace to Bijoux
19 Apr 19:49
You Will Need
-
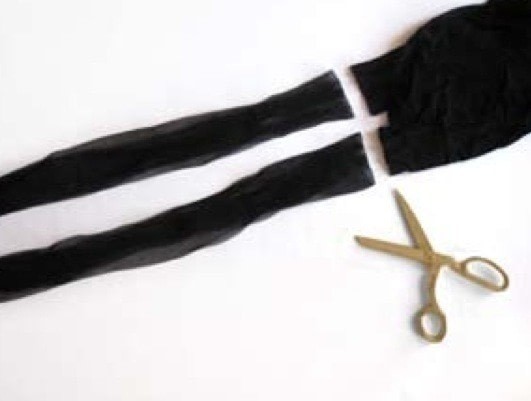
 Step 1
Grab a pair of sheer stockings and cut off the legs. Leave room at both ends (so you can tie your necklace together when it's done).
-
 Step 2
Knot one leg (leave a little room at the end) and drop bouncy balls, one at a time, tying knots between them as you go.
-
Step 3
Repeat the process with the second stocking leg. Make sure that the one leg has more balls. This will serve as the bottom strand.
-
Step 4
Attach the legs together by knotting them.
P.S. - Get creative by mixing balls of different colors and sizes with a variety of textured stockings and tights. The possibilities are endless.


CO + K User