

About
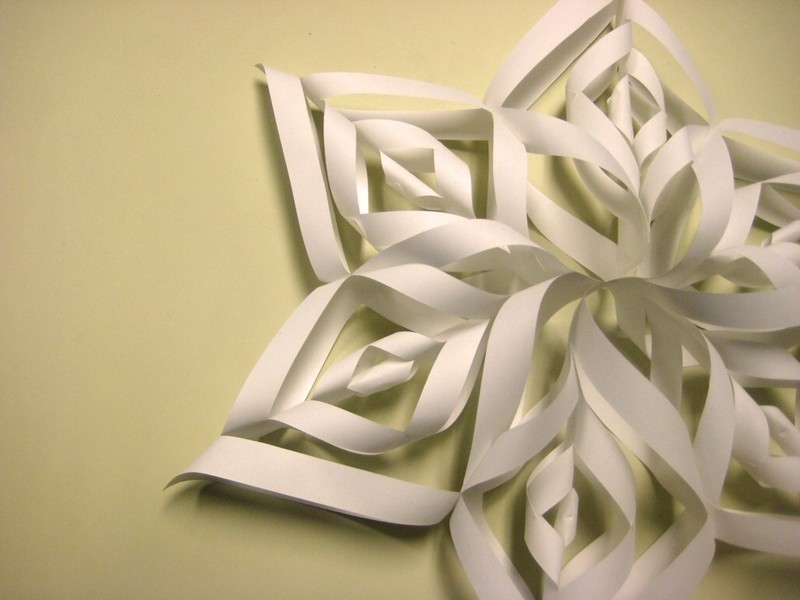
How To Make The Most Beautiful Paper Snowflake Ever! a spectacular - origami like - snowflake deco
Last year, my friend Vero found an online tutorial to make this beautiful winter//Christmas decoration. This year we tried to find the instructions again and they were gone :(
So we decided to do our own “How to” for this project. Note that in the end the snowflake is pretty big.
These instruction are also availiable in french on our blog : http://carottelychee.blogspot.com/2009/12/tutoriel-un-merveilleux-flocon-de-neige.html
Tags
-
 kendell64 commented on Beautiful Paper Snowflake
21 Mar 07:57
kendell64 commented on Beautiful Paper Snowflake
21 Mar 07:57
-
 Helen W. favorited Beautiful Paper Snowflake
21 Dec 08:41
Helen W. favorited Beautiful Paper Snowflake
21 Dec 08:41
-
 Kevin Huggins favorited Beautiful Paper Snowflake
28 Jan 09:42
Kevin Huggins favorited Beautiful Paper Snowflake
28 Jan 09:42
-
 Noemi M. added Beautiful Paper Snowflake to deco
29 Oct 09:02
Noemi M. added Beautiful Paper Snowflake to deco
29 Oct 09:02
-
 jabbathemut added Beautiful Paper Snowflake to paper
16 Dec 15:41
jabbathemut added Beautiful Paper Snowflake to paper
16 Dec 15:41
-
 Christine D. favorited Beautiful Paper Snowflake
22 Oct 13:20
Christine D. favorited Beautiful Paper Snowflake
22 Oct 13:20
-
 Jen S. added Beautiful Paper Snowflake to stuff for me
18 Jul 17:42
Jen S. added Beautiful Paper Snowflake to stuff for me
18 Jul 17:42
-
 Marci F. favorited Beautiful Paper Snowflake
12 Jul 05:17
Marci F. favorited Beautiful Paper Snowflake
12 Jul 05:17
-
 Willow J. favorited Beautiful Paper Snowflake
08 Feb 09:55
Willow J. favorited Beautiful Paper Snowflake
08 Feb 09:55
-
Cheryl S. added Beautiful Paper Snowflake to Paper Crafts
20 Dec 05:09
-
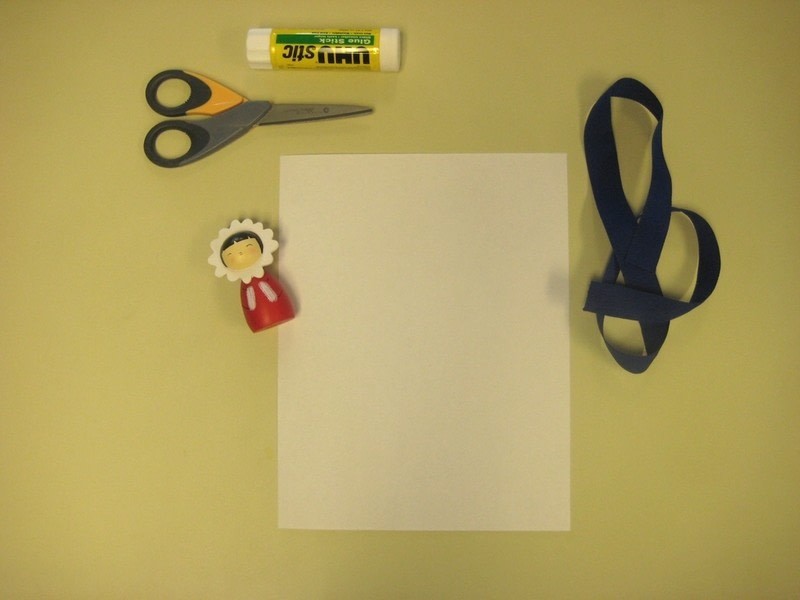
 Step 1
This is the material you will need for this how to :)The momiji doll is not mandatory but she really did enjoy watching us!
-
 Step 2
Fold the sheet of paper into a triangle
-
 Step 3
Cut the exceeding piece of paper to make a perfect triangle
-
 Step 4
Fold the triangle again to make a smaller triangle
-
 Step 5
With a pencil, mark four equal points to guide you with your cut.
-
 Step 6
Make a cut following the length of the triangle and stop a little bit before the edge.
-
 Step 7
Make the second cut in the same direction, stopping just a few millimeters before the first cut.
-
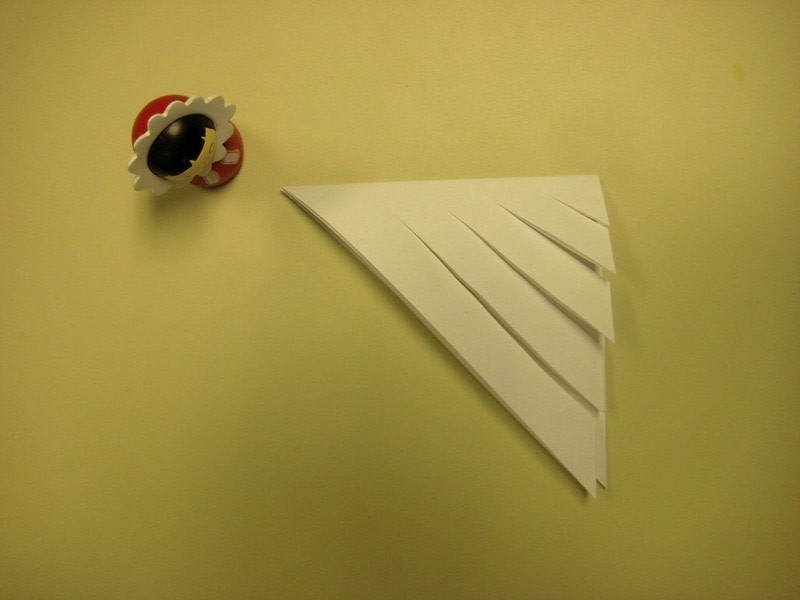
 Step 8
Make all your cuts.
-
 Step 9
Put the triangle on the table.
-
 Step 10
Unfold it. You now have a square.
-
 Step 11
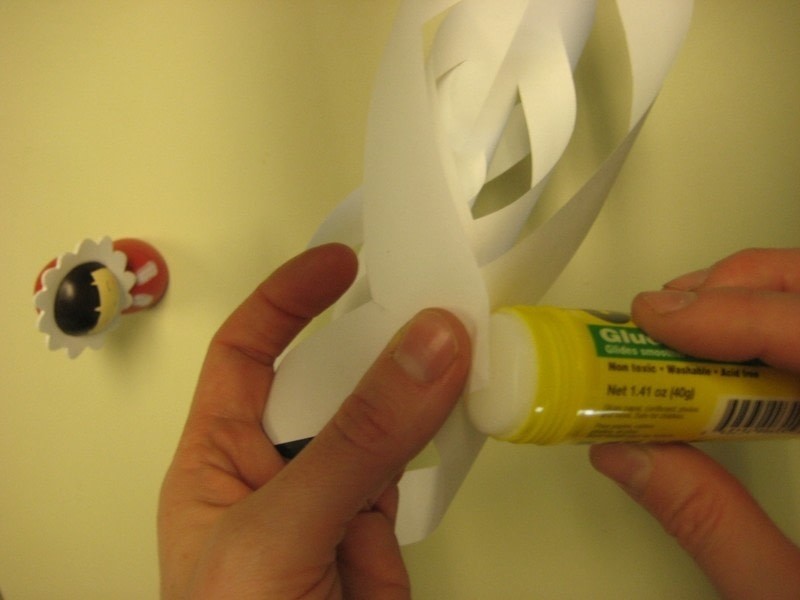
Fold the two center cuts and glue them together. Use your finger as shown in the picture, holding the pieces together for a few seconds and allowing them to dry a bit.
-
 Step 12
Turn over the square. Fold the two second cuts and glue them together. Use your finger as shown in the picture, holding the pieces together for a few seconds and allowing them to dry a bit.
-
 Step 13
Turn over the square. Fold the third cuts and glue them together. Turn over the square. Fold the fourth cuts and glue them together. Turn over the square. Fold the fifth cuts of the cut paper and glue them together.
-
 Step 14
Voilà! You have the first point of your snowflake.
-
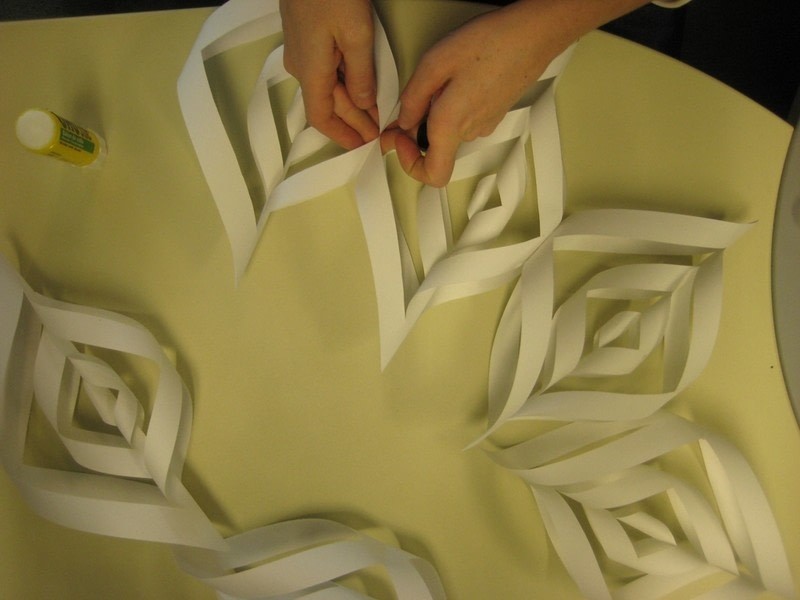
 Step 15
Repeat those 13 steps 5 more times, making in total the 6 points required to complete your snowflake.
-
 Step 16
Glue together the side part of each point to build your snowflake
-
 Step 17
Hold the paper together with you finger for a few seconds to allow the glue to dry a bit.
-
 Step 18
Glue the last side to side point.
-
 Step 19
You can use a paperclip to hold the final part. Allow the glue to dry at least one hour.
-
 Step 20
Glue the sides of three of the points and then glue the three ends together. Repeat this for the other three points. Then glue these two halves together.
-
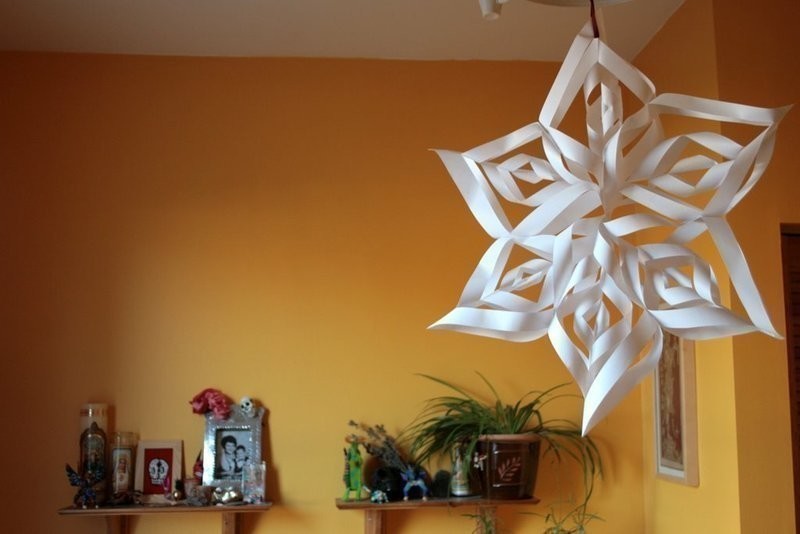
 Step 21
Your snowflake is done.
-
 Step 22
Use a nice ribbon to hang the snowflake.


http://www.ellinee.com/blog/fourth-of-july-paper-stars-tutorial/
Thank you <3
i am going to beg my awesome wife to make some putting her own spin on them
Happy Holidays !!!