


About
The "Ile Saint-Louis Bag"
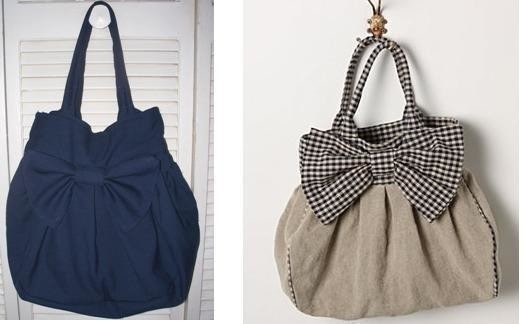
While browsing the Anthropologie website last week, I saw this really cute bag. I could've choked when I saw the $498 price tag. So, I decided to have a go at making it myself. I'll have a how-to on it soon!
It took a few days (about 5 days) because I kept taking it apart and redoing it so I could get it to look like the picture. I think I managed to get pretty close to the real thing. I used the one color fabric as opposed to the contrast they used. I like it better all one color anyway. I also lined it with a fun white and yellow strip material (courtesy of a recycled shirt). It has patch pocket and a zip pocket on the inside as well.
What do you think?
The how-to has a lot of steps but hopefully you will like the outcome. I am excited to see your different versions!
Tags
-
 Ronald T. commented on Anthropologie Inspired Bag
11 Jul 05:25
Ronald T. commented on Anthropologie Inspired Bag
11 Jul 05:25
-
Ronald T. favorited Anthropologie Inspired Bag
11 Jul 05:25
-
 sharon g. added Anthropologie Inspired Bag to Bags
03 Feb 23:47
sharon g. added Anthropologie Inspired Bag to Bags
03 Feb 23:47
-
sharon g. favorited Anthropologie Inspired Bag
03 Feb 23:47
-
 Kevin Huggins favorited Anthropologie Inspired Bag
28 Jan 09:42
Kevin Huggins favorited Anthropologie Inspired Bag
28 Jan 09:42
-
 Aiemethyst O. favorited Anthropologie Inspired Bag
17 Sep 14:19
Aiemethyst O. favorited Anthropologie Inspired Bag
17 Sep 14:19
-
 CannibalCasey favorited Anthropologie Inspired Bag
02 Jul 02:58
CannibalCasey favorited Anthropologie Inspired Bag
02 Jul 02:58
-
Laura added Anthropologie Inspired Bag to Wardrobe + Accessories
02 Sep 07:21
-
 Shelly S. added Anthropologie Inspired Bag to refashion
23 Aug 03:28
Shelly S. added Anthropologie Inspired Bag to refashion
23 Aug 03:28
-
Shelly S. favorited Anthropologie Inspired Bag
23 Aug 03:28
-
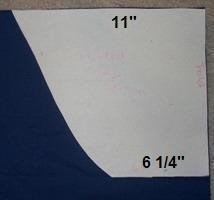
 Step 1
-Draw your pattern like the one pictured at the left.
-Put your fabric down and trace the pattern out.The straight edge is your fold. Your bag should also be 11" from top to bottom. -
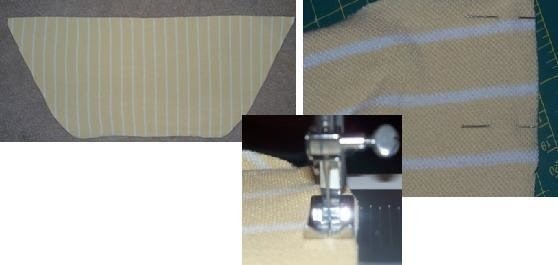
 Step 2
-Cut two of these pieces out.
-Unfolded your bag should be 22" long at the top and 12 1/2" long at the bottom.
-
 Step 3
-Cut one strip of outer fabric that is 6" x 36" long
-
 Step 4
-Pin the strip to one of the outer pieces. (right sides together)
-Now sew it together.
-Pin the other outer pieces to the strip and sew it.
-
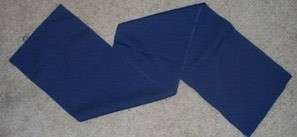
 Step 5
-You should have a super wide bag similar to the picture at the left.
-
 Step 6
-Repeat steps one and two for the lining.
-If you want to add pockets, add them before sewing the lining together.
-Pin the lining pieces right sides together and sew.
-Set the lining aside for now.
-
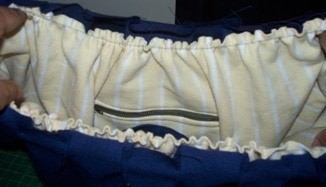
 Step 7
Grab the outer shell...
-Starting at the center of the bag make four pleats on each side.
-
 Step 8
-Make inverted pleats on the side panel
-
 Step 9
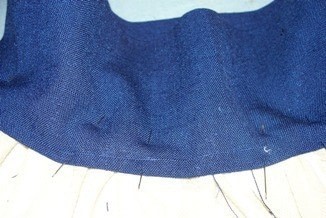
-After pleating, your bag should be about 11" wide at the top laying flat.
-Baste (wide) stitch it all the way around the top to hold the pleats together.
(Be careful when stitching. I messed my pleats up here and had to start over)
-Set aside
-
 Step 10
Grab the lining...
-Sew a baste stitch all the way around the top of the lining.
-Pull the bottom thread to gather the lining until it is the same size as your outer shell (11")
-Tuck the lining into the outer shell as illustrated. The wrong side of the lining should face the wrong side of the outer shell.
-Baste stitch them together.
Your bag is starting to take shape!!
-
 Step 11
Let's make the straps...
-Cut two pieces that are 20"x6"
-Fold and press the edges in 1" so pieces are 4 inches wide.-Then fold the entire piece in half and press.
-
 Step 12
-Stitch the edges together
-Mark one inch from each end then fold the strip in half again.
-Starting at on of the marks, sew along the stitch you just made until you get to the other mark.
-Press the ends flat
Set aside
-
 Step 13
For the band...
-Cut two pieces that are 24"x6"
-Press the edges in 1"
-
 Step 14
-Pin one piece to the inside of the bag as illustrated.
-Sew along the bottom of the strip
-Now pin the other piece to the outside of the bag and sew along the bottom as well.
-
 Step 15
-From the outside, your bag should look like the picture.
-Pin the other piece to the outside of the bag and sew along the bottom
-
 Step 16
-Pin the two band pieces together along the top
-As you pin, position the straps between the two band pieces and pin them in as well
-Sew everything together
Almost there!!
-
 Step 17
Let's make the bow...
-Cut two rectangles that are 10"x7 1/2"
-Pin them right side together and sew. Leave a small opening in the center of one of the long side for turning it right side out.
-
 Step 18
-Cut a small rectangle that is 1 1/2" wide and 2-3" long.
-Press the edges in 1/4" so the strip is 1" wide
-
 Step 19
-Fit the small rectangle around the larger one.
-
 Step 20
-Sew the ends together to form your bow.
-Hand stitch the bow to the center front of the bag.
Drumroll please...
-
 Step 21
Ta dah!!!!
You have your very own Anthropologie Inspired Ile Saint-Louis Bag!!!
-
 Step 22
Post your super cute version below


In the 4th step, you're pinning and sewing the strip to the outer pieces. Let me know if you need any more help (^_^)