
About
More Turning Trash Into Art ~ Lots O' Pics
A couple of months ago, I had brought home some Styrofoam blocks from work that had come inside a refrigerated packing box. I started to paint cartoon microbes on one of them and had planned on a series of germy vignettes for some of the others. I haven't gotten around to that project yet, but this afternoon, I dug out one of my decorative painting books, The Complete Book Of Paint, by Lynne Robertson, Richard Lowther, and Liz Wagstaff. There are some great tutorials on antique finishes, so I decided to try at least one of them out tonight. Only, I had no canvases...but I did have the Styrofoam blocks!
This is my version of what began as a verdigris finish, but came out more and more random as I went along. I didn't exactly adhere to the directions explicitly, and it wound up much different that I anticipated. I do like the end result.
Tags
You Will Need
-
 Step 1
I started off by giving the block a base coat of chalk board paint using a foam brush. The can has been sitting on the shelf waiting for a project for a while now. Finally the time came.
-
 Step 2
I mixed some dark green and titanium white acrylics and thinned them out with water. I was still following the book's instructions at this point. Major accomplishment for me.
-
 Step 3
drip, drip, drip
I poured the thinned out paint over the block in the bathroom sink. Then I misted water from a spray bottle over the whole thing and let it run down the drain. I let it sit on a piece of cardboard to dry for a bit.
-
 Step 4
More paint was mixed while the block was drying. This time it was a weird mix of darker cadet blue, aqua, and a few greens--basically whatever looked appealing that was within grabbing reach-- mixed with white. This was thinned with water and again poured over the block in the sink, then sprayed with water.
-
 Step 5
looks like it's been slimed
I repeated the process with a mix of Christmas green, school bus yellow, white, and glossy sealing varnish. It got the misty spray treatment and was left to dry on the card board while I whipped up more bizarre paint combinations. I decided it was too green so more paint mixing was in order. It turned out darker blue gray and that was poured over the piece. Much, much spraying ensued. It gets to be quite addictive! Poor Bob was waiting patiently to get in the shower at this point.
-
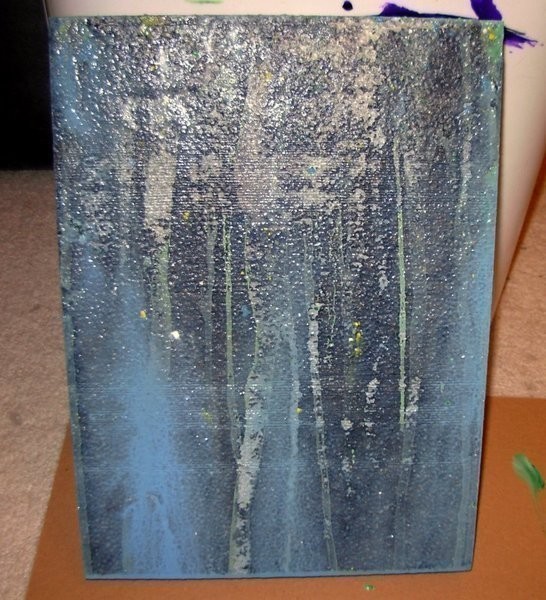
 Step 6
Here is more or less the final product. I ended up spraying away most of the green, but there are touches of it here and there. I hate to sound cliche, but this picture really does not do it justice. It's very layered and has the weathered look I was aiming for.


Versions

Comments