


About
Guide To Making Sew On Patches
-
 Key West Witch favorited Sew On Patches
12 Sep 09:11
Key West Witch favorited Sew On Patches
12 Sep 09:11
-
 ~*SuNsHiNe*~ favorited Sew On Patches
22 Feb 03:30
~*SuNsHiNe*~ favorited Sew On Patches
22 Feb 03:30
-
 Zombie Babe favorited Sew On Patches
02 Aug 10:17
Zombie Babe favorited Sew On Patches
02 Aug 10:17
-
 Step 1
You will need some scraps of fabric in the colours of choice, a picture or drawing to trace, bondaweb or pellon, pencil, iron, paper, fabric pens, thread.
If you are doing this for the first time I recommend using cotton fabrics as they handle the heat better than synthetics. -
 Step 2
Trace off the different bits of the picture that you will need onto the bondaweb/pellon e.g.
I have traced the dress in two pieces, the skirt and the bodice and labelled that these are to be purple, also the gloved arm, for later ( it's easy to forget). The face and arm have been traced seperately and labeled in the colour to be used. Then the hair area has been traced and labelled yellow.
PLEASE NOTE THAT THE FINISHED RESULT WILL BE IN REVERSE TO THE PICTURE YOU ARE USING. If you want it the same way round, trace the picture on ordinary tracing paper and trace using the reverse side onto the bondaweb/pellon -
 Step 3
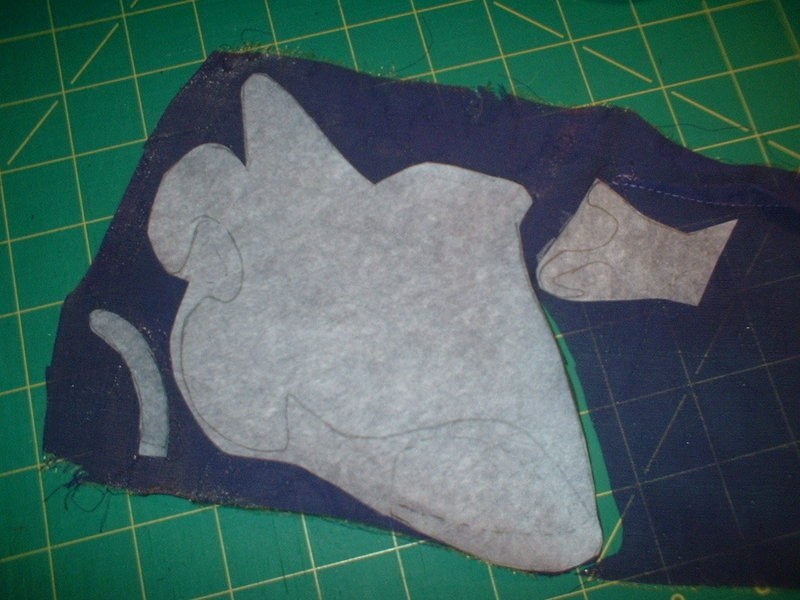
Roughly cut the shapes from the sheet of bondaweb/pellon and iron onto the wrong side of the fabrics.
Check with the directions of bondaweb/pellon regarding the settings on your iron.
It is always a good idea to protect your iron by using a sheet of freezer paper, greasepfroof paper or just plain paper from the glue that can leak during the fusing. -
 Step 4
Cut out the pieces as marked. Spend some time playing around with placing the pieces on a pice of fabric that will be used as the backing, this is important to make sure it all fits together properly.
Once you are happy with the image remove the paper backing from the pieces and rearrange onto the backing fabric. Once you are happy everything is in the right place fuse the picture to the backing fabric by gently applying the iron for the recommended time.
If a piece moves during this process don't despair, it does happen. If you can't disguise it, start agian. It happens to us all. -
 Step 5
To make sure your patch lasts the endless wear it will get you have to anchor all the bits to the backing fabric.
If you have a sewing machine you can use a satin or buttonhole stitch round each small piece then round the outside. If you don't have a sewing machine you can still use the same stitches or blanket stitch by hand. This will take a little longer.
You can use the stitching to pick out details, you can also use a very fine fabric pen to do facial features and other small details. -
 Step 6
Finally, cut around the patch as close to the stitching as you can without cutting the stitches.
Sew the patch to the garment, bag, whatever you intended it for.
This one will be going on a childs sweater.


Comments


