


About
Looks great with casual and fancy schmancy clothes
NOW WITH ADDED DIAGRAMS!
This project is heavily inspired by Louise Black's ruffle scarf.
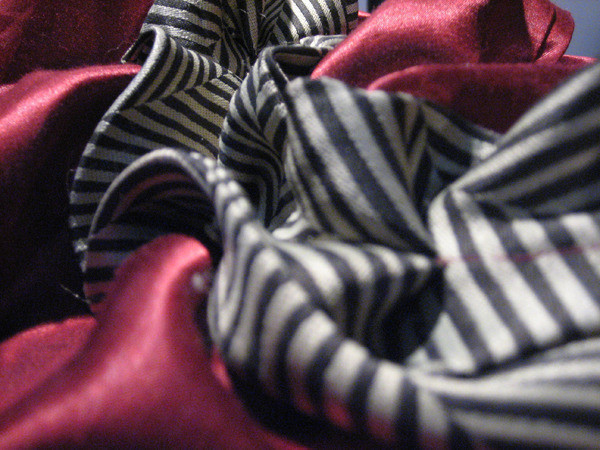
In this version the back layer is slightly larger than I'd like it - I forgot that the ties narrowed in the middle and the red gets a bit floppy when I wear it.
-
 Deborah M. favorited Ruffle Scarf
04 Jun 23:15
Deborah M. favorited Ruffle Scarf
04 Jun 23:15
-
Kathy S. favorited Ruffle Scarf
09 Jul 22:45
-
 Bibbidi Bobbidi Bootiful favorited Ruffle Scarf
04 Jun 03:28
Bibbidi Bobbidi Bootiful favorited Ruffle Scarf
04 Jun 03:28
-
 Vi A. added Ruffle Scarf to necklaces
10 Apr 04:13
Vi A. added Ruffle Scarf to necklaces
10 Apr 04:13
-
 Emma H. favorited Ruffle Scarf
14 Sep 17:10
Emma H. favorited Ruffle Scarf
14 Sep 17:10
You Will Need
-
 Step 1
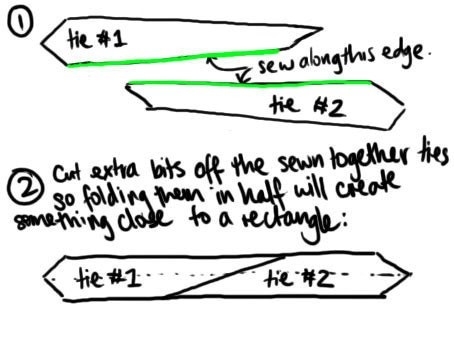
I happened to find two ties that were exactly the same from a market, but two differently-patterned ties will work equally as well. It will be easier if your ties are roughly the same shape and length however. (If not you can always cut the larger one to size.)
Unpick both of the ties and iron flat. Sew them together so you get a symmetrical shape with a large triangular ends on both sides. You may have to snip off the smaller lengths and trim the edges.
Length is especially important here because you're going to ruffle and end up with a scarf about half the size of what you have now. When it doubt make this length longer rather than shorter.
-
 Step 2
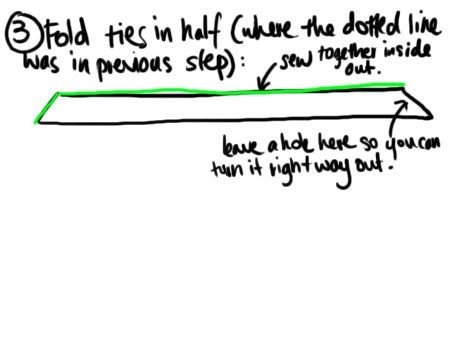
Fold the two ties in half wrong side out. Sew along the edges leaving a small hole so you can turn it inside out with the nice side facing. Sew close the hole.
-
Step 3
Cut out two long rectangles from fabric of your choice. Make them slighter longer and wider than the length of your ties. Take into account that the ties will be shorter in the centre. If you really want to you can also make your rectangles narrower in the middle, but I didn't bother.
Sew two rectangles together inside out, then turn them right side and close the hole.
-
 Step 4
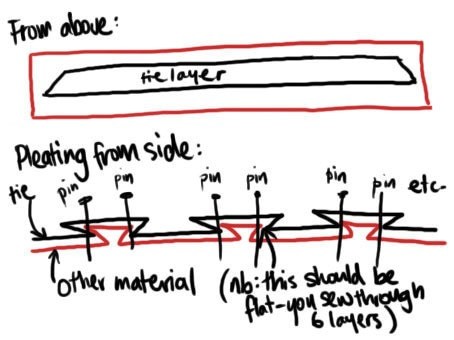
Place the length of tie on the length of material so it's centred. Pin the two length together on the centre line.
Start pleating and pinning from the middle so it's even and symmetrical.
-
Step 5
After pinning all the pleats, your scarf should be about half the length it was. You can vary the size and direction of your pleats to experiment.
Sew a straight stitch across the centre.
-
Step 6
Wear your ruffle scarf!
Versions


Comments


