


About
Master the art of paper folding!
I found a tutorial for origami bows but it was is Korean. I thought I would a) give it a go and then b) try and explain the steps in English. I'm a complete origami novice and it took me a few tries to get it right so don't give up!
Tags
-
 Shirin L. favorited Origami Bows
29 Jan 21:33
Shirin L. favorited Origami Bows
29 Jan 21:33
-
 Marie B. favorited Origami Bows
05 Apr 11:58
Marie B. favorited Origami Bows
05 Apr 11:58
-
 DAARSHENI favorited Origami Bows
14 Jul 02:46
DAARSHENI favorited Origami Bows
14 Jul 02:46
-
 Rebecca M. favorited Origami Bows
23 Jun 22:11
Rebecca M. favorited Origami Bows
23 Jun 22:11
-
Marie R. added Origami Bows to ART
12 Feb 15:36
-
Dori V. added Origami Bows to to do-
07 Nov 03:46
-
 artpanda18 favorited Origami Bows
06 Mar 04:21
artpanda18 favorited Origami Bows
06 Mar 04:21
-
 Tammy M. favorited Origami Bows
02 Mar 14:01
Tammy M. favorited Origami Bows
02 Mar 14:01
-
 PaigePickle7 :) favorited Origami Bows
12 Nov 04:50
PaigePickle7 :) favorited Origami Bows
12 Nov 04:50
-
Poppy C. favorited Origami Bows
07 Nov 21:51
You Will Need
-
 Step 1
Grab some origami paper (You can use any paper as long as it's cut into a square) and some scissors and away we go!
Start with your square of paper, fold in half horizontally and vertically, crease well and unfold.
-
 Step 2
Fold diagonally, crease well and unfold.
-
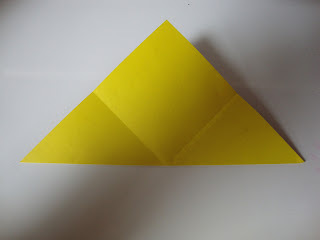
 Step 3
Your paper should know look like this with the creases you have made.
-
 Step 4
Follow the creased lines and fold like this...
-
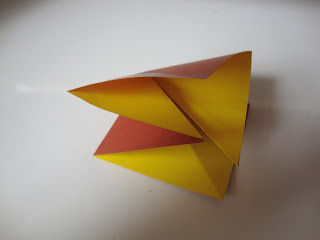
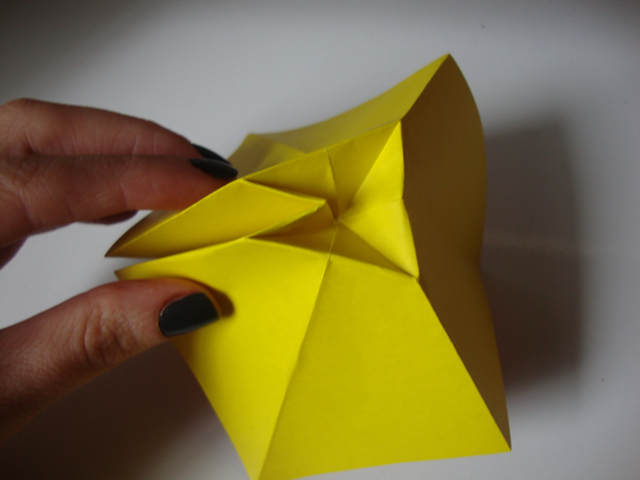
 Step 5
It's had to explain but the paper, with the creases will naturally fall into this without much effort.
-
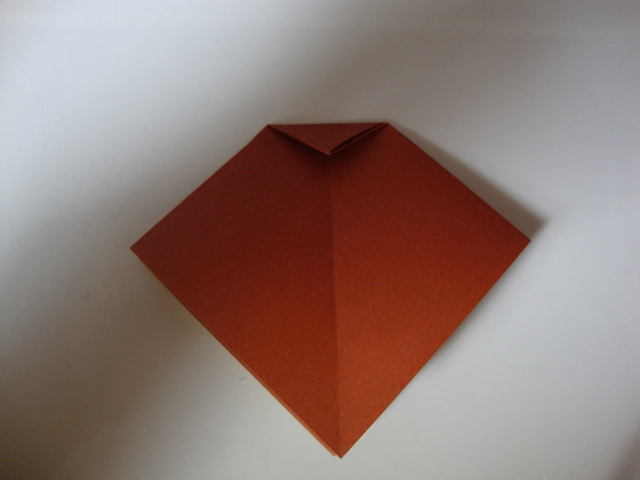
 Step 6
On the completely closed edge of your square, fold down the corner by 1/2" creasing well.
-
 Step 7
Unfold your paper and you will see the creases have made a small square in the middle.
-
 Step 8
This next step I found a bit confusing as there is an order to folding the lines. Once you get that figured out it will become easier.
-
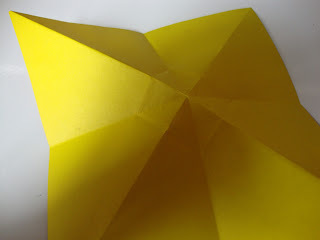
 Step 9
This is how the fold lines should look in order for it to fold into itself in the next step. You can see that the 4 corners coming off the center square are folded in "mountain folds" which means that they fold upwards like a mountain peak and the sides are folded in a "valley fold" so they crease inwards.
-
 Step 10
By following the step above, it'll allow you to start folding the paper like so...
-
 Step 11
Still with me?
-
 Step 12
Folded like a pro eh! :-/
-
 Step 13
This is how it will look once it's all folded up.
-
 Step 14
The next step is to fold the edges off the flat top down like so.
-
 Step 15
Flip over and do the same on the other side.
-
 Step 16
Gently open up keeping the folds you've just made in place. I know, I know... but trust me, as you do it, it'll make sense!
-
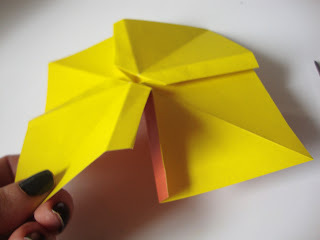
 Step 17
Once opened up, it'll look like this!
-
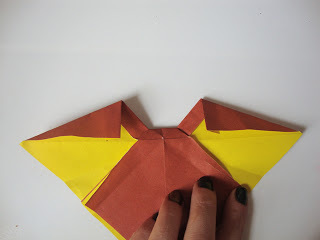
 Step 18
Turn the paper over and make sure it's placed the same as the photo. (you'll see by the creases) The lines marked in BLACK are where you will make 4 cuts along the crease.
-
 Step 19
From the side you can see where to make the cut. This is the part I got wrong so many times as it wasn't clear exactly where I should have been cutting! I hope this demonstrates the correct way well enough!
-
 Step 20
Repeat on all four corners as marked in black in step 18.
-
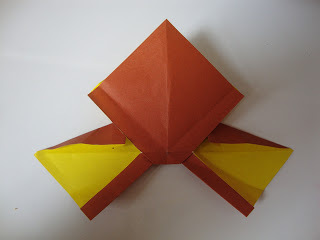
 Step 21
Fold down the large top piece.
-
 Step 22
Fold the left and right side sticking up in half.
-
 Step 23
Flip the paper over and repeat on the bottom corners.
-
 Step 24
This is what it will then look like.
-
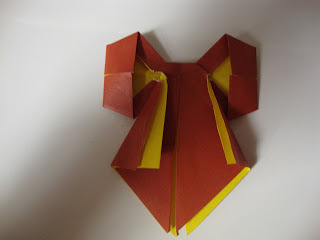
 Step 25
Turn your paper over and you'll see you've finally got a bow like shape!
-
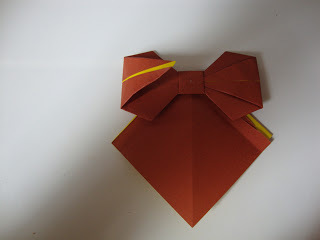
 Step 26
Tuck the pointed ends into the middle of your bow, where the knot would be if it was a ribbon.
-
 Step 27
Turn the bow back over and fold the left and right edges as shown and then made a cut up the middle.
-
 Step 28
Fold the sides of middle cuts of the bow over.
-
 Step 29
Turn back over and there you have your finished bow! You can either leave the bow tail as it is or...
-
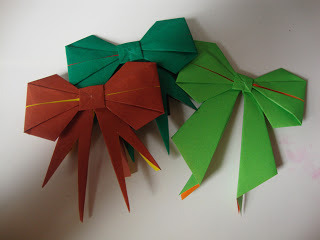
 Step 30
You can cut it to make pointed ends.
These get easier the more you make I assure you. They look great used as present bows or use to decorate handmade cards!


Versions


Comments


