


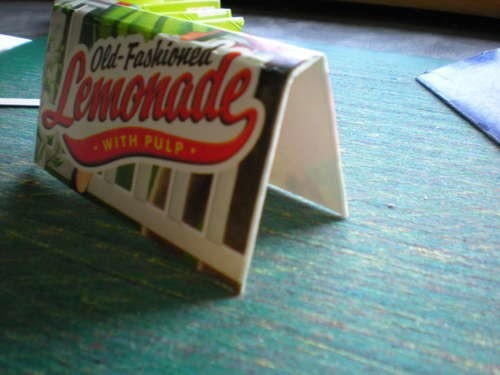
About
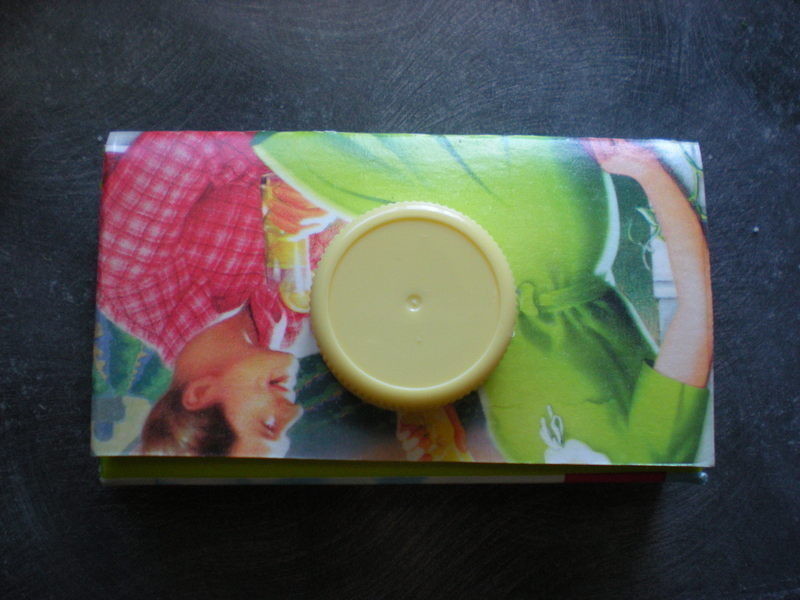
A cute wee coin purse
Brought into existence in May-June-ish.
-
 Key West Witch favorited Juice Carton Coin Purse
08 Aug 15:40
Key West Witch favorited Juice Carton Coin Purse
08 Aug 15:40
-
 Julie A. added Juice Carton Coin Purse to to make
26 Jun 01:08
Julie A. added Juice Carton Coin Purse to to make
26 Jun 01:08
You Will Need
-
 Step 1
Materials
-X-acto knife: Good ol' X-acto knife. Usually for these I use a big, box-cutter-type X-acto knife.
-Ruler
-Clothespins
-Pencil to mark off fold-lines
-Glue: I would recommend some sort of craft adhesive like E6000 perhaps. I used EXTREME REPAIR glue by LePage 'cause it dries clear, has a nice texture to it and is pretty much everything-proof (according to the package). If you can, use something that dries clear, 'cause unless you're really careful, It'll end up looking pretty messy. -
 Step 2
Disassembling
I usually start by opening the top of the carton. -
 Step 3
This can be tricky to do without bending it and making creases in the carton So BE CAREFUL. Also don't cut off your fingers! (I've never done that before but I have gotten a little too close)
-
 Step 4
This part really just involves a lot of careful prying-apart.
-
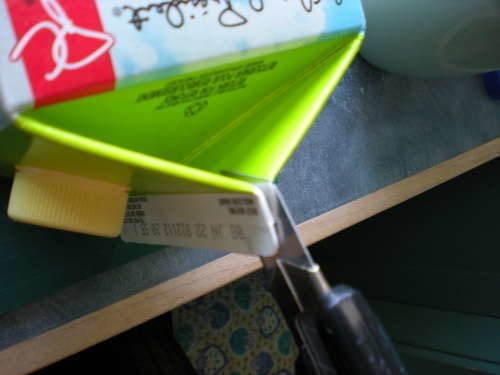
 Step 5
Next, find the seam where the carton is joined. Cut all the way down this seam to the bottom. Next, cut the bottom of the carton off.
-
 Step 6
Cuttin' Stuff Up!
-
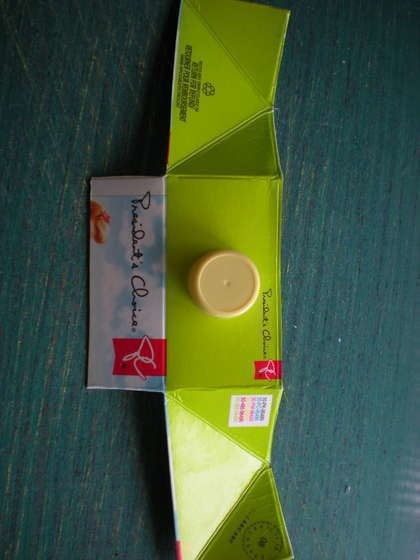
 Step 7
Cut along the dotted lines as shown.
-
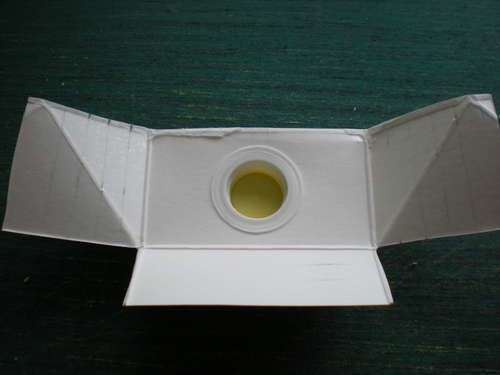
 Step 8
Measure about three Centimeters down from the blue line and cut the bottom part off.
-
 Step 9
On Your Marks, Get Set...
Time to mark off the places where the side-pleats are going to be. From the side of the carton, make four marks 1cm apart. leave about 2cm extra (this'll leave room to glue it to the carton). On the bottom flap make a mark 1cm away from the crease. -
 Step 10
Pleats
This part can also prove to be rather difficult and I'd suggest using something like a ruler (or a bone folder if you have one) to help fold the carton against. Along the sides, make accordion-style pleats (first one inward, second outward, etc.) along all the lines you marked earlier. -
 Step 11
Fold the bottom section along the line as marked earlier.
-
 Step 12
Please note:
Be careful when you're folding the carton. If you fold it too fast or with a lot of pressure, the 'shell'-sorta part of the carton likes to break, and then the white cardboard underneath shows through. Every time I've made one of these though, it's happened a little bit so, don't worry /too/ much about it. -
 Step 13
Back and Front flap
Now, I usually use the part of the carton that we cut off in step two because it's the front of the carton and usually the most interesting. Also, it's the side that's in english (Canadian bi-lingual labeling). -
 Step 14
I cut it to about four and a half inches in length and it's the same width as the carton is normally, so you don't need to cut the sides. Now, two inches up from the bottom, make a fold. Measure another centimeter up from that and make another fold. It should look something like a book cover now.
-
 Step 15
Get yer glue out
I'm sure there are several different ways you could approach this, but I'm rather impatient and don't like waiting for all the separate glued components to set individually (all three of them...>_>). So, I'munna show you how to do it pretty much all all at once. Just so that nothing gets messed up I'd suggest that you let the bottom flap set for at least 10-15 minutes before continuing. Alright time to bring out the clothespins. -
 Step 16
Apply the glue to the flaps on the sides and stick 'em in there one at a time.
-
 Step 17
Clothespin them when they're in there to keep them in place.
-
 Step 18
Flap hole
for this, I just took a pencil and marked off where the top and bottom of the twisty thing is on the flap. That was a rather confusing explanation. I'll just let the picture explain...Ta-Da! You're finished! Hopefully that made sense. If there's something you need clarified, let me know.


Thanks for sharing the directions.